Previous Next

REMOVAL & INSTALLATION

1.5L, 1.6L, 1.8L, 2.0L and 2.4L Engines

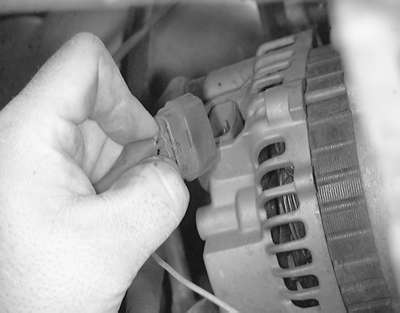
Fig. 1: Detach the regulator connector from the alternator

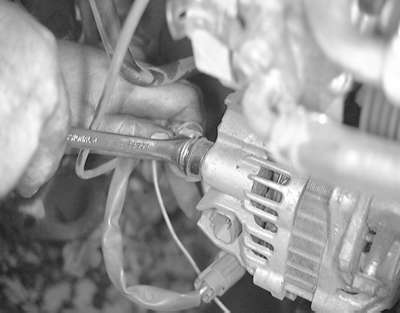
Fig. 2: Remove the nut retaining the battery cable to the alternator . . .

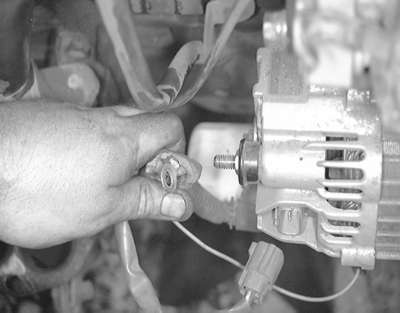
Fig. 3: . . . then remove the battery cable from the alternator

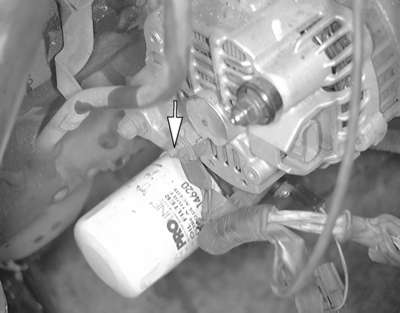
Fig. 4: Remove the nut retaining the wire harness to the alternator, and remove the harness from the alternator

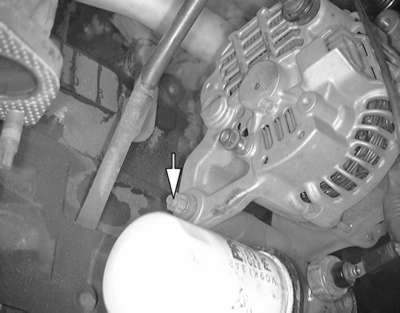
Fig. 5: Remove the nut for the pivot bolt on the rear of the alternator . . .

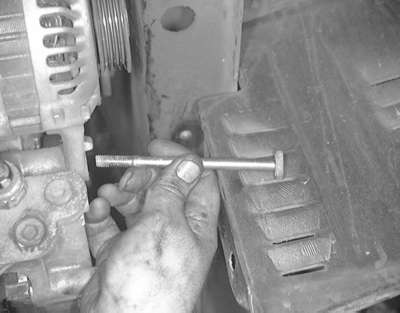
Fig. 6: . . . then remove the pivot bolt from the alternator

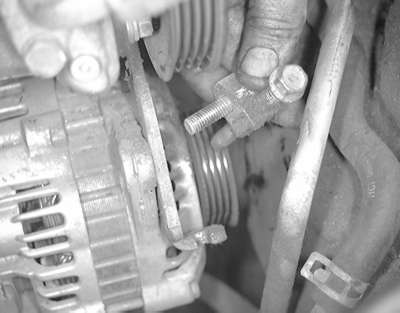
Fig. 7: Remove the alternator adjusting bolt . . .

Fig. 8: . . . then remove the alternator from the vehicle

  1. Disconnect the negative battery cable.
  2. Remove the left side cover panel under the vehicle.
  3. On turbocharged Galant models, remove the air intake hose.
  4. Remove the drive belts.
  5. Remove the water pump pulleys.
  6. Remove the alternator upper bracket/brace.
  7. On the 1.6L engine remove the battery, windshield washer reservoir and battery tray.
  8. On the 1.6L engine, remove the attaching bolts at the top of the radiator and lift up the radiator. Do not disconnect the radiator hoses.
  9. Detach the alternator wiring connectors.
  10. Remove the alternator mounting bolts and remove the alternator.

    To install:

  11. Position the alternator on the lower mounting fixture and install the lower mounting bolt and nut. Tighten nut just enough to allow for movement of the alternator.
  12. On the 1.6L engine, lower the radiator and reinstall the upper attaching bolts.
  13. On the 1.6L engine, install the battery, windshield washer reservoir and battery tray.
  14. Install the alternator upper bracket/brace and connect the alternator electrical harness.
  15. Install the water pump pulleys.
  16. Install the drive belts and adjust to the proper tension.
  17. On turbocharged Galant models, install the air intake hose.
  18. Install the left side cover panel under the vehicle as required.
  19. Connect the negative battery cable and check for proper operation.
3.0L DOHC Engine

Fig. 9: Alternator mounting — 3.0L DOHC engine

  1. Disconnect the negative battery cable.
  2. Remove the headlamp washer reservoir tank.
  3. Remove the condenser fan and upper radiator insulator.
  4. Loosen the tensioner pulley and remove the alternator drive belt.
  5. Remove the alternator upper and lower mounting bolts.
  6. Remove the alternator support bracket mounting bolts.
  7. Remove the alternator support bracket from the vehicle.
  8. Disconnect the alternator wiring harness.
  9. Remove the alternator from the vehicle.

    To install:

  10. Install the alternator to the vehicle and connect the wiring harness.
  11. Install the alternator support bracket to the vehicle and tighten the bracket mounting bolts to specifications.
  12. Position the alternator on the mounting bracket. Install and tighten the mounting bolt and nut to 17 ft. lbs. (24 Nm).
  13. Reinstall the drive belt and adjust the tensioner until the proper belt tension is achieved.
  14. Install the upper radiator insulator and condenser fan.
  15. Install the headlamp washer reservoir tank.
  16. Connect the negative battery cable and check the charging system for proper operation.
3.0L SOHC and 3.5L Engines

Fig. 10: Alternator mounting — 3.0L SOHC engine

Fig. 11: Alternator mounting — 3.5L engine

  1. Disconnect the negative battery cable.
  2. Disconnect and remove the air intake hose.
  3. Loosen the tensioner pulley and remove the alternator drive belt.
  4. On California models, remove the rear bank converter assembly.
  5. Remove the engine roll stopper stay bracket assembly.
  6. On the 3.0L SOHC engine, disconnect the EGR temperature sensor wire and remove the EGR pipe assembly.
  7. On the 3.0L SOHC engine, remove the intake plenum stay bracket assembly.
  8. Detach the alternator wiring harness connectors.
  9. Remove the alternator upper and lower mounting bolts.
  10. From beneath the vehicle, remove the alternator.

    To install:

  11. Position the alternator on the lower mounting fixture. Install and tighten the mounting bolt and nut to 14–18 ft. lbs. (20–25 Nm).
  12. Connect the alternator wiring harness.
  13. On the 3.0L SOHC engine, install the intake plenum stay bracket and tighten the mounting bolt to 13 ft. lbs. (18 Nm).
  14. On the 3.0L SOHC engine, install the EGR pipe and tighten the fitting connections to 43 ft. lbs. (60 Nm).
  15. On the 3.0L SOHC engine, connect the EGR temperature sensor wire.
  16. Connect the engine roll stopper stay and tighten the mounting bolt to 35 ft. lbs. (45 Nm) and the nut to 36–43 ft. lbs. (50–60 Nm).
  17. Install the rear converter assembly, if removed.
  18. Reinstall the drive belt and adjust the tensioner until the proper belt tension is achieved.
  19. Connect the air intake hose.
  20. Connect the negative battery cable and check the charging system for proper operation.

Previous Next