Previous Next

Signal and Marker Lights

REMOVAL & INSTALLATION

Parking And Side Marker Lights

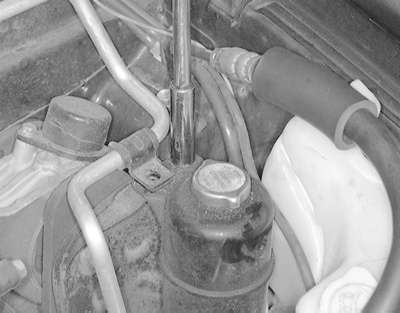
Fig. 1: On 1994–98 Galant models, remove the power steering reservoir mounting bolts, and position the reservoir to the side

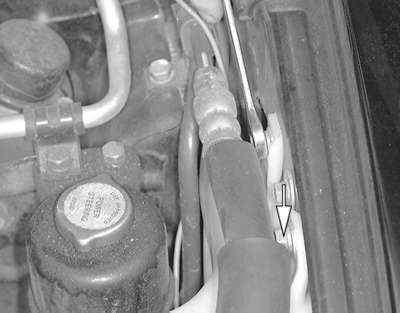
Fig. 2: Remove the washer fluid reservoir retaining screws . . .

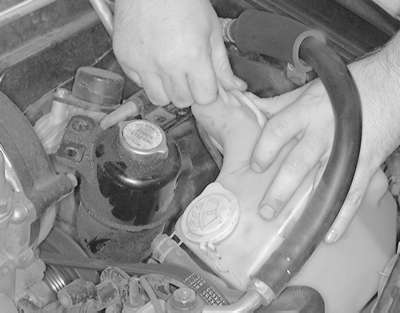
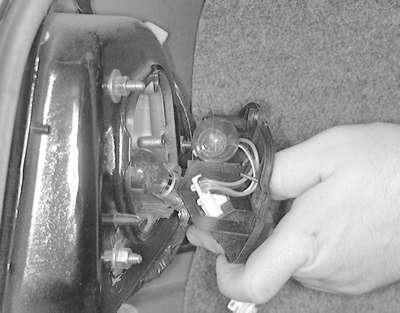
Fig. 3: . . . then move the reservoir out of the way to access the parking and side marker lamp bulbs on 1994–98 Galant models

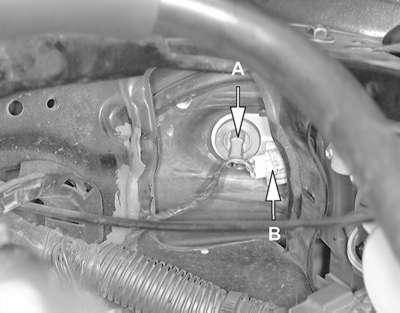
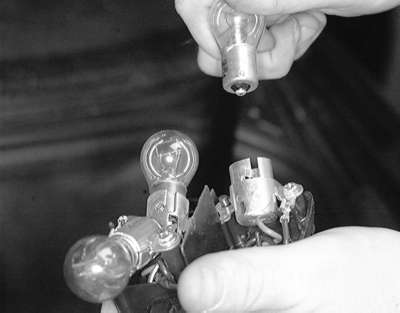
Fig. 4: After the washer fluid reservoir is removed, the parking lamp bulb (B) and the side marker lamp (A) are accessible on 1994–98 Galant models

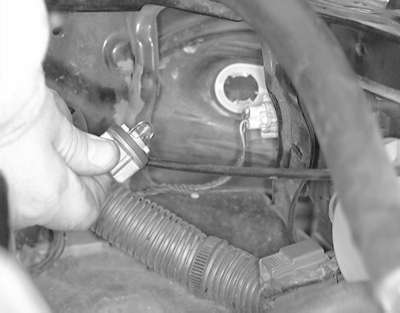
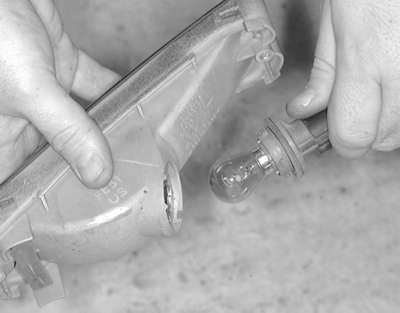
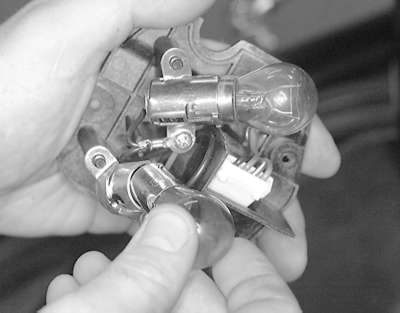
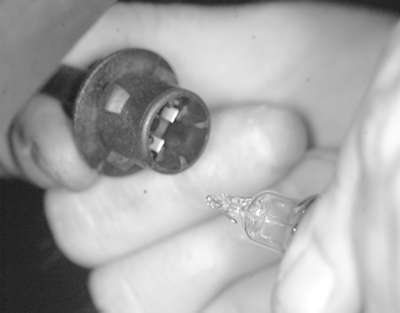
Fig. 5: Twist the bulb socket to release it from the lens

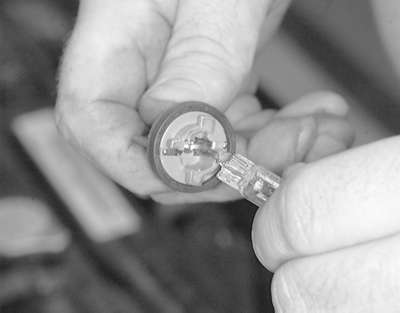
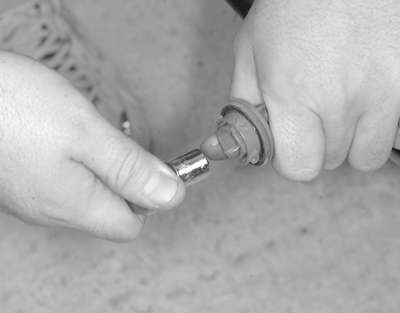
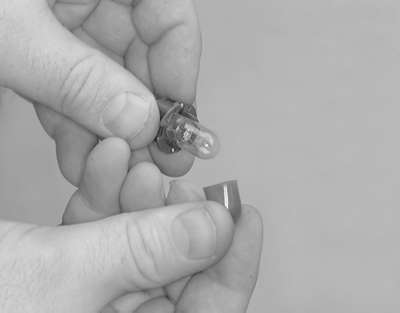
Fig. 6: Pull the bulb assembly out of the socket to remove

  1. Disconnect the negative battery cable.
  2. Remove any necessary components to access the bulbs.
  3. Rotate the bulb sockets and rotate them counterclockwise to remove them.
  4. Grasp the bulb and remove it from the socket by pulling it straight out.
  5. The installation is the reverse of removal.
Front Turn Signal

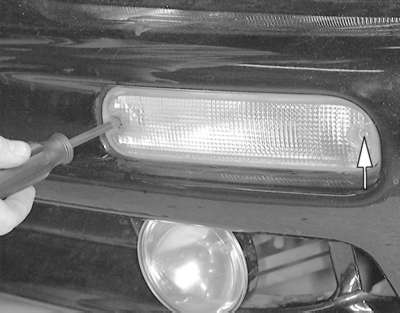
Fig. 7: Remove the turn signal lens retaining screw . . .

Fig. 8: . . . then remove the lens from the front fascia

Fig. 9: Twist the bulb socket to release it from the lens

Fig. 10: Pull the bulb assembly out of the socket to remove

  1. Disconnect the negative battery cable.
  2. Remove the two retaining screws from the lens.
  3. Remove the lens from the front fascia.
  4. Grasp the bulb socket and rotate it counter-clockwise to remove it from the lamp.
  5. Pull the bulb out to remove it from the socket.
  6. Installation is the reverse of removal.
Rear Turn Signal, Brake and Tail Lights

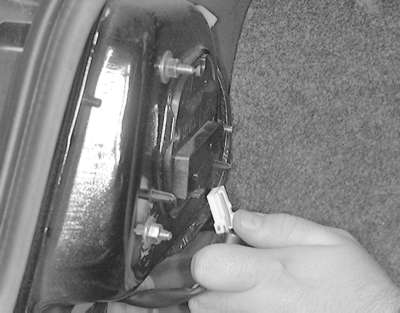
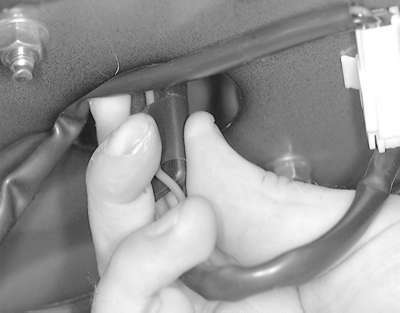
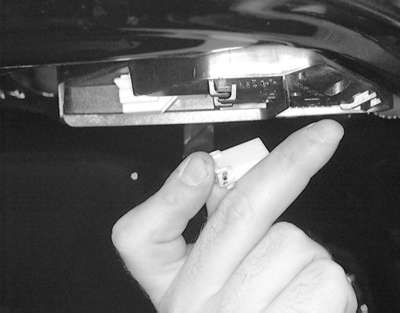
Fig. 11: The back-up lamp socket assembly is located on the underside of the trunk lid. Detach the electrical connector . . .

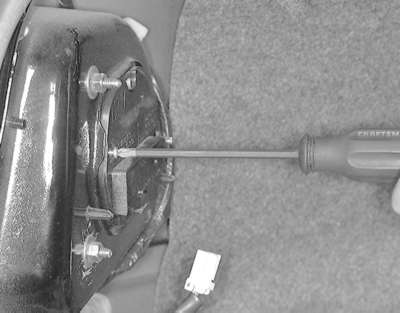
Fig. 12: . . . then unfasten the trim panel retaining screws for access to the bulb(s)

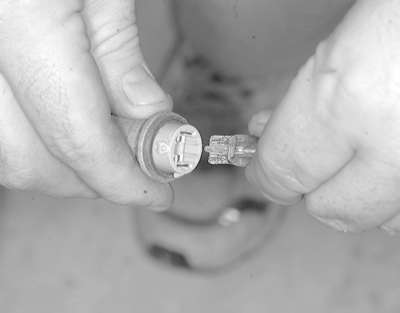
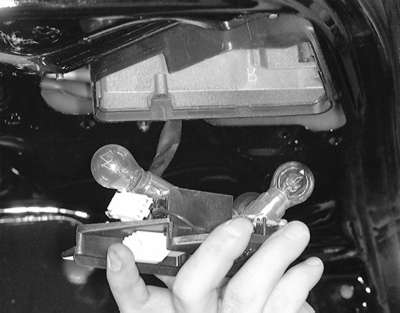
Fig. 13: Twist the bulb socket to release it from the lens

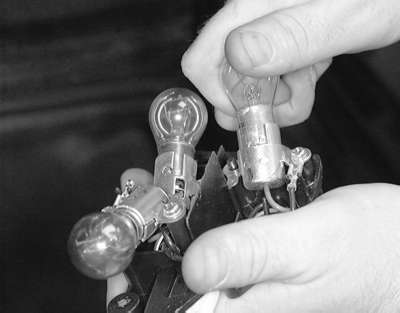
Fig. 14: Pull the bulb assembly out of the socket to remove

  1. Disconnect the negative battery cable.
  2. Open the trunk lid, hatch, or tailgate and remove the retainers, then remove the inner trim panel in order to get to the rear lamp assembly.
  3. Turn the necessary bulb and socket assembly to unlock it from the housing, then pull it from the housing.
  4. Pull the bulb from the socket and replace with a new one of the same type.
  5. Installation is the reverse of the removal procedure.
Back-up Light

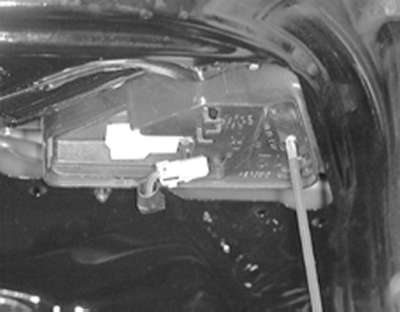
Fig. 15: The back-up lamp socket assembly is located on the underside of the trunk lid

Fig. 16: Twist the bulb socket to release the locking tabs from the lens

Fig. 17: Pull the bulb assembly straight out of the socket to remove it

  1. Disconnect the negative battery cable.
  2. Open the trunk lid.
  3. If equipped, remove the trim on the underside of the trunk lid.
  4. Turn the socket counterclockwise 14 of a turn to release it from the lens.
  5. Pull the bulb out to remove it from the socket.
  6. The installation is the reverse of removal.
  7. Connect the negative battery cable.
  8. Verify the operation of the lamp.
Side Marker Light

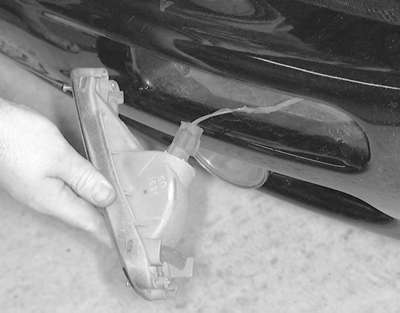
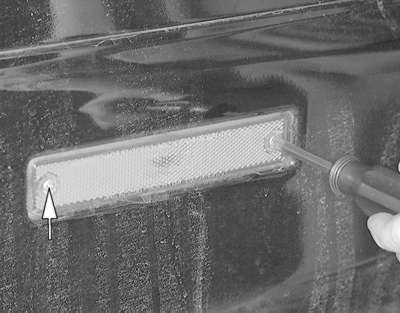
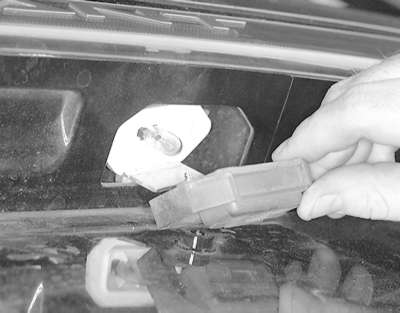
Fig. 18: Remove the side marker light retaining screw . . .

Fig. 19: . . . then pull the lens away from the rear fascia

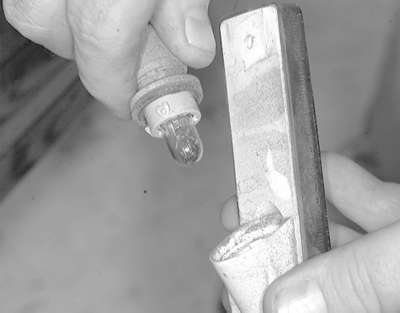
Fig. 20: Twist the bulb socket to release it from the lens

Fig. 21: Pull the bulb assembly straight out of the socket to remove

  1. Remove the two retaining screws from the lens.
  2. Remove the lens from the rear fascia.
  3. Grasp the bulb socket and rotate it counter-clockwise to remove it from the lamp.
  4. Pull the bulb out to remove it from the socket.
  5. Installation is the reverse of removal.
High-mount Brake Light
1994–98 GALANT

Fig. 22: Detach the high-mount brake light electrical connector

Fig. 23: Remove the lamp retaining screws . . .

Fig. 24: . . . then lower the lamp assembly for access to the bulbs

Fig. 25: Rotate the bulb assembly. . .

Fig. 26: . . . then pull it from the socket

  1. Disconnect the negative battery cable.

    NOTE: The lamp assembly is accessible from the trunk underneath the package shelf.

  2. Open the trunk lid and detach the electrical connector from the lamp assembly.
  3. Remove the retaining screw holding the lamp assembly.
  4. Lower the lamp assembly from the lamp lens.
  5. Rotate the bulb clockwise while pushing it gently inward to remove it from the socket.
  6. The installation is the reverse of removal.
1990–96 MIRAGE, 1990–93 GALANT, AND 1992–96 DIAMANTE
  1. Disconnect the negative battery cable.
  2. On the Mirage and Galant, remove the square retainer clips or bolts from the high-mount brake light cover and remove the cover.
  3. On the Diamante, press gently inward on the sides of the light cover and remove it from the lamp.
  4. Rotate the bulb clockwise while pushing it gently inward to remove it from the socket.
  5. The installation is the reverse of removal.
1997–00 MIRAGE, 1999–00 GALANT, AND 1997–00 DIAMANTE
  1. Disconnect the negative battery cable.

    NOTE: The bulb socket is accessible from the trunk underneath the package shelf.

  2. Open the trunk lid and detach the electrical connector from the bulb socket.
  3. Rotate the socket counterclockwise and remove it from the lamp assembly.
  4. Rotate the bulb clockwise while pushing it gently inward to remove it from the socket.
  5. The installation is the reverse of removal.
License Plate Lights

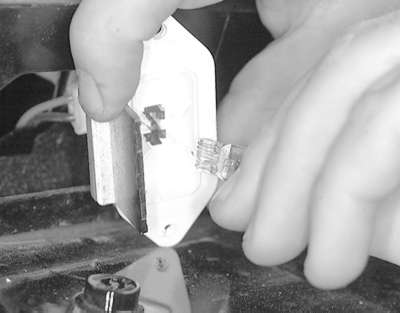
Fig. 27: Remove the two lamp lens retaining screws . . .

Fig. 28: . . . then lower the lens to access the bulb

Fig. 29: Remove the bulb by pulling it from the terminals on the lens

  1. Disconnect the negative battery cable.
  2. Remove the two retaining screws for the lamp lens.
  3. Lower the lens from the trunk lid.
  4. Grasp the bulb and remove it from the terminals on the lens.

    To install:

  5. Place the bulb into place on the lens and lightly press into the terminals on the lens.
  6. Place the lens into position on the trunk lid and tighten the two retaining screws.
  7. Connect the negative battery cable.
  8. Verify the operation of the lamp.
Dome/ Passenger Area Lamps

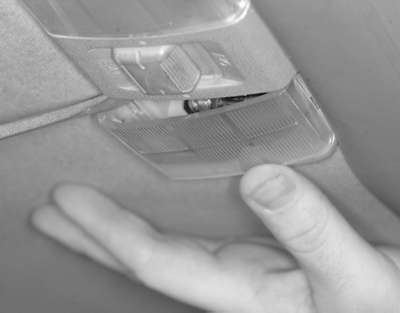
Fig. 30: Using a suitable tool, carefully pry the lamp
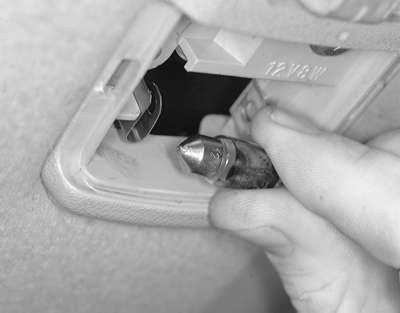
 lens loose . . .

Fig. 31: . . . then remove the lens from the dome lamp assembly

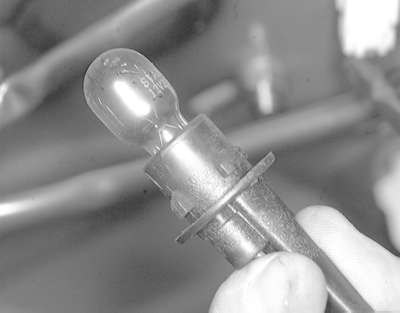
Fig. 32: Pull the bulb straight out to remove it

  1. Using a small prytool, carefully remove the cover lens from the lamp assembly.
  2. Remove the bulb from its retaining clip contacts. If the bulb has tapered ends, gently depress the spring clip/metal contact and disengage the light bulb, then pull it free of the two metal contacts.

    To install:

  3. Before installing the light bulb into the metal contacts, ensure that all electrical conducting surfaces are free of corrosion or dirt.
  4. Position the bulb between the two metal contacts. If the contacts have small holes, be sure that the tapered ends of the bulb are situated in them.
  5. To ensure that the replacement bulb functions properly, activate the applicable switch to illuminate the bulb which was just replaced. If the replacement light bulb does not illuminate, either it is faulty or there is a problem in the bulb circuit or switch. Correct as necessary.
  6. Install the cover lens until its retaining tabs are properly engaged.
Instrument Cluster Light bulbs

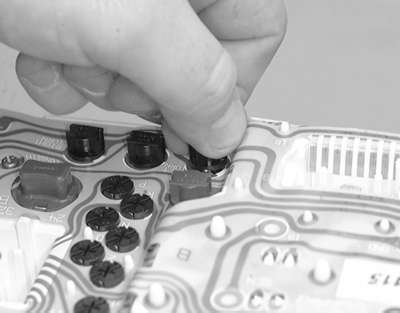
Fig. 33: With the cluster removed, turn the socket counterclockwise . . .

Fig. 34: . . . and remove the socket from the instrument cluster

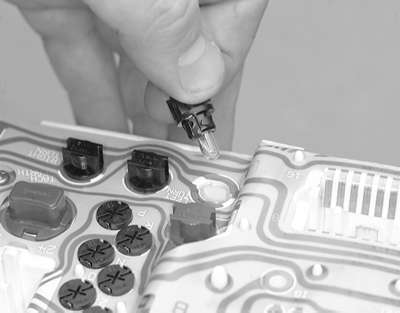
Fig. 35: Pull the bulb straight out to remove it

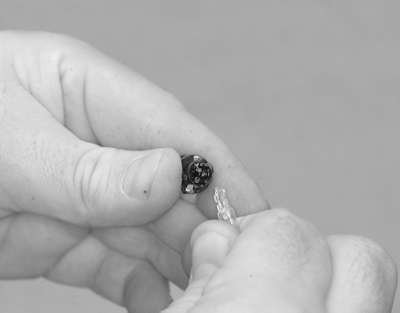
Fig. 36: On some of the bulbs, it is necessary to transfer the colored bulb cover to the new bulb

  1. Disconnect the negative battery cable.
  2. Remove the instrument cluster as outlined in this section.
  3. Turn the desired bulb socket counterclockwise to remove it from the cluster.
  4. Grasp the bulb and pull it straight out to remove it from the socket.

    To install:

  5. If necessary, transfer the colored bulb cover to the new bulb.
  6. Place a new bulb into the socket and lightly press it into place.
  7. Place the socket into the cluster and turn the socket clockwise to engage it into the cluster.
  8. Install the instrument cluster.
  9. Connect the negative battery cable.

Previous Next