NOTE: The installation angle of the crank arm and motor has been factory set, do not remove them unless it is necessary to do so. If arm must be removed, remove them only after marking their mounting positions.
To install:
To install:
NOTE: The installation angle of the crank arm and motor has been factory set. Do not remove unless necessary. If arm must be removed, remove only after marking mounting positions.
To install:
NOTE: The installation angle of the crank arm and motor has been factory set; do not remove them unless it is necessary to do so. If they must be removed, remove them only after marking their mounting positions.
To install:
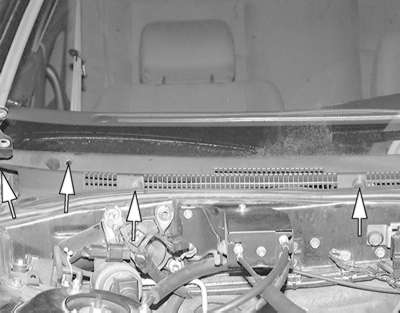
| Fig. 1: Remove the retaining clips from the front garnish
panel
|
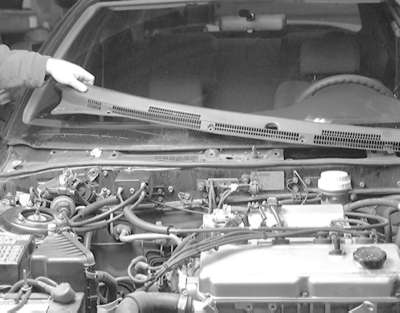
| Fig. 2: Lift the panel up and remove it from the vehicle
|
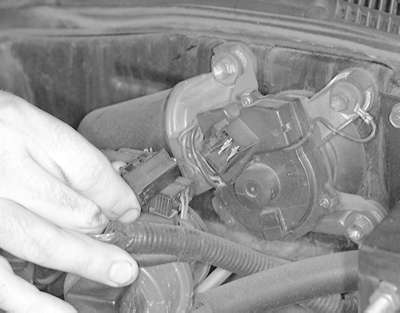
| Fig. 3: Detach the connector and remove the three wiper
motor retaining bolts
|
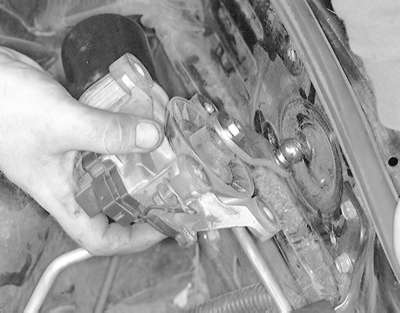
| Fig. 4: Pull the motor from the firewall and detach
the linkage
|
NOTE: The installation angle of the crank arm and motor has been factory set. Do not remove them unless necessary. If they must be removed, remove them only after marking their mounting positions.
To install:
To install:
NOTE: Before proceeding, connect the battery and check the operation of the motor. If satisfactory, disconnect the cable and complete the installation.