Previous Next

Master Cylinder

REMOVAL & INSTALLATION

Fig. 1: Brake master cylinder and related components — Diamante

Fig. 2: Master cylinder and related components — 1994–97 Galant

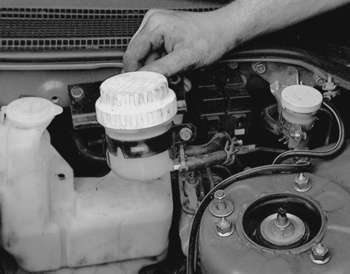
Fig. 3: Unfasten the master cylinder reservoir mounting bracket bolts

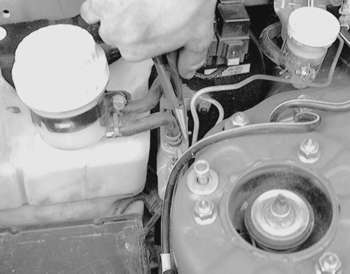
Fig. 4: Unfasten the brake hose retaining clamps and disconnect the hose from the master cylinder

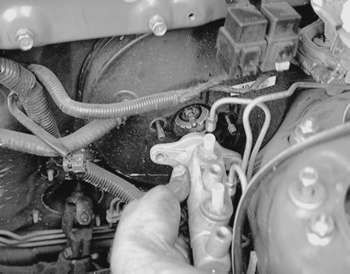
Fig. 5: Detach the fluid level sensor connector, then remove the master cylinder reservoir

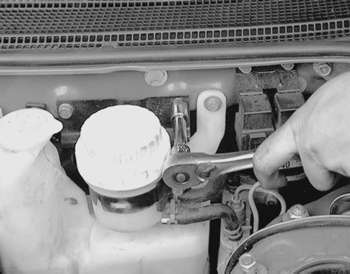
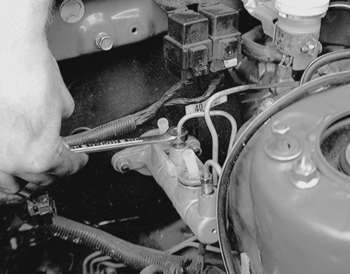
Fig. 6: Use a flare nut wrench to disconnect and plug the brake lines from the master cylinder

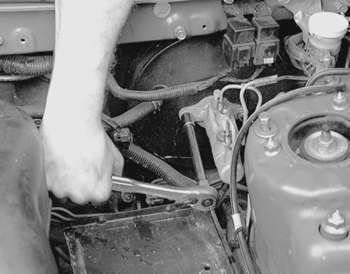
Fig. 7: Unfasten the master cylinder-to-power booster retaining nuts . . .

Fig. 8: . . . then remove the master cylinder assembly from the vehicle

Fig. 9: The brake booster pushrod and primary piston clearance (A) must be adjusted

  1. Disconnect the negative battery cable.
  2. Remove the master cylinder reservoir cap, then use a clean turkey baster or equivalent to siphon out as much fluid as possible and place in a suitable container. Install the cap.

    CAUTION
    Brake fluid contains polyglycol ethers and polyglycols. Avoid contact with the eyes and wash your hands thoroughly after handling brake fluid. If you do get brake fluid in your eyes, flush your eyes with clean, running water for 15 minutes. If eye irritation persists, or if you have taken brake fluid internally, IMMEDIATELY seek medical assistance.

  3. Disconnect and plug the lines from the brake master cylinder reservoir.
  4. Detach the fluid level sensor connector, unfasten the retainers, then remove the master cylinder reservoir.
  5. For vehicles equipped with manual transaxle, remove the clutch master cylinder reservoir bracket.
  6. Disconnect and plug the brake lines from the master cylinder.
  7. Unfasten the master cylinder-to-power booster retaining nuts, then remove the master cylinder from the vehicle.

    To install:

  8. Adjust the clearance (A) between the brake booster pushrod and the primary piston as follows:
    1. Calculate the clearance A from the B, C and D measurements, as shown in the accompanying figure. A equals B minus C minus D.
    2. The clearance should be 0.256–0.335 in. (0.65–0.858mm). When brake booster negative pressure 9.7 psi (67 kPa) is applied, then clearance value will become 0.004–0.012 in. (0.1–0.3mm).
  9. Install the master cylinder to the brake booster, then install the retaining nuts. Tighten the nuts to 7 ft. lbs. (10 Nm).
  10. Install the master cylinder reservoir, securing the retainers.
  11. Attach the fluid level sensor connector, then unplug and connect the fluid lines to the reservoir.
  12. The remainder of installation is the reverse of the removal procedure. Fill the reservoir with the proper type and amount of DOT 3 brake fluid from a fresh, sealed container.

    WARNING
    Clean, high quality brake fluid is essential to the safe and proper operation of the brake system. You should always buy the highest quality brake fluid that is available. If the brake fluid becomes contaminated, drain and flush the system, then refill the master cylinder with new fluid. Never reuse any brake fluid. Any brake fluid that is removed from the system should be discarded. Also, do not allow any brake fluid to come in contact with a painted surface; it will damage the paint.

  13. Bleed the brake system, as outlined later in this section.
  14. Adjust the brake pedal, as outlined later in this section.

Previous Next