CAUTION
Wait at least 90 seconds after the negative battery cable is disconnected
to prevent possible deployment of the air bag.
To install:
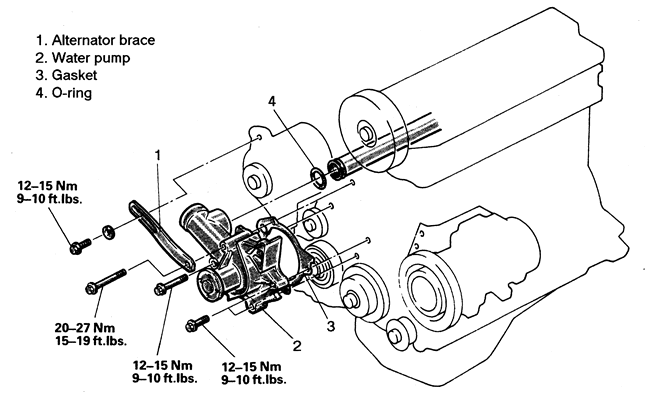
| Fig. 1: Water pump and related components-2.4L
engine
|
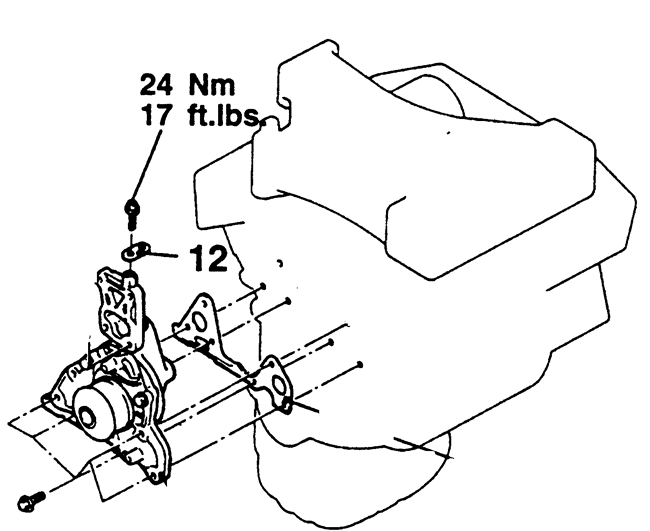
| Fig. 2: Water pump mounting-3.0L engine
|
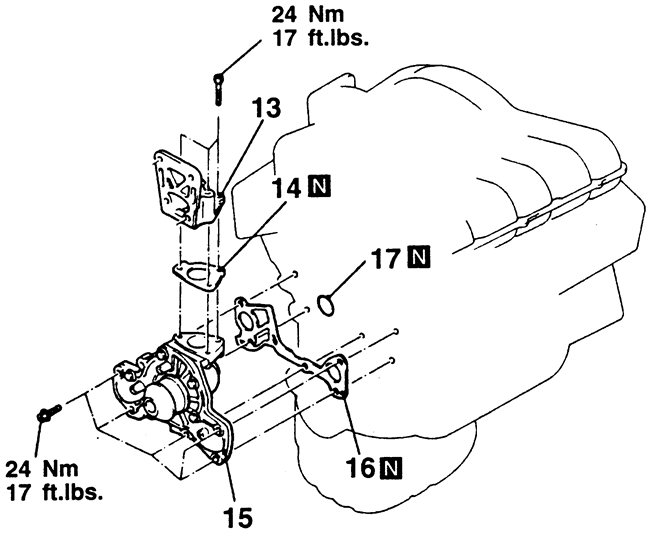
| Fig. 3: Water pump and related components-3.5L engine
|