The belts on your Mitsubishi should be inspected and adjusted every 15,000 miles (24,000 km). They should be replaced every 30,000 miles (48,000 km). It is a good idea to first inspect the belts and then turn the engine over by engaging the starter for a split second in order to permit re-inspection of the belts in another position. This way, worn areas will not be hidden by the pulley sheaves. You'll have to replace belts that show severe wear if you want to avoid a breakdown on the road.
Belts must run under constant tension in order to ensure slip-free performance. Belts that slip will overheat and wear out at a very high rate. Too much tension, on the other hand, may cause premature failure of alternator, water pump, or power steering pump bearings.
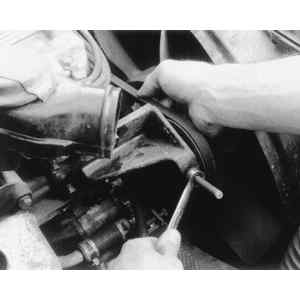
Estimate tension by pressing a belt halfway between pulleys with thumb pressure (about 20 lbs. or 9 kg). The belt should deflect downward 1⁄4 – 3⁄8 in. (6–10 mm). Note that "deflection'' does not refer to play or droop, but stretch. If the belt requires adjustment, use wrenches at both ends of the alternator or power steering pump support bolt and loosen it. Then loosen the adjusting bolt that passes through a slotted bracket. Pull (pry with an appropriate prybar, only if necessary) the alternator or power steering pump away from the engine block to create tension and hold it in position while you tighten the adjusting bolt.
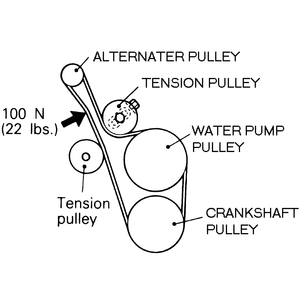
On some later model vehicles, belt tension is adjusted by loosening the tension pulley locknut, turning the adjusting bolt on the tension pulley. Once you've reached the proper belt tension, tighten the locknut to retain the adjustment.
NOTE: If possible, do not pry on the component. If you cannot get enough tension on the belt without prying, make sure to pry with an appropriate prybar squarely on the front of the housing right where the adjusting bolt passes through it. After tightening the adjusting bolt, tighten the support bolt and nut.
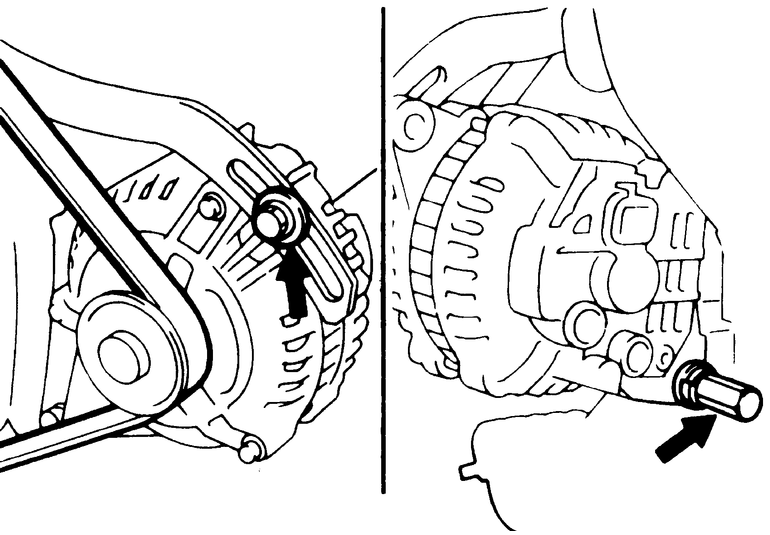
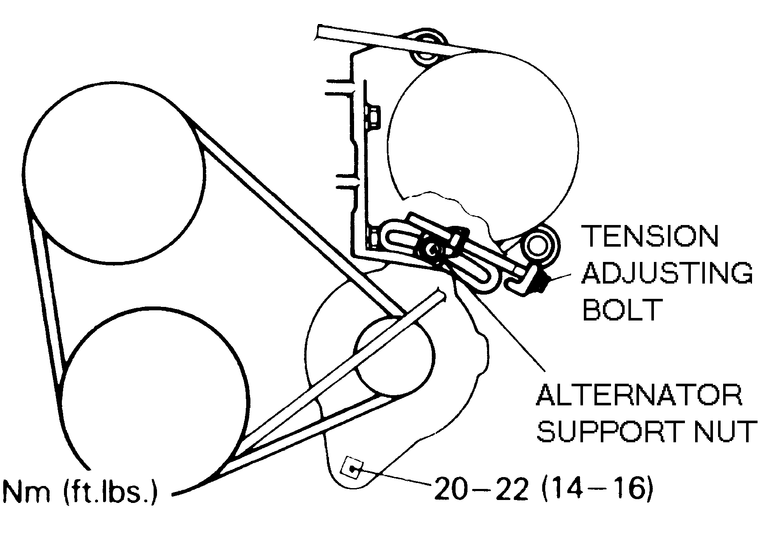
| Fig. 1: Alternator belt adjustment — most
models similar
|
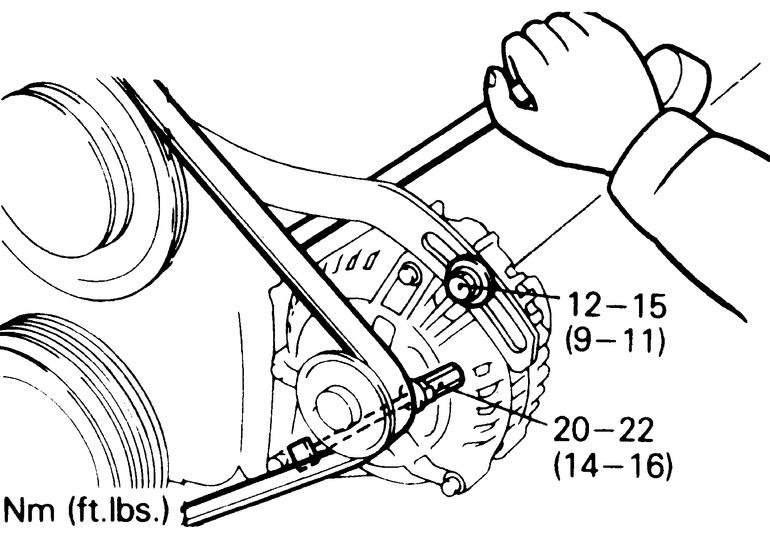
| Fig. 2: Alternator belt adjustment support and adjusting
bolts
|
| Fig. 3: When setting belt tension use a proper prytool
|
| Fig. 4: Belt adjustment — with tension
type pulley
|
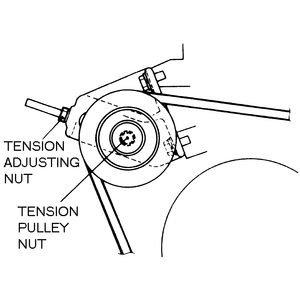
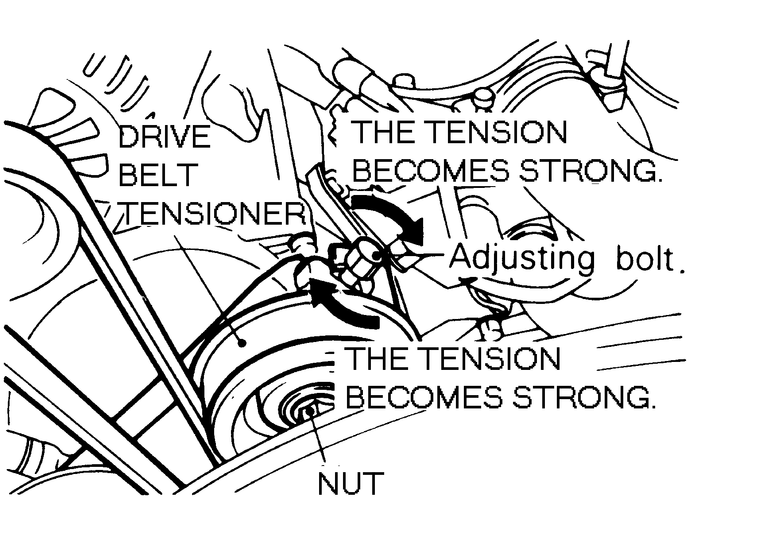
| Fig. 5: Adjusting the drive belt using the tension
adjusting nut
|
| Fig. 6: Tightening or loosening the tension pulley
nut
|
| Fig. 7: Alternator tension adjusting bolt and support
bolt
|
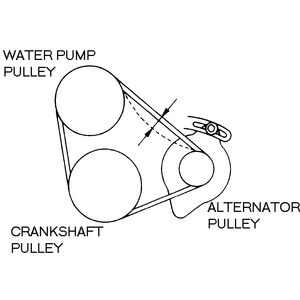
| Fig. 8: Drive belt tension adjustment bolt — most
models similar
|
| Fig. 9: Drive belt adjustment and adjustment checking
point — most models similar
|