To locate the inline filter, follow the fuel line back from the carburetor.
Inline filters are often mounted to the frame rail underneath the vehicle.
It may be necessary to raise and safely support the vehicle using jackstands
in order to access the filter.
- Disconnect the negative battery cable.
- Either use a pair of pliers to force the clamps on the fuel lines open,
or use a screwdriver to loosen the screw type hose clamps, depending on
the type of clamps securing the fuel filter hoses to the filter. Back them
well away from the connections.
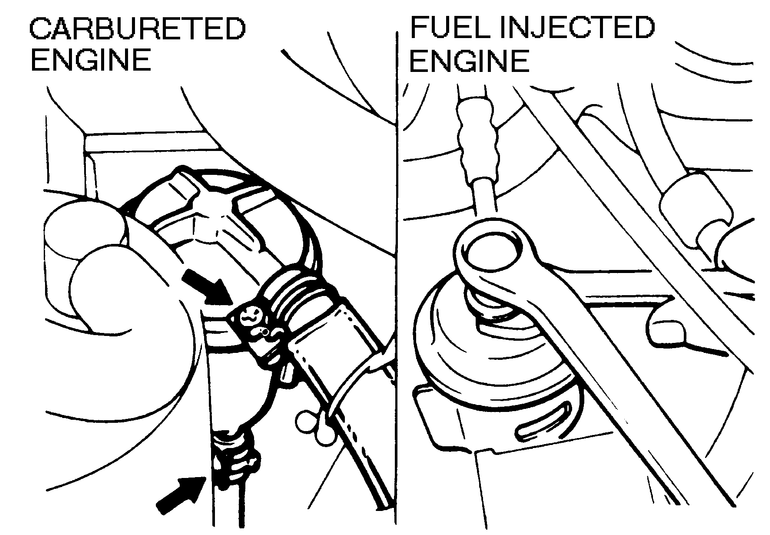
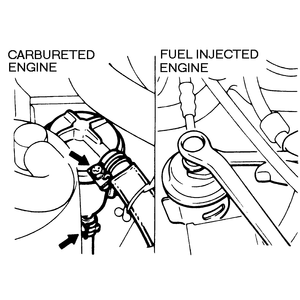
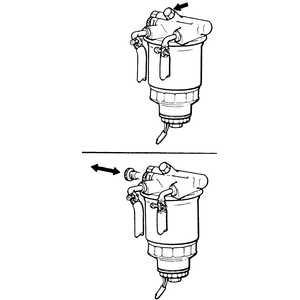
| Fig. 1: Fuel filters on carbureted vehicles are
secured by hose clamps, while the filters on fuel injected vehicles
use banjo fittings
|
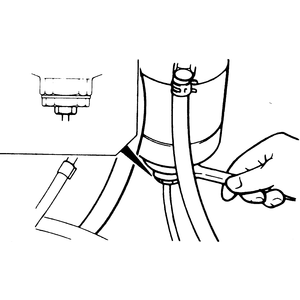
| Fig. 2: When connecting the fuel lines to the filter,
make sure the fuel lines are installed far enough onto the connections.
The line should overlap the connection about 1 inch (25mm)
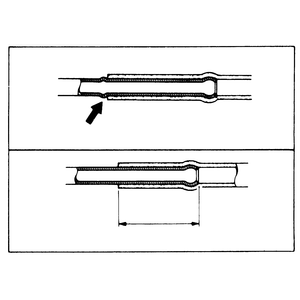
|
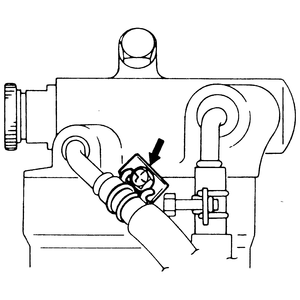
| Fig. 3: Fuel filter — 2.6L engine
|
- Work the fuel lines off the filter connections. If they are difficult
to remove, it may help to pull them off with a twisting motion. Remove the
filter from its mounting clip.
- Inspect the fuel lines for cracks or breaks and replace them if necessary.
To install:
- Install the new filter in the same position the old one was in in the
clamp.
- Connect the inlet fuel line to the inlet fitting on the bottom of the
filter.
- Connect the outlet to the outlet fitting on top. Make sure the hoses are
fully installed over the bulged-out portions of the fittings.
- Use either pliers or a screwdriver, depending on the type of hose clamps,
to fasten the hose clamps over the filter fittings so they are beyond the
bulged-out sections of the fittings, but a small distance away from the
ends of the hoses.
- Connect the negative battery cable.
- Start the engine and inspect the hose connections for fuel leaks. Correct
any fuel leak immediately.
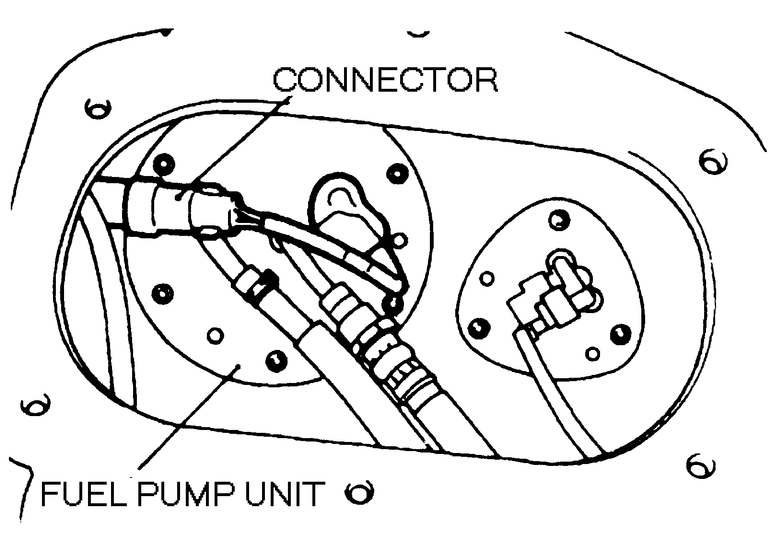
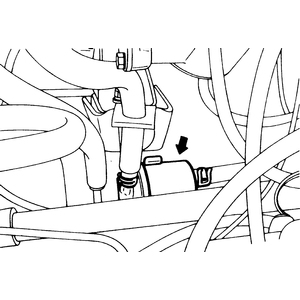
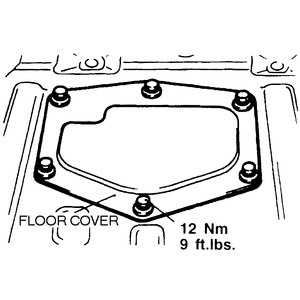
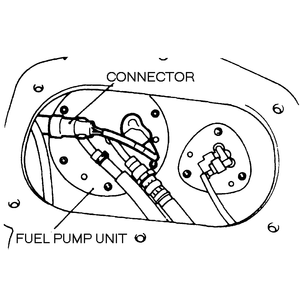
NOTE: Some Montero vehicles are equipped with a fuel pump
access cover. Take out the carpet in the cargo area and lift up the floor
cover to remove the fuel pump access cover. Unplug the fuel pump harness connector,
then start and run the engine until it stalls to reduce the fuel pressure.
| Fig. 4: Fuel pump harness location — Pick-up
models
|
To locate the inline filter, follow the fuel line back from the throttle
body. Inline filters are often mounted to the frame rail underneath the vehicle.
It may be necessary to raise and safely support the vehicle using jackstands
in order to access the filter.
- First, you MUST reduce the pressure in the fuel system; refer to Section
5 for this procedure.
- Unfasten the negative battery cable from the battery.
- Remove the air cleaner assembly; refer to the air cleaner filter removal
procedure described earlier in this section.
- Using an open-end wrench to hold the fuel filter stationary, loosen the
bolt for the banjo type connector on top of the fuel filter with a box wrench.
Perform the same procedure to the inlet connector on the bottom of the filter.
- Remove the bolt or nuts attaching the filter to the bracket and remove
it.
To install:
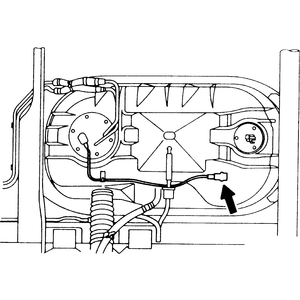
| Fig. 5: Fuel pump access cover — Montero
|
| Fig. 6: Fuel pump harness location — Montero
|
- To install the new filter, reverse the above procedure. A torque wrench
is recommended to tighten the bolts for the fuel line banjo fittings. If
the banjo fitting washers are damaged, replace them. Tighten the outlet
fitting to 18–25 ft. lbs. (24–34 Nm) and the inlet fitting to
25 ft. lbs. (34 Nm).
- Reconnect the negative battery cable, then start the engine and check
for leaks.
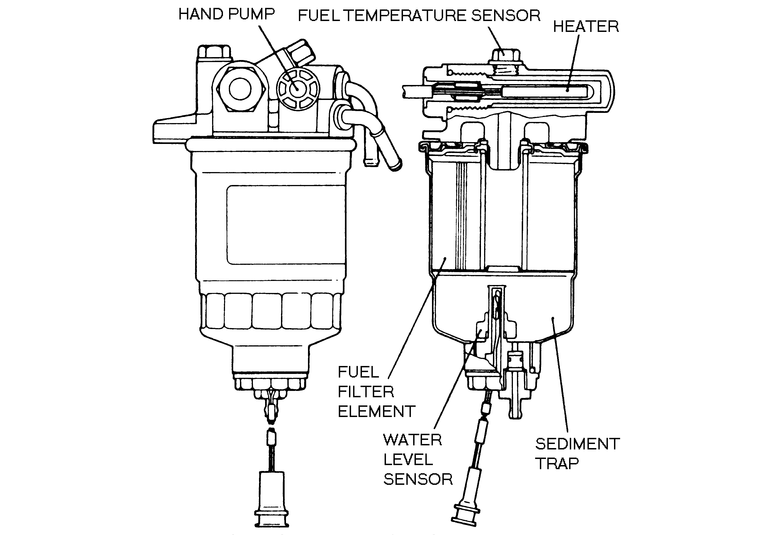
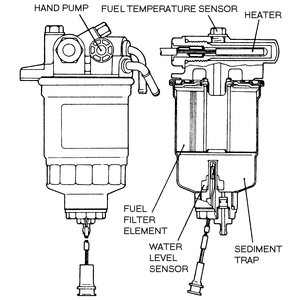
The fuel filter element (cartridge) is contained within the filter canister
which must be removed to gain access. The filter canister is located in the
engine compartment and is positioned between the fuel tank and the feed pump
in the fuel system.
- Label and unplug all electrical connectors running to the filter canister.
These connectors are for the water level sensor, the fuel heater and the
fuel temperature sensor.
- Carefully unfasten the fuel hoses at the fuel filter. Have a supply of
rags handy to catch overflow from the hoses.
| Fig. 7: Cross-section of the diesel fuel filter
|
| Fig. 8: A helpful trick for removing the water
level sensor from the diesel fuel filter
|
| Fig. 9: Correct clamp positioning is important
|
| Fig. 10: Location of the air bleed port (upper)
and hand pump (lower) for bleeding the diesel fuel system
|
NOTE: While not as flammable as gasoline, diesel fuel
is slippery, smelly and very capable of staining anything it touches.
Prevent spillage whenever possible and mop up spilled fluid immediately.
Cat litter or similar products are ideal for dealing with puddles on the
floor.
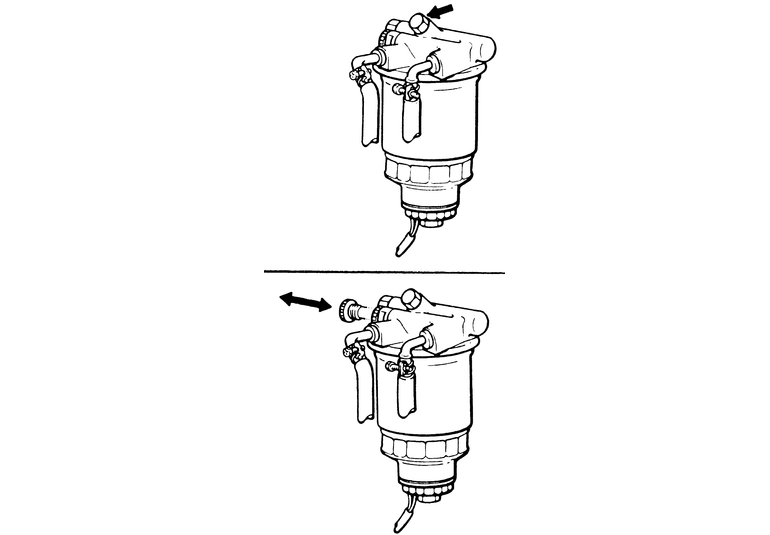
- Remove the two bolts holding the filter to the body and remove the filter
canister.
- Remove the protector and bracket from the canister.
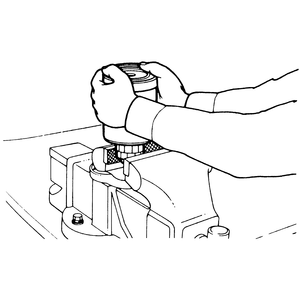
- Screw the filter out of the canister body by hand. Carefully remove the
water level sensor and the drain plug from the cartridge. It may be handy
to lightly clamp the unit in a vise to aid removal, but do not damage the
sensor or the housing.
To install:
- It is possible to clean the filter element with kerosene. However, replacement
with a new cartridge is highly recommended instead of cleaning.
- Install the drain plug and and the water level sensor on the new cartridge.
Tighten the drain plug to 3 ft. lbs. (4 Nm) and the water sensor to 9 ft.
lbs. (12 Nm).
- Screw the cartridge onto the body. Install the protector and bracket.
- Install filter assembly onto the vehicle. Install the main fuel hoses.
When tightening the clamps, make sure the heads of the clamp bolts face
away from the body of the filter.
- Whenever the fuel supply has run out or the lines have been opened, the
system must be bled to eliminate air. The air bleed plug projects at an
angle from the top of the filter housing.
- Loosen it.
- Have rags handy and place some under the bleed port; as fuel will
come out of the bleed port.
- The knob for the hand pump is located on the side of the filter body.
Unscrew it and pull the pump lever out of the housing.
- Work the hand pump and watch the fuel coming out of the air bleed
plug; when there are no air bubbles mixed with the fuel, tighten the
air bleed plug.
- Continue pumping until the operation of the pump lever feels stiff
or heavy during each stroke.
- Push the pump lever all the way in and turn it to the right to lock
it in place.
- Refasten the wiring connectors to the pump housing terminals. Make certain
each is firmly seated.
When water accumulates in the fuel filter, the fuel–water separator
light will come on. This indicates that the filter has reached its safe capacity
and must be drained. Even if the light has not come on, the wise owner will
drain the filter with every oil change. This simple procedure can be done
with the filter on the vehicle and can prevent severe engine damage or failure.
- Use the proper sized wrench to loosen the drain plug on the bottom of
the fuel filter.
- The knob for the hand pump is located on the side of the filter body.
Unscrew it and pull the pump lever out of the housing.
- Pump the hand pump until the water is expelled and fuel is being pumped
out.
- Push the pump lever all the way in and turn it to the right to lock it
in place.
| Fig. 11: Draining water from the diesel fuel filter
|