NOTE: Measure the voltage with the ECM connector plugged in. Measure the voltage between each terminal and the grounding terminal. You may find it convenient to pull the ECM out to make it easier to reach the connector terminals. It is not necessary to do inspection in the order of the chart.
WARNING
Short-circuiting the positive (+) probe between a connector terminal and
any ground other than the grounding terminal could damage the vehicle wiring,
the sensor or the ECM. Use care to prevent this from happening.
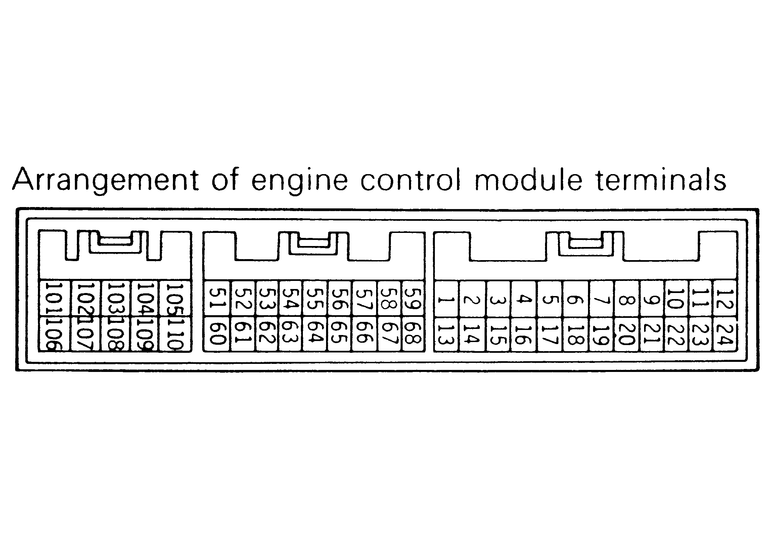
| Fig. 1: The arrangement of the ECM terminals — 2.4L
and 3.0L (12 valve) engines
|
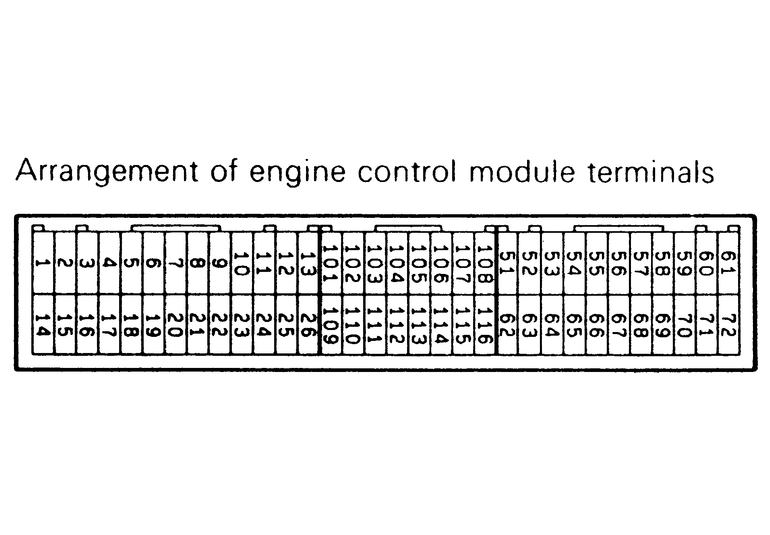
| Fig. 2: The arrangement of the ECM terminals — 2.4L
(California RWD 1993–), 3.0L (24 valve) and 3.5L engines
|
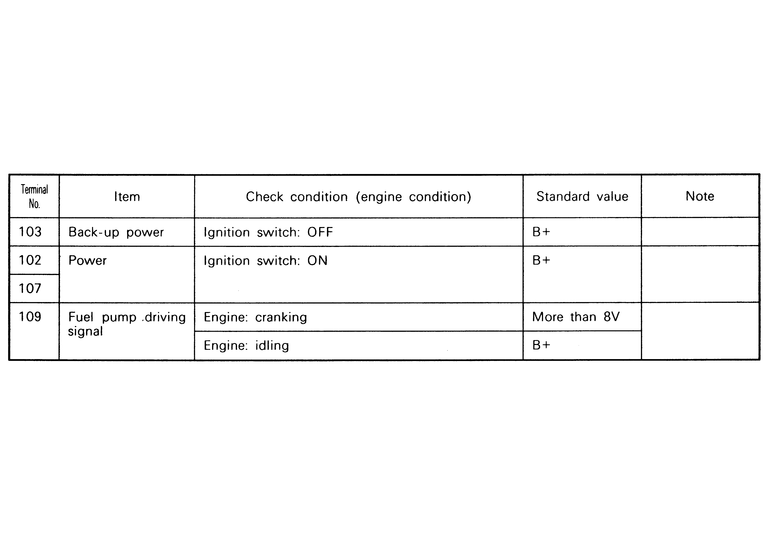
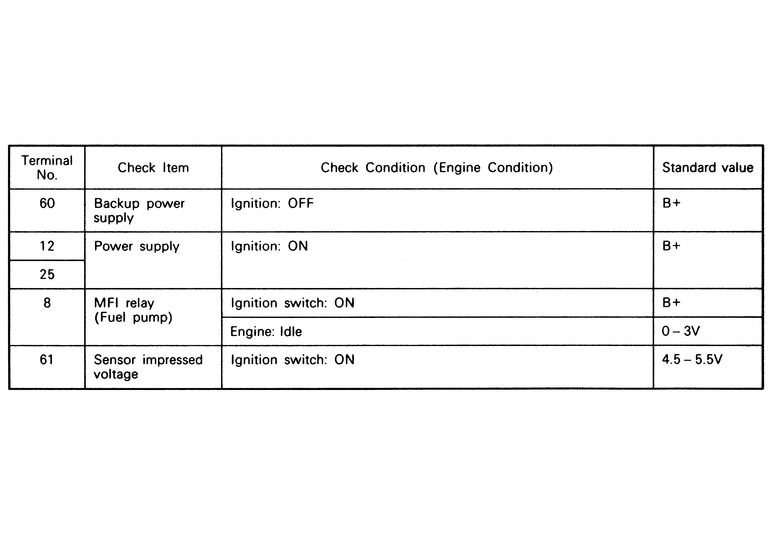
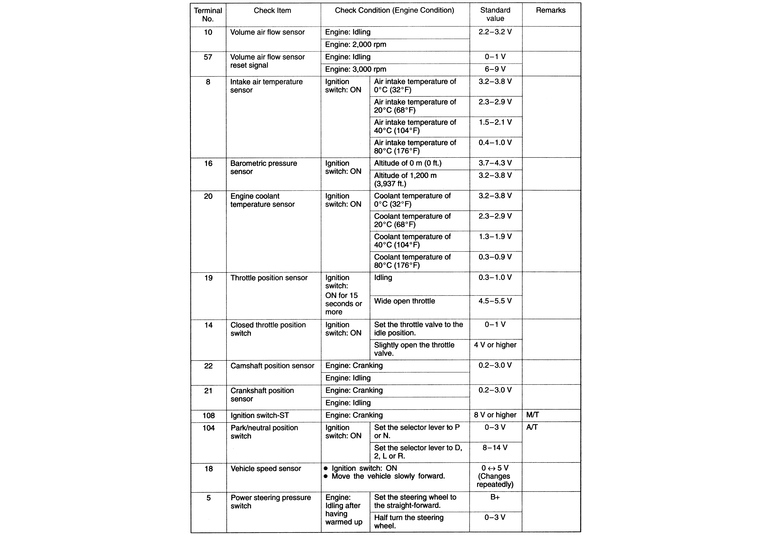
| Fig. 3: The ECM terminal voltage check chart — 2.4L
engines
|
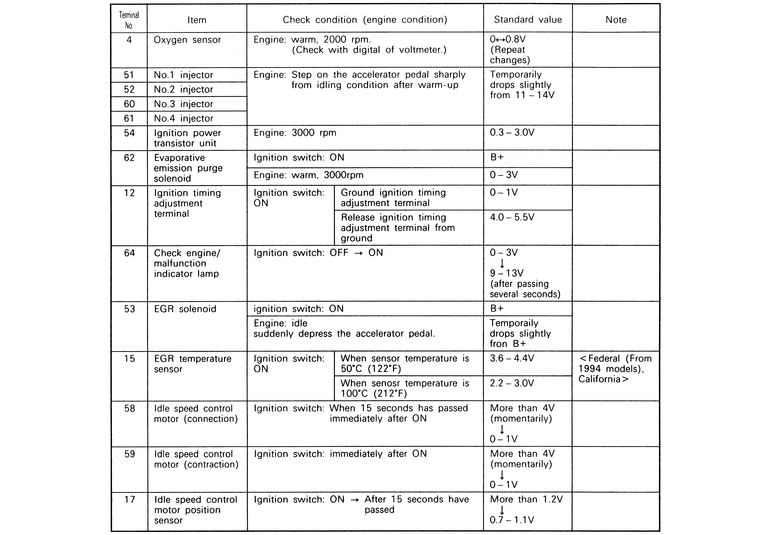
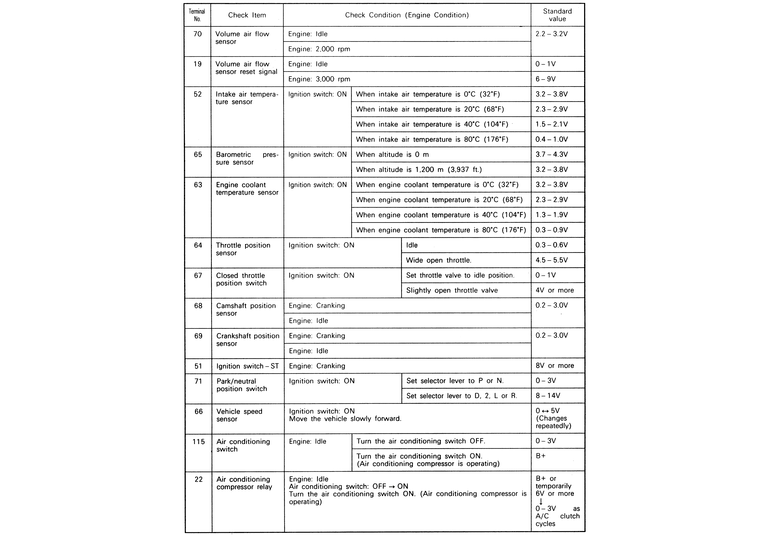
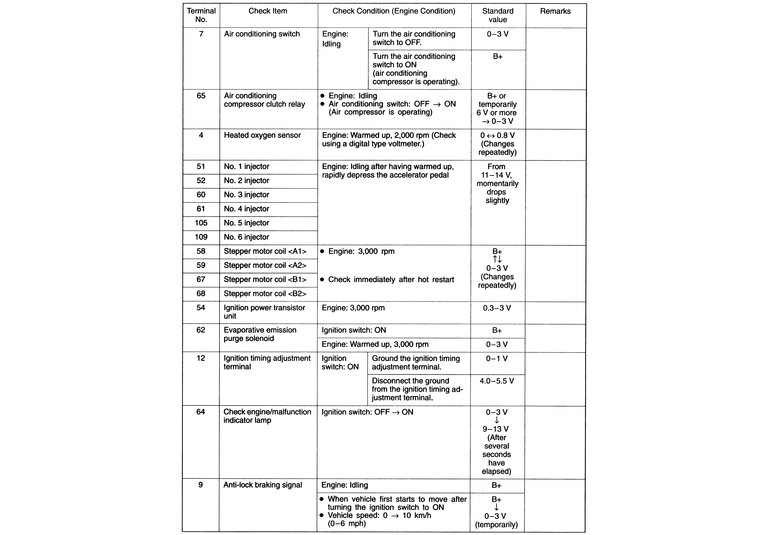
| Fig. 4: The ECM terminal voltage check chart — 2.4L
engines
|
| Fig. 5: The ECM terminal voltage check chart — 2.4L
engines
|
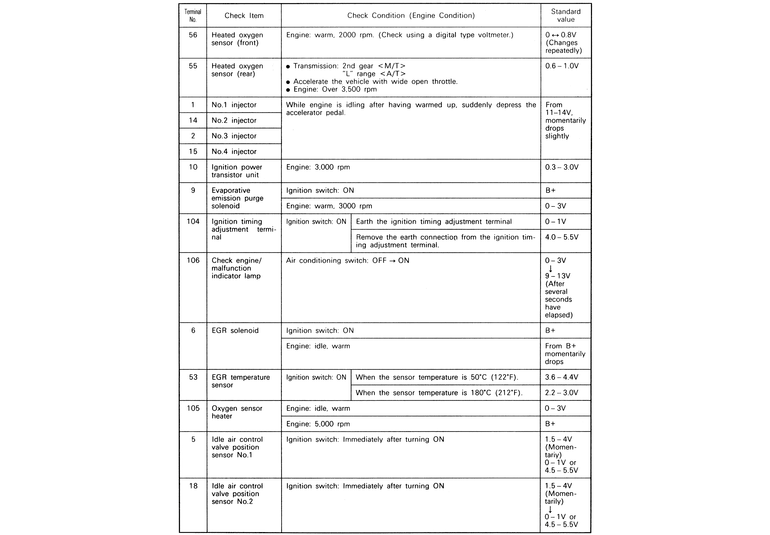
| Fig. 6: The ECM terminal voltage check chart — 2.4L
(California RWD 1993–95) engines
|
| Fig. 7: The ECM terminal voltage check chart — 2.4L
engines
|
| Fig. 8: The ECM terminal voltage check chart — 2.4L
engines
|
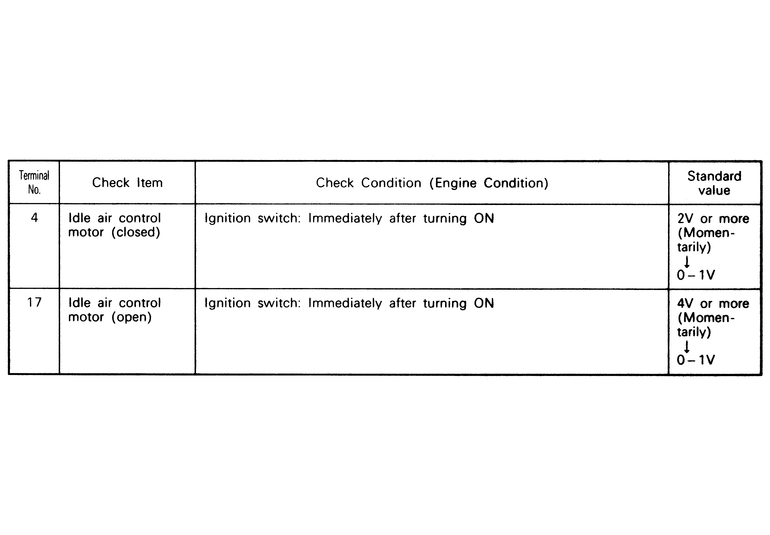
| Fig. 9: The ECM terminal voltage check chart — 2.4L
engines
|
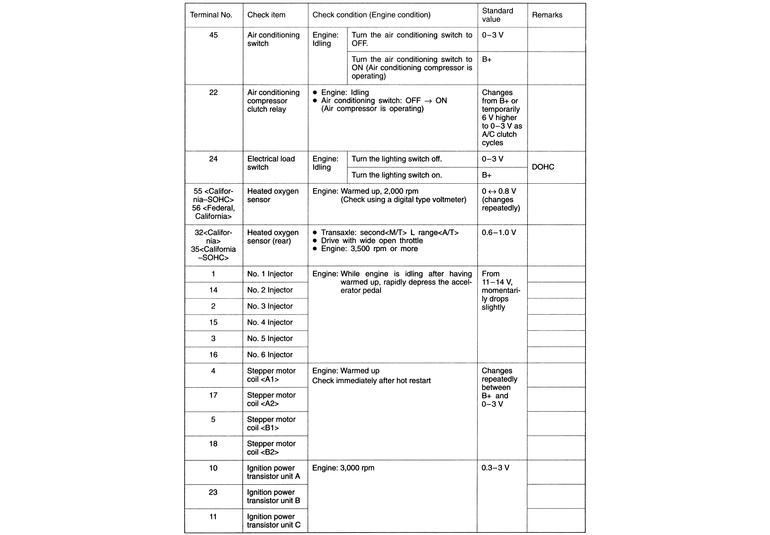
| Fig. 10: The ECM terminal voltage check chart — 3.0L
(12 valve) engines
|
| Fig. 11: The ECM terminal voltage check chart — 3.0L
(12 valve) engines
|
| Fig. 12: The ECM terminal voltage check chart — 3.0L
(24 valve) and 3.5L engines
|
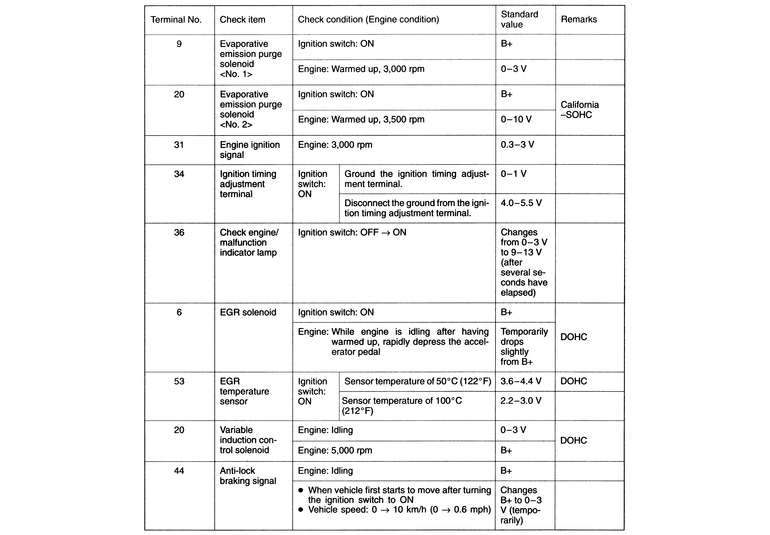
| Fig. 13: The ECM terminal voltage check chart — 3.0L
(24 valve) and 3.5L engines
|