Previous Next

REMOVAL & INSTALLATION

CAUTION
Most headlight retaining rings and trim bezels have very sharp edges. Wear gloves. Never pry or push on a headlamp; it can shatter suddenly. When changing a replaceable bulb, never touch the new bulb with your fingers; always hold it by the base. The natural oils in your skin will cling to the glass and create hot spots on the bulb envelope. These hot spots will shorten the life of the bulb substantially. If the bulb has been handled, clean the glass with alcohol and dry it thoroughly before installation.

Pick-up
  1. Remove the grille.
  2. Remove the four small screws holding the metal retaining ring or frame.
  3. Pull the lamp forward and out; disconnect the wiring harness. Install the new lamp and connect the harness.
  4. Fit the lamp into place and install the retaining ring.
  5. Install the grille.

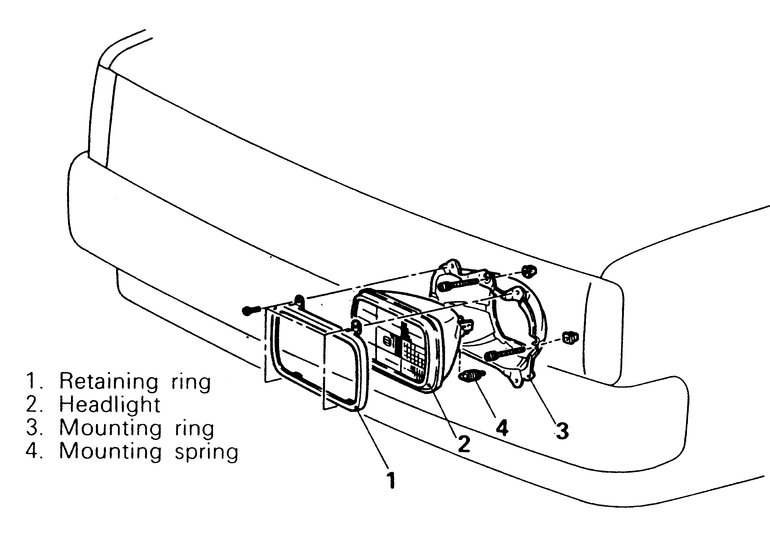
    Fig. 1: Headlight assembly removal and installation components — all Pick-ups similar

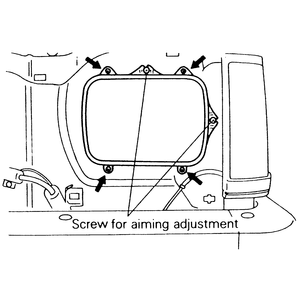
    Fig. 2: Only remove the four screws around the retaining ring — do not loosen or remove the aiming screws

1983–91 Montero
  1. Remove the radiator grille.
  2. Remove the front sidemarker lamp.
  3. Remove the plastic headlamp bezel.
  4. Loosen or remove the three screws holding the headlight retaining ring. Once all three screws are loosened, the ring may be turned slightly and removed. This trick eliminates removing very small screws.
  5. Remove the headlamp and disconnect the wiring harness. Install the new lamp and connect the wiring. Fit the lamp in place and install the retaining ring.
  6. Install the plastic bezel, the sidemarker assembly and the grille.

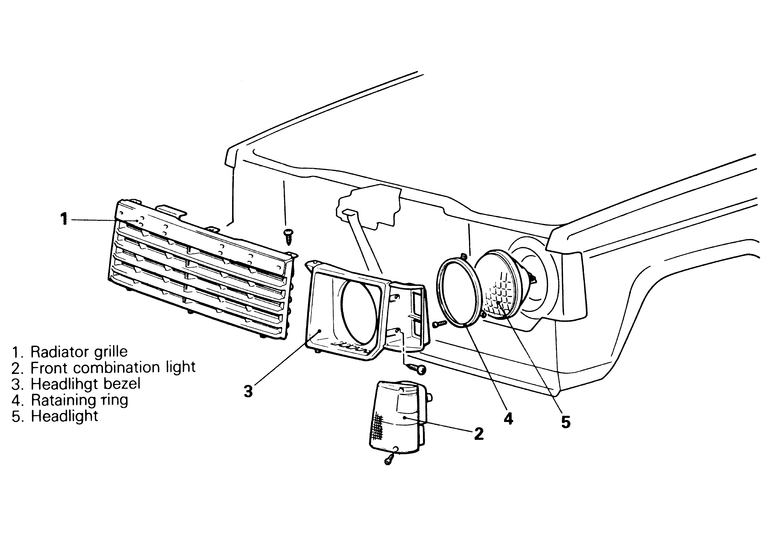
    Fig. 3: Headlight assembly removal and installation components — 1983–91 Monteros

1992–95 Montero

The 1992–95 Monteros have a replaceable bulb rather than a sealed bulb. This procedure tells how to remove the headlight assembly and the small replaceable bulb.

HEADLIGHT ASSEMBLY
  1. Remove the front combination light (turn signal & side marker light) mounting screws and set spring. Remove the combination light by pulling it towards the front of the vehicle.

    NOTE: For the left side, before removing the front combination light, remove the engine coolant reserve tank.

  2. Remove the radiator grille.
  3. Loosen and remove the two mounting bolts and the two mounting nuts from the headlight.
  4. Pull the headlight out of the retaining bezel and disconnect the wiring harness.
  5. Attach the wires to the new headlight and install it into the headlight recess.
  6. Tighten the outside two mounting bolts, then tighten the two inside mounting nuts.
  7. Install the radiator grille.

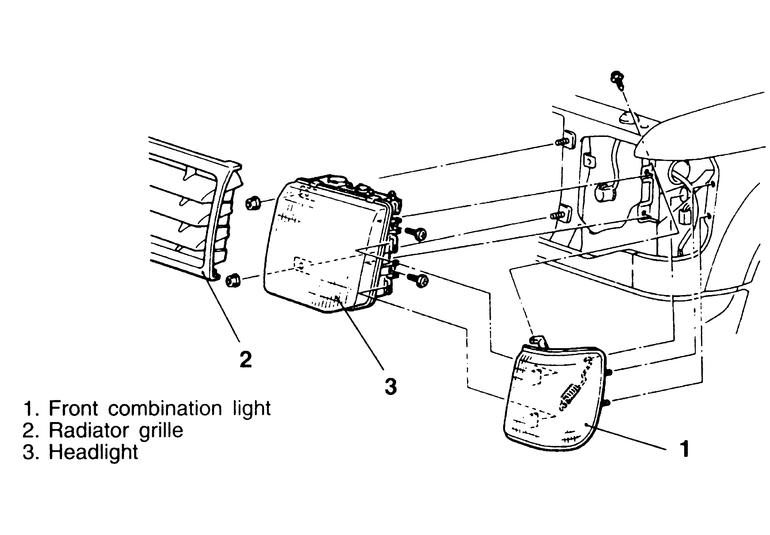
    Fig. 4: Headlight assembly removal and installation components — 1992–95 Monteros

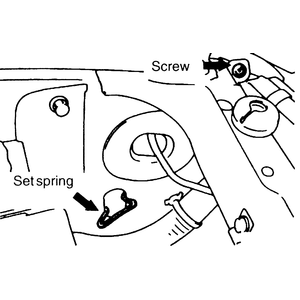
    Fig. 5: When removing the front combination light, make sure to disconnect the set spring from the fender — 1992–95 Monteros

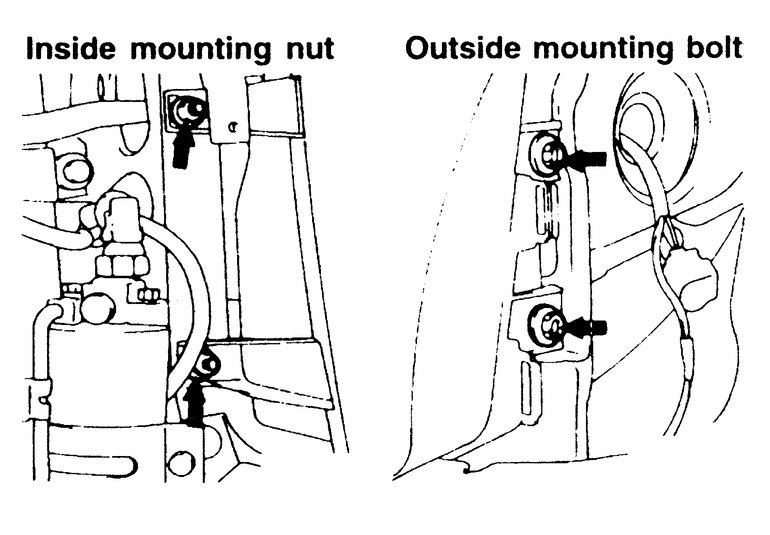
    Fig. 6: Tighten the outside mounting bolts, then the inside nuts — 1992–95 Monteros

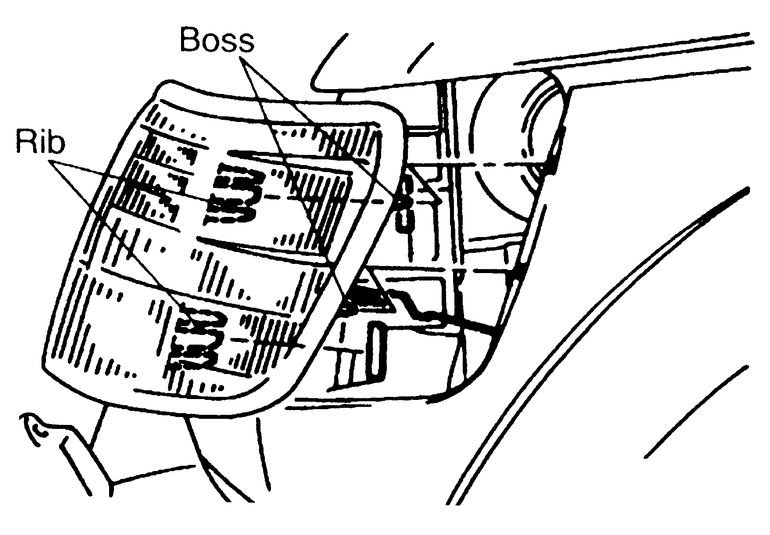
    Fig. 7: Installing the front combination light on the 1992–95 Monteros

  8. Align the front combination light positioning bosses with the insertion holes in the fender, then align the ribs with the headlight insertion holes.
  9. While pushing the front combination light in towards the rear of the vehicle, pull the set spring into the engine compartment to tighten it to the vehicle body, then tighten with the screw.
  10. Install the engine coolant reserve tank, if removed.
REPLACEABLE BULB
  1. Remove the engine coolant reserve tank (left-hand side only).
  2. Disconnect the negative (-) battery cable from the battery.
  3. Unplug the harness connector, then pull the socket cover out.
  4. Remove the locking cap by rotating it counterclockwise, then remove the socket and bulb together.

    NOTE: If the socket cover is not securely installed, the lens will be out of focus, or water will get inside the light unit, so the cover should be securely installed.

    WARNING
    Never hold the halogen light bulb with a bare hand, dirty glove, etc. If the glass surface is dirty, be sure to clean it with alcohol or paint thinner and install it after drying it thoroughly.

  5. Insert the bulb and socket together into the back of the headlight assembly.
  6. Turn the locking cap clockwise to lock it in place.
  7. Install the socket cover and wiring harness to the headlight assembly.
  8. Connect the battery cable to the battery.
  9. Install the engine coolant reserve tank.

Previous Next