Previous Next

REMOVAL & INSTALLATION

  1. Have the A/C system discharged by a qualified automotive mechanic.
  2. Disconnect the negative (-) battery cable from the battery.
  3. Remove the passenger-side (right-hand side) rear pillar trim. The evaporator is located under this trim piece.
  4. Remove the liquid line and the suction line connections from the evaporator assembly. Once the lines are removed, cap the hoses or pipes with a blank plug to prevent entry of dust, dirt and water.
  5. Make certain to discard the old O-rings from the A/C lines and acquire new ones for reassembly.
  6. Disconnect the upper duct from the top of the rear evaporator assembly.
  7. Unplug the wiring harness connector.
  8. Unbolt the mounting bolts and remove the evaporator assembly from the vehicle. Be careful, the evaporator will still have some coolant inside; do not spill it in the vehicle.
  9. To install the rear evaporator, set it in place in the vehicle.
  10. Secure it in place with the mounting bolts and plug the wiring harness connector back together.
  11. Install the upper duct into the top of the evaporator.
  12. Apply a coating of compressor oil (DENSO OIL 6 or SUNISO 5GS) to the new O-rings and place them in position in the liquid and suction lines. Refer to the refrigerant line procedure in this section for specifics.
  13. Bolt the lines tightly to the evaporator.
  14. Reinstall the rear pillar trim and connect the negative (-) battery cable to the battery.
  15. Have the A/C system evacuated and charged by a certified mechanic.

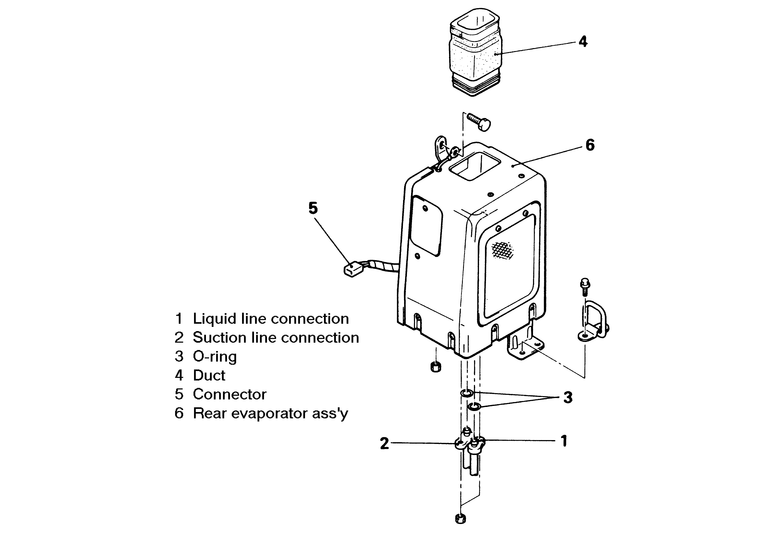
    Fig. 1: Air conditioning rear evaporator unit removal and installation components — 1983–91 Monteros

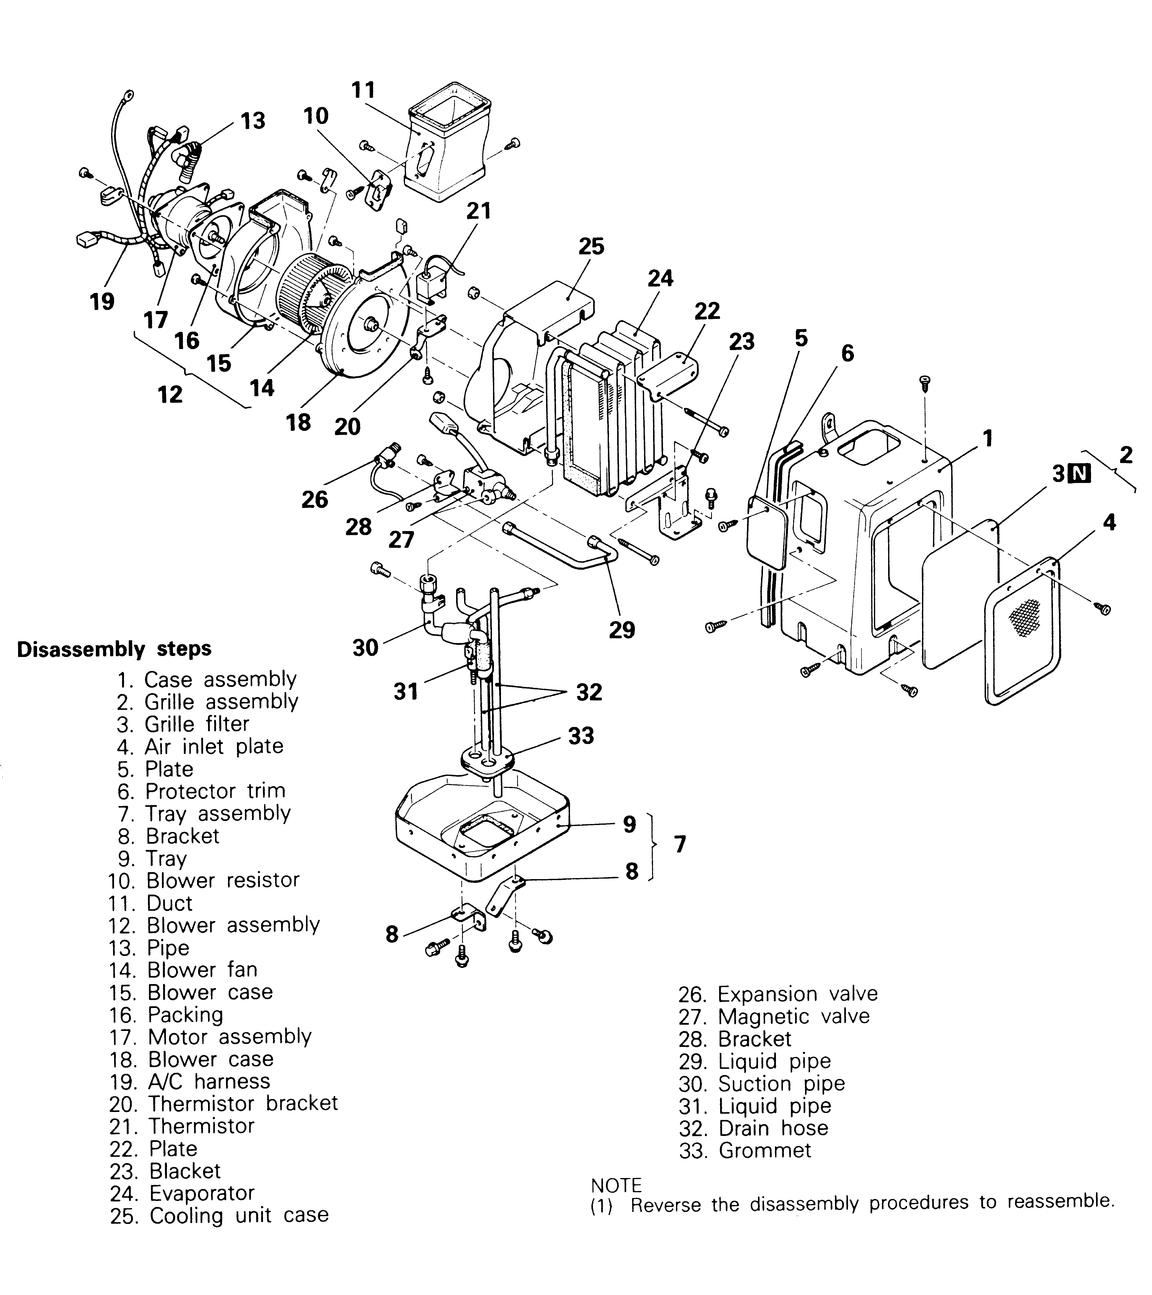
    Fig. 2: Rear evaporator disassembly and reassembly components — 1983–91 Monteros

    Fig. 3: The rear ventilator system, which is attached to the rear evaporator unit — 1983–91 Monteros

Previous Next