Previous Next

REMOVAL & INSTALLATION

NOTE: Whenever brake pads are replaced, replace them in complete sets; that is, replace the pads on both front wheels even if only one side is worn.

There are several combinations of shims, spacers and clips in use on Mitsubishi vehicles. When disassembling, work on one side at a time and pay attention to placement of these components. If you become confused during reassembly, refer to the other side for correct placement. To remove the brake pads:

  1. Raise the vehicle and support it safely on jackstands.
  2. Remove the front wheels.
  3. Siphon a sufficient amount of brake fluid from the master cylinder reservoir to prevent the brake fluid from overflowing when installing new brake pads. This is necessary as the piston must be forced into the cylinder bore to provide clearance to install the caliper with the new pads.
  4. Unscrew and remove the lockpin without disturbing the grease coating. Place the pin in a clean spot where grease will not pick up dust. Lift up the caliper body by using the guide pin bolt as a fulcrum. Fasten the caliper in the raised position with wire.

    WARNING
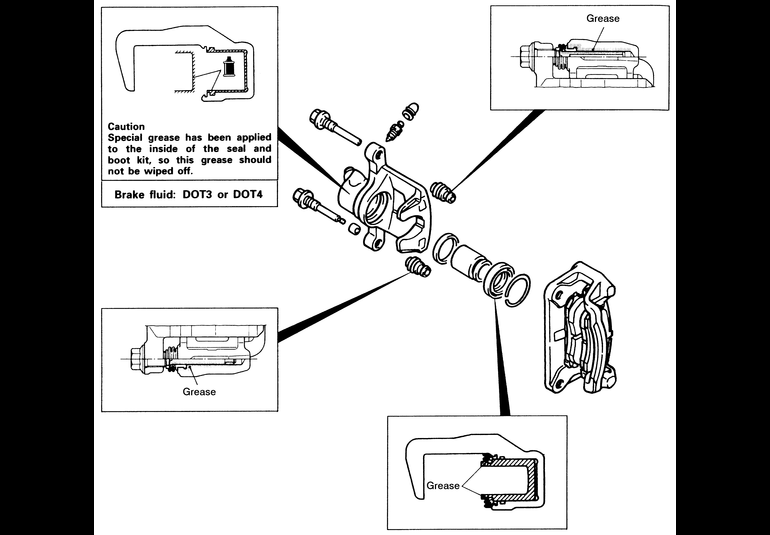
    There is a coating of special grease on the lockpin. Be careful that this grease is not removed, and that dirt does not contaminate the grease on the pin.

  5. Remove the shims, brake pads and spring clips in order. Depending on the number of such components, either diagram their placement or lay them aside in order.
  6. Clean the surface of the piston with a clean, damp rag. Make sure there is room in the master cylinder reservoir for more fluid (fluid will be forced back into the reservoir in the next step). If necessary, remove some fluid with a clean squeeze ball syringe.

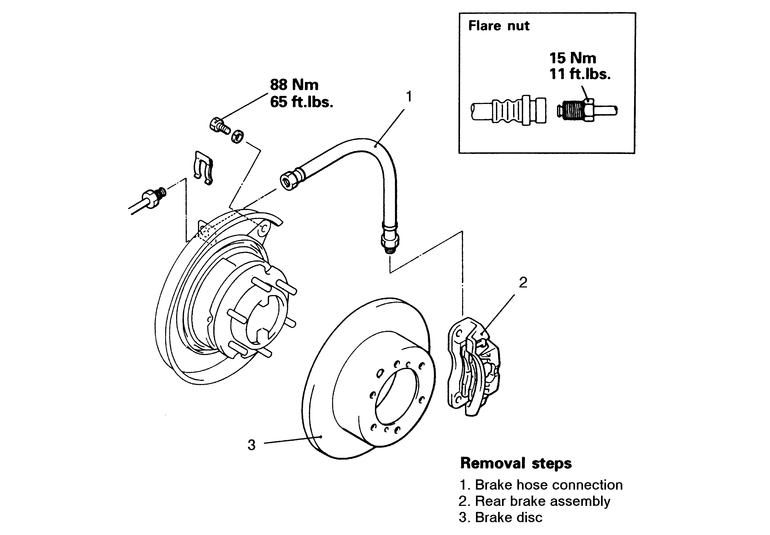
    Fig. 1: Rear disc brake caliper removal and installation components — 1992–95 Monteros

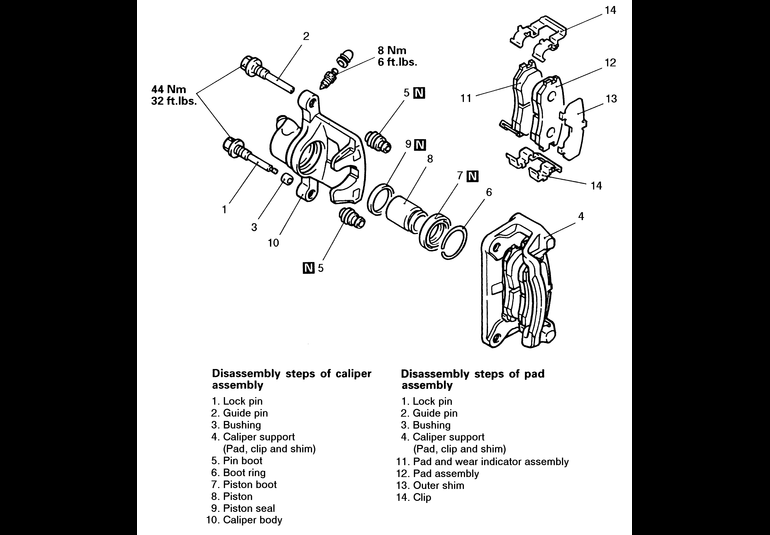
    Fig. 2: Rear brake caliper disassembly and reassembly components — 1992–95 Monteros

    Fig. 3: Rear brake caliper lubrication points for reassembly — 1992–95 Monteros

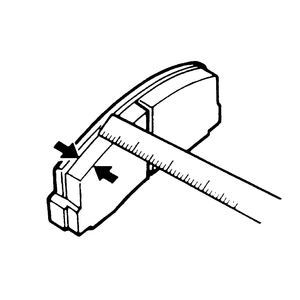
    Fig. 4: Measure the brake pad thickness — if any portion is below specifications, replace the pads

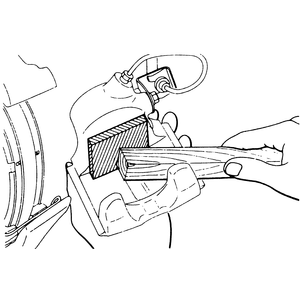
    Fig. 5: Use a C-clamp to push the cylinder back into the caliper, but two pieces of wood can be used if no C-clamp is available

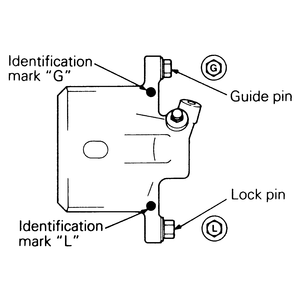
    Fig. 6: When installing the brake caliper lock and guide pins, make sure they are installed in the correct holes

  7. Use a large C-clamp or similar tool to depress the caliper pistons back into the calipers. The pistons will need to be almost flush with the case to fit over the new, thicker pads.
  8. Install the brake pads with the shims, clips and fittings in the correct order. Vehicles with upper and lower spring clips for each pad should have these clips replaced with the pads.

    NOTE: Keep the brake surface of each pad free of grease, oil and fluids during the installation. A greasy fingerprint or similar light contact may be removed with a commercial brake cleaning spray.

  9. Remove the wire, lower the caliper into position, and screw in the lower lockpin. Make certain the rubber boot is correctly placed on the lockpin and is not pinched or deformed.
  10. Replace the wheels and lower the vehicle.

    WARNING
    Do NOT attempt to drive the vehicle immediately after lowering it to the ground. The first two or three brake pedal applications may not provide any brake response.

  11. Pump the brake pedal several times with the engine off. The first two or three pedal strokes may be longer than usual as the pistons return from their compressed position and drive the pads inward. After a reasonable feel has been achieved, check the master cylinder reservoir and top up the fluid as needed. Start the engine and pump the brake pedal again, checking for the proper feel and engagement point.
  12. Since the brake hoses and hydraulic system was not opened during the repair, it is usually not necessary to bleed the brake system after pad replacement. Use good judgement in determining pedal feel; bleeding may be necessary for other reasons.

    NOTE: Braking should be moderate for the first 10 miles (16 km) or so until the new pads seat correctly. The new pads will bed best if put through several moderate heating and cooling cycles. Avoid hard braking until the brakes have experienced several long, slow stops with time to cool in between. Taking the time to properly bed the brakes will yield quieter operation, more efficient stopping and contribute to extended brake life.

Previous Next