FRONT STABILIZER
Exploded View
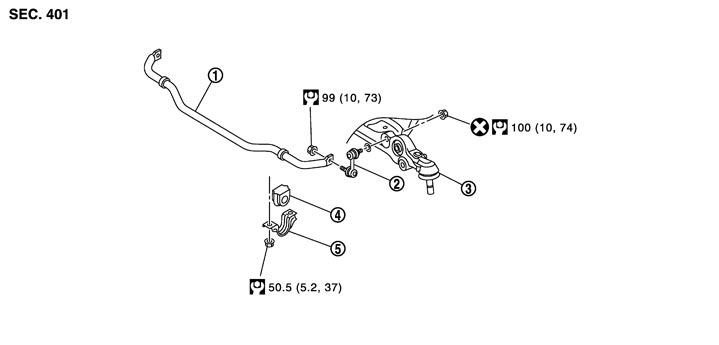
|
1. |
Stabilizer bar |
2. |
Stabilizer connecting rod |
3. |
Transverse link |
|
4. |
Stabilizer bushing |
5. |
Stabilizer clamp |
|
|
|
Refer to Components for the symbols in the figure. |
|||||
Removal and Installation
 REMOVAL
- 1.Remove tires with power tool.
- 2.Remove under cover. Refer to Exploded View.
- 3.Remove stabilizer connecting rod.
■ CAUTION ■
Apply a matching mark to identify the installation position.- 4.Remove stabilizer clamp and stabilizer bushing.
- 5.Remove stabilizer bar.
INSTALLATIONNote the following, and install in the reverse order of removal.
- Check the matching mark when installing.
- Never tap on the ball joint cap of the stabilizer connecting rod with a hammer or a similar item when inserting the stabilizer connecting rod into the transverse link.
- Tighten the mounting nut to the specified torque while holding a hexagonal part of stabilizer connecting rod side.