DOOR FINISHER
Exploded View
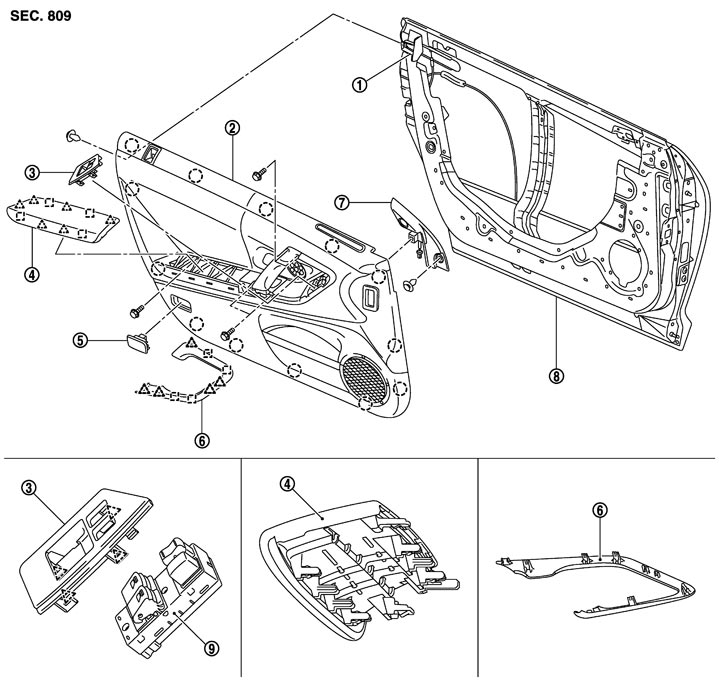
|
1. |
Bracket |
2. |
Door finisher |
3. |
Power window switch finisher |
|
4. |
Armrest |
5. |
Step lamp |
6. |
Door grip cap |
|
7. |
Door corner cover inner |
8. |
Door panel |
9. |
Power window switch |

|
: Clip |
|
|
|
|

|
: Pawl |
|
|
|
|

|
: Metal clip |
|
|
|
|
Removal and Installation
■ CAUTION ■
Wrap the tip of flat-bladed screwdriver with a shop cloth before remove.
 REMOVAL
- 1.Fully open the door window.
- 2.Insert a remover tool (A) into the lower side of door grip cap (1), then disengage and remove the pawls and metal clips.
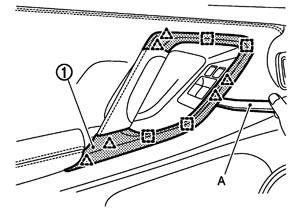
| : Pawl |
| : Metal clip |
- 3.Insert a remover tool (A) into the rear of armrest (1), then disengage and remove the pawls and metal clips.
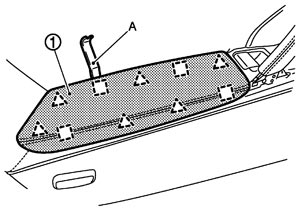
| : Pawl |
| : Metal clip |
- 4.Remove the door finisher tightening bolts (A) shown in the figure.
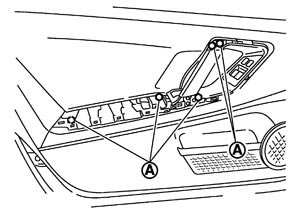
- 5.Remove the clip from the door finisher rear end. Refer to Exploded View.
- 6.Disengage the clips from the door finisher (1) rear side using a remover tool (A).
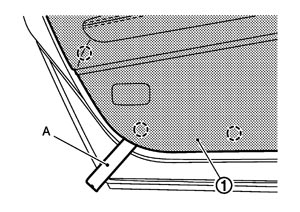
■ CAUTION ■
Insert the remover tool between door panel and clip, and then disengage the clip. | : Clip |
- 7.Remove the door finisher rear side lock knob cable (2) and the inside handle cable (1) from the inside handle (A).
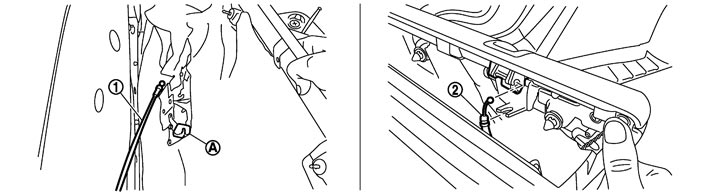
- 8.Lift up the door finisher and pull it out toward the passenger room. Disconnect the connectors (A) and (B) from the door finisher rear side.
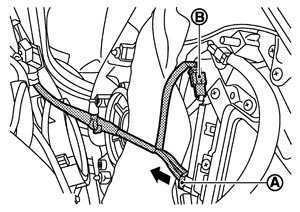
- 9.Remove the door finisher.
- 10.Remove the front door squawker (BOSE AUDIO WITH NAVIGATION) after removing the door finisher. Refer to Removal and Installation.
INSTALLATIONNote the following, and install in the reverse order of removal.
■ CAUTION ■
When installing the door finisher, check that the clips are securely fitted in panel holes, and then press them in.