BODY SIDE TRIM
Exploded View
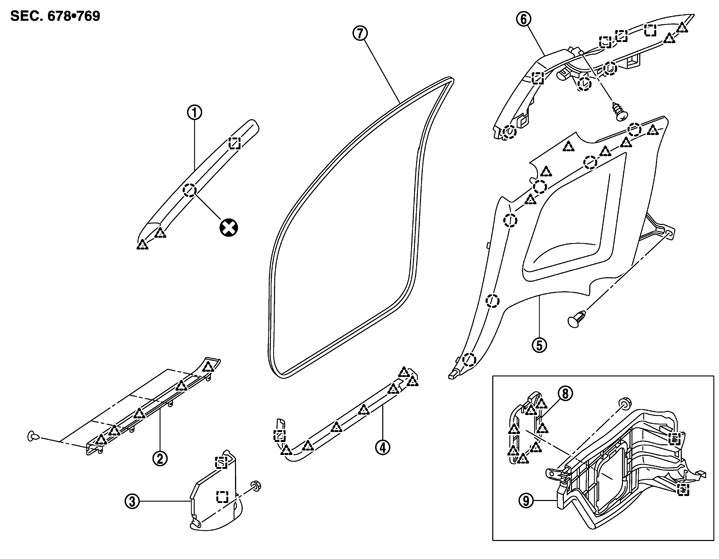
|
1. |
Front pillar garnish |
2. |
Kicking plate outer |
3. |
Dash side finisher (RH) |
|
4. |
Kicking plate inner |
5. |
Rear side finisher |
6. |
Rear pillar finisher |
|
7. |
Body side welt |
8. |
Dash side finisher cover |
9. |
Dash side finisher (LH) |

|
: Clip |
|
|
|
|

|
: Pawl |
|
|
|
|

|
: Metal clip |
|
|
|
|
|
Refer to Components for the symbol shown in the figure. |
|||||
Removal and Installation
■ CAUTION ■
Wrap the tools with shop cloth or tape to prevent damage when using the tools during removal.
 REMOVAL
 FRONT PILLAR GARNISH
- 1.Remove the front body side welt of the front pillar.
- 2.Insert the remover tool (A) into the clearance between the front pillar garnish (1) and the vehicle body, disengage the metal clips, cut the clip (2) and then remove the front pillar garnish.
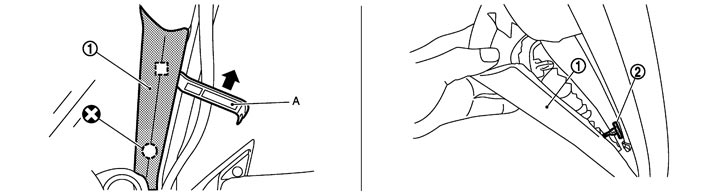
| : Clip |
| : Metal clip |
KICKING PLATE INNERLift up the kicking plate inner (1) toward upper side of the vehicle, disengage and remove the pawls, with a remover tool (A).
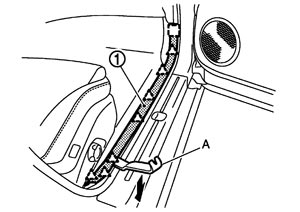
| : Pawl |
| : Metal clip |
■ CAUTION ■
When removing, disengage the tabs on the inside of rear end, and then lift upward. DASH SIDE FINISHER- 1.Remove the kicking plate inner.
- 2.Remove the clip (A) of the dash side finisher (1).
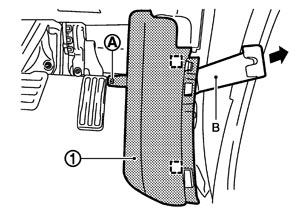
- 3.Disengage and remove the clips of the dash side finisher using the remover tool (B).
|
|
: Metal clip |
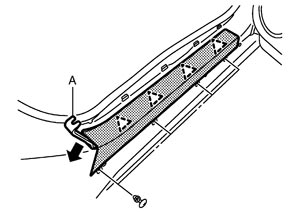
KICKING PLATE OUTER- 1.Remove the center mudguard. Refer to Removal and Installation.
- 2.Disengage and remove the pawls using a remover tool (A) after removing the clip of kicking plate outer.
|
|
: Pawl |
BODY SIDE WELT- 1.Remove the kicking plate inner.
- 2.Remove the body side welt from the panel flange.
REAR SIDE FINISHER- 1.Remove the kicking plate inner.
- 2.Remove the body side welt from the rear side finisher.
- 3.Remove the rear seat cushion and the rear seatback. Refer to Removal and Installation.
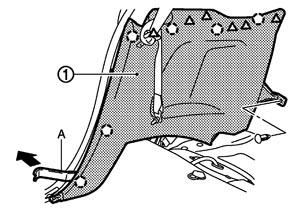
- 4.Insert the remover tool (A) into the clearance between the rear side finisher (1) and the vehicle body, and then disengage the clips.
| : Clip |
| : Pawl |
- 5.Disengage the joint of the pawls with the rear pillar finisher, and then remove the rear side finisher.
REAR PILLAR FINISHER- 1.Remove the rear seat cushion and the rear seatback. Refer to Removal and Installation.
- 2.Remove the kicking plate inner.
- 3.Remove the rear side finisher and the body side welt of rear pillar finisher.
- 4.Remove the rear side finisher.
- 5.Remove the front seat belt shoulder anchor. Refer to Removal and Installation.
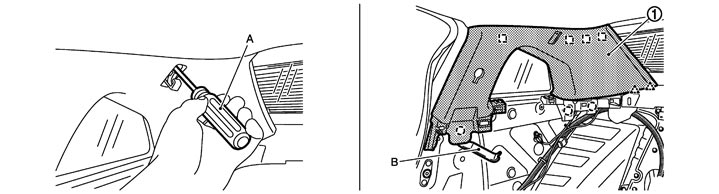
- 6.Remove the mounting screw from rear pillar finisher (1) using a screwdriver (A).
- 7.Disengage the clips and the metal clips from the rear pillar finisher (1) using the remover tool (B).
| : Clip |
| : Pawl |
| : Metal clip |
INSTALLATIONNote the following, and install in the reverse order of removal.
■ CAUTION ■
When installing body side trim, check that clips are securely fitted in panel holes on the body, and then press them in.