FLOOR TRIM
Exploded View
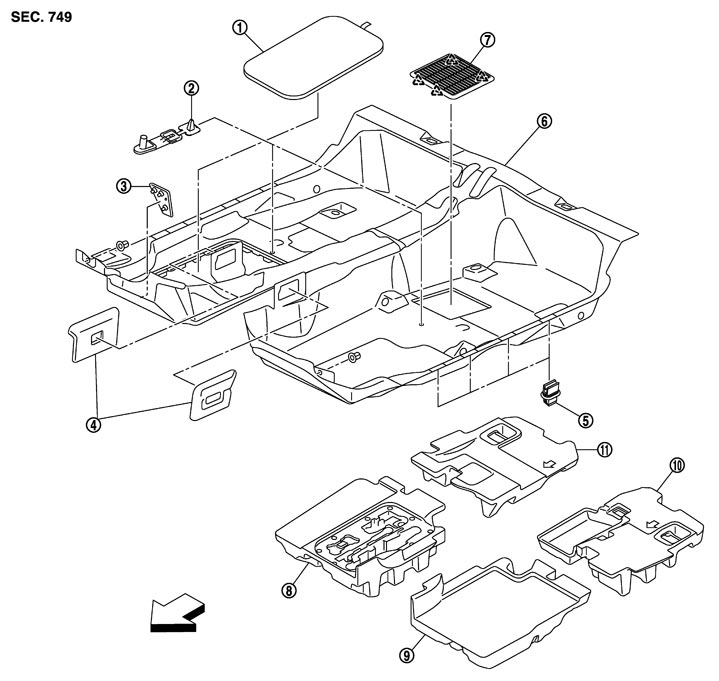
|
1. |
Seal box cover |
2. |
Floor carpet hook |
3. |
Footrest |
|
4. |
Foot duct |
5. |
Floor carpet fixing clip |
6. |
Floor carpet |
|
7. |
Grille |
8. |
Front floor spacer (RH) |
9. |
Front floor spacer (LH) |
|
10. |
Rear floor spacer (LH) |
11. |
Rear floor spacer (RH) |
|
|

|
: Pawl |
|
|
|
|

|
: Vehicle front |
|
|
|
|
Removal and Installation
 REMOVAL
- 1.Remove the front seat assembly (LH/RH). Refer to Removal and Installation.
- 2.Remove rear seat cushion. Refer to Removal and Installation.
- 3.Remove the footrest.
- 4.Disengage and remove the clips of floor carpet hook (1) using the remover tool (A).
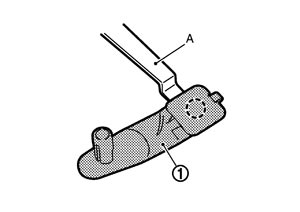
 | : Clip |
- 5.Remove the floor side anchor bolt of front seat belt (LH/RH). Refer to Removal and Installation.
- 6.Remove the center console assembly. Refer to Removal and Installation.
- 7.Remove the side instrument panel (LH/RH). Refer to Removal and Installation.
- 8.Remove the foot duct (LH/RH) (1) and floor harness fixing clamp (B) using the remover tool (A).
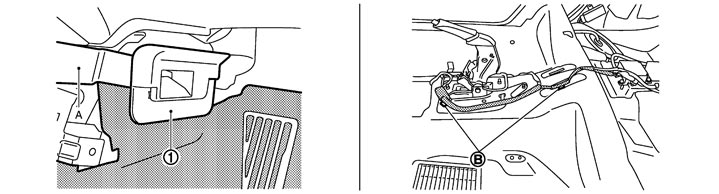
- 9.Disconnect the center connector of diagnosis sensor unit. Refer to Removal and Installation.
- 10.Remove the dash side finisher (LH/RH), kicking plate inner (LH/RH), and body side welt (LH/RH). Refer to Removal and Installation.
- 11.Remove the front side of rear side finisher to obtain the space between rear side finisher and floor carpet.
- 12.Disengage the floor carpet fixing clip and then remove the tool box cover and the amplifier cover.
INSTALLATIONInstall in the reverse order of removal.