REAR DIFFUSER
FLOOR SIDE FAIRING
Exploded View
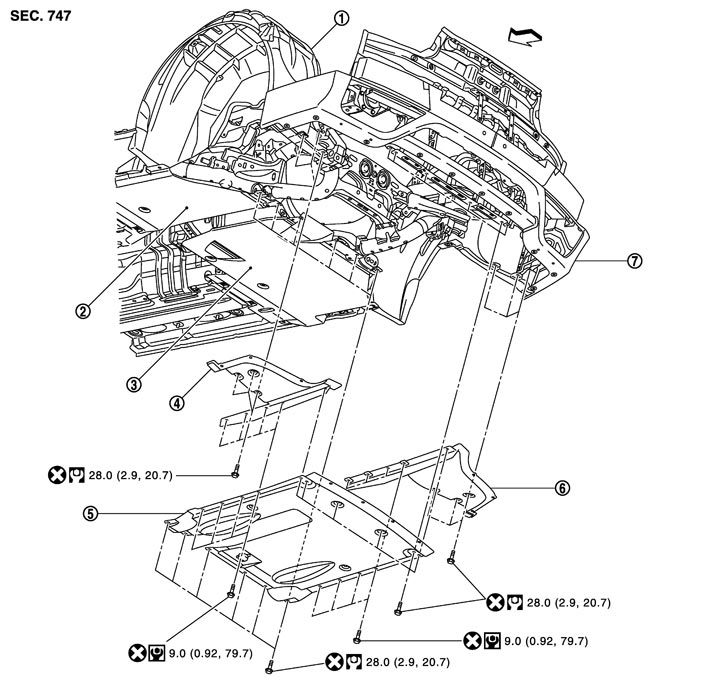
Rear diffuser construction
|
1. |
Rear wheel house protector LH |
2. |
Front diffuser LH |
3. |
Front diffuser RH |
|
4. |
Rear diffuser LH |
5. |
Rear diffuser (center) |
6. |
Rear diffuser RH |
|
7. |
Rear bumper fascia (lower) |
|
|
|
|

|
: Vehicle front |
|
|
|
|
|
Refer to Components for symbols in the figure. |
|||||
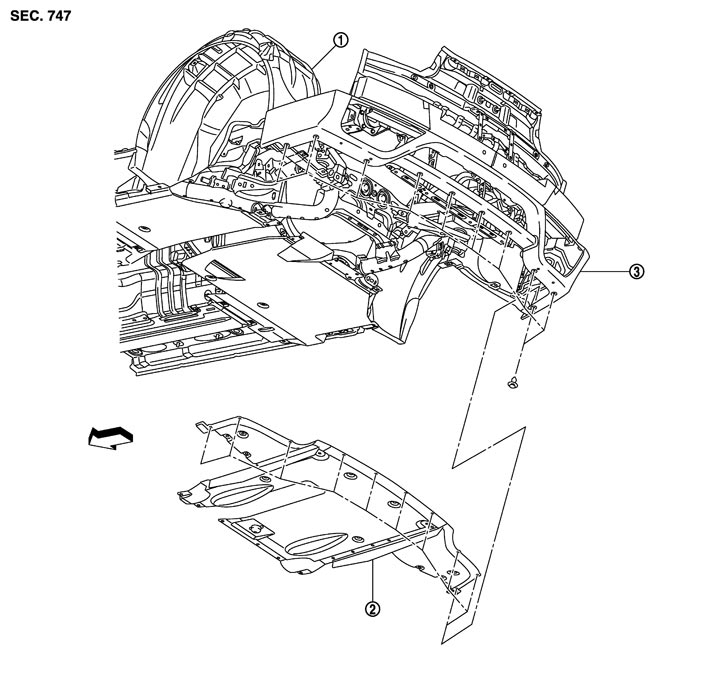
Installation position for clip
|
1. |
Rear wheel well protector LH |
2. |
Rear diffuser assembly |
3. |
Rear bumper fascia (lower) |
|
|
: Vehicle front |
|
|
|
|
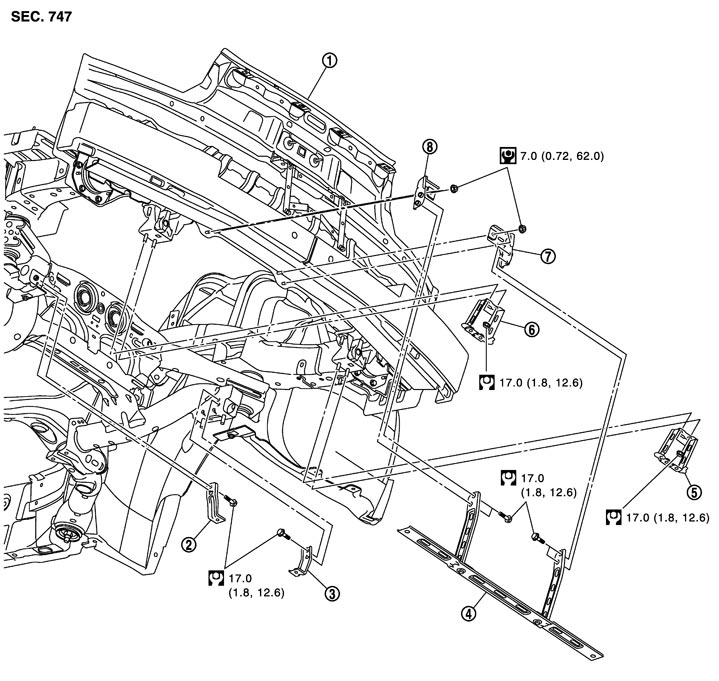
Bracket construction
|
1. |
Rear panel assembly |
2. |
Diffuser bracket A LH |
3. |
Diffuser bracket A RH |
|
4. |
Diffuser center bracket |
5. |
Diffuser bracket B RH |
6. |
Diffuser bracket B LH |
|
7. |
Diffuser bracket C RH |
8. |
Diffuser bracket C LH |
|
|
|
Refer to Components for symbols in the figure. |
|||||
Removal and Installation
 REMOVAL
 Rear diffuser (center)
- 1.Remove the clips connecting with the rear bumper fascia (lower) lower surface.
- 2.Remove the rear diffuser (center) mounting bolts.
- 3.Remove the rear diffuser (center).
Rear diffuser RH- 1.Remove the rear diffuser (center).
- 2.Remove the mounting bolts and clips of rear diffuser RH.
- 3.Remove the rear diffuser RH.
Rear diffuser LH- 1.Remove the rear diffuser (center).
- 2.Remove the mounting bolts and clips of rear diffuser LH.
- 3.Remove the rear diffuser LH.
INSTALLATIONNote the following, and install in the reverse order of removal.
■ CAUTION ■
- Replace the mounting bolts with new ones to prevent electric corrosion when removing and installing the rear diffuser.
- Visually check the clips for deformation and damage at installation. Replace with new ones if necessary.
- Always tighten the mounting bolts to the specified torque.