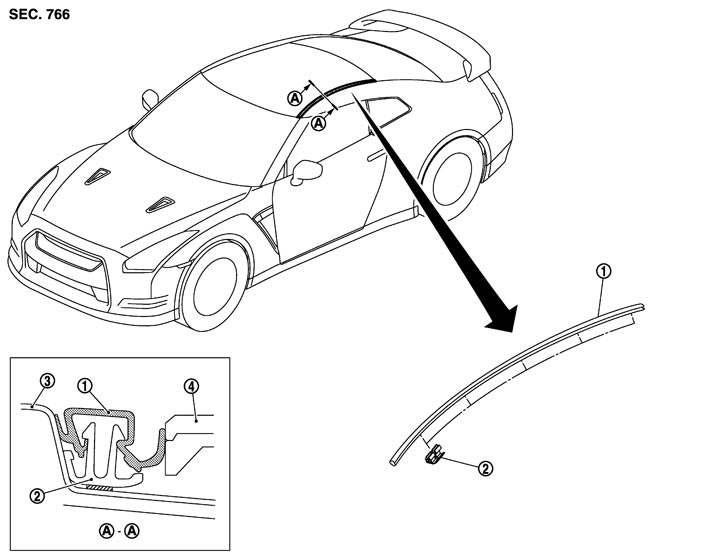
REMOVAL
Disengage the joint of clips from the roof side molding (1) rear edge with the remover tool (A).
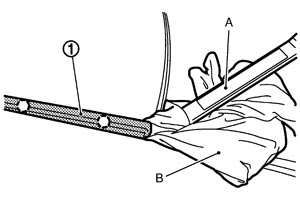
■ CAUTION ■
Wrap a shop cloth (B) around the remover tool to protect the body panel from damage.
| : Clip
|
INSTALLATION
Install in the reveres order of removal.
REMOVAL AND INSTALLATION OF ROOF SIDE MOLDING CLIP

Removal
1.Remove roof side molding.
2.Heat adhesive tape interface with a dryer, and then peel roof side molding clips with long-nose pliers.
■ CAUTION ■
Be careful not to damage the body.
Installation
1.Clean tape removed surface with a shop cloth soaked in white gasoline or IPA.
2.Use two-part epoxy adhesive.
Adhesive
| : 3M–weld DP-100 or equivalent
|
3.Apply adhesive evenly to clip tape surface.
Thickness
| : Approximately 0.5 mm (0.020 in)
|
4.Position applied parts to the proper location, and then sufficiently press-fit until the adhesive protrudes to tape side.
Press-fit limit
| : 19.6 N × 2 seconds
|
5.Tape clips after press fit, and temporarily hold it for specified time based on the following.
5 to 10°C (41 to 50°F)
| : 1 hour or more
|
11 to 23°C (52 to 73°F)
| : 30 minutes or more
|
24°C or more (75°F or more)
| : 15 minutes or more
|
6.Install from roof side molding rear end to front end in this order after temporarily holding.
■ CAUTION ■
- When installing roof side molding of windshield portion, check that molding fastener is securely inserted and then press in.
- Never wash the vehicle with in 24 hours so as to keep adhesive.