WATER INLET AND THERMOSTAT ASSEMBLY
Exploded View
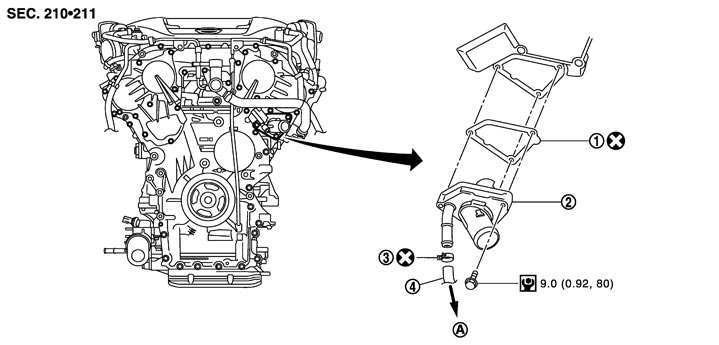
|
1. |
Gasket |
2. |
Water inlet and thermostat assembly |
3. |
Clamp |
|
4. |
Water hose |
|
|
|
|
|
A. |
To reservoir tank |
|
|
|
|
|
Refer to Components for symbols in the figure. |
|||||
Removal and Installation
 REMOVAL
- 1.Remove engine undercover with power tool.
- 2.Drain engine coolant from radiator drain plug at the bottom of radiator. Refer to Draining.
- Perform this step when the engine is cold.
- Never spill engine coolant on drive belt.
■ CAUTION ■
- 3.Remove air duct and air cleaner case assembly (LH). Refer to Exploded View.
- 4.Remove reservoir tank. Refer to Exploded View (GT-R certified NISSAN dealer).
- 5.Disconnect radiator hose (lower) and water hose at water inlet and thermostat assembly side.
- 6.Disconnect intake valve timing control solenoid valve harness connector (bank 2).
- 7.Remove water inlet and thermostat assembly (1).
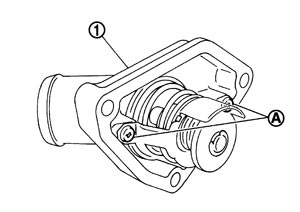
| A | : Never loosen these screws. |
■ CAUTION ■
Never disassemble water inlet and thermostat assembly. Replace them as a unit, if necessary. INSTALLATIONNote the following, and install in the reverse order of removal.
■ CAUTION ■
- Replace water hose clamp if it is removed.
- Be careful not to spill engine coolant over engine room. Use rag to absorb engine coolant.
Inspection
INSPECTION AFTER REMOVAL- 1.Check valve seating condition at ordinary room temperatures. It should seat tightly.
- 2.Check valve operation.
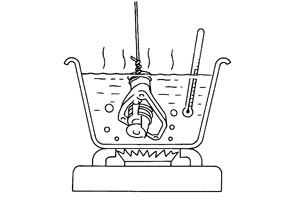
| Thermostat (Standard) | : Refer to Thermostat (GT-R certified NISSAN dealer). |
- If the malfunctioning condition, when valve seating at ordinary room temperature, or measured values are out of the standard, replace water inlet and thermostat assembly.
INSPECTION AFTER INSTALLATION- Check for leakage of engine coolant using the radiator cap tester adapter (commercial service tool) and the radiator cap tester (commercial service tool). Refer to Inspection.
- Start and warm up the engine. Visually check that there is no leakage of engine coolant.