HEAT EXCHANGER
HEAT EXCHANGER SYSTEM · TRANSMISSION: GR6Z30A
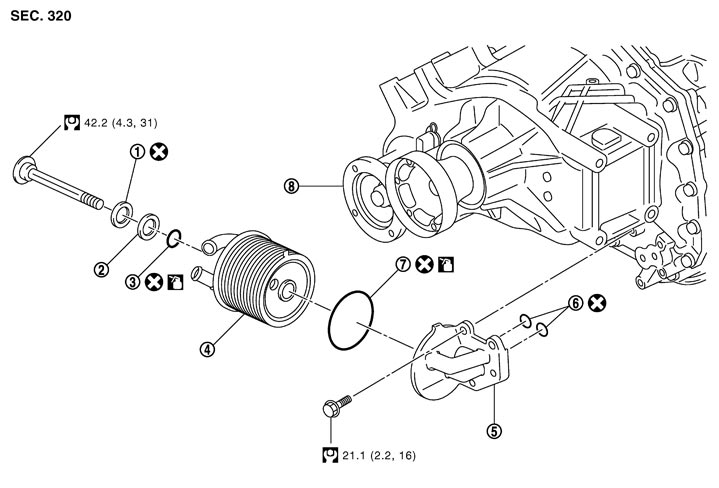
Exploded View
|
1. |
Spring washer |
2. |
Plane washer |
3. |
O-ring |
|
4. |
Heat exchanger |
5. |
Heat exchanger bracket |
6. |
O-ring |
|
7. |
O-ring |
8. |
Transmission assembly |
|
|

|
: Apply Genuine NISSAN Transmission oil R35 Special |
|
|
||
|
Refer to Components in GI section for the symbols other than above. |
|||||
Removal and Installation
 REMOVAL
■ CAUTION ■
Be careful because the heat exchanger unit and transmission oil are hot during work.
- 1.Remove the main muffler. Refer to Exploded View.
- 2.Remove the heat insulator.
- 3.Remove water hose C and water hose D from the heat exchanger. Refer to Exploded View (GT-R certified NISSAN dealer).
- 4.Remove the heat exchanger (1).
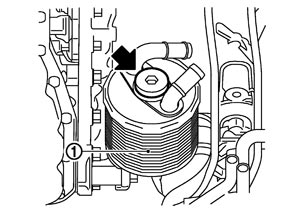
 | : Bolt |
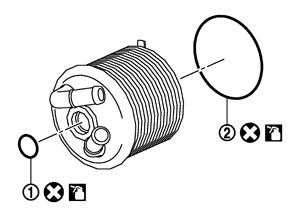
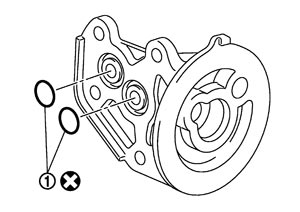
- 5.Remove O-rings (1) and (2) from the heat exchanger.
- 6.Remove the heat exchanger bracket (1) from the transmission assembly.
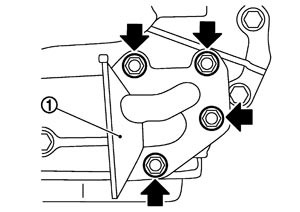
| : Bolt |
- 7.Remove O-ring (1) from the heat exchanger bracket.
 INSTALLATION
Note the following, and install in the reverse order of removal.
■ CAUTION ■
- Never reuse O-ring.
- Apply the transmission oil to O-ring when the O-ring is installed to the heat exchanger.
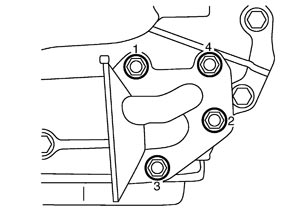
- Temporally tighten the mounting bolt, and then tighten it to the specified torque in the order shown in the figure when installing the heat exchanger bracket to the transmission assembly.
- Install the heat exchanger so that the spring washer (1) is positioned as shown in the figure.
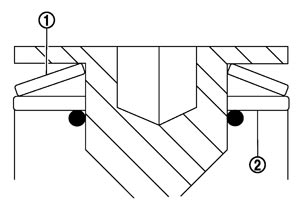
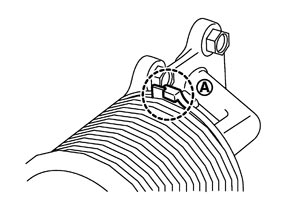
2 : Plane washer ■ CAUTION ■Never reuse spring washer. - Tighten the heat exchanger mounting bolt under the condition that the heat exchanger is fitted with the stopper (A) of heat exchanger bracket.
- Fill with the transmission oil to the transmission assembly after installation. Refer to Filling.