INSIDE HANDLE
DOOR LOCK
Exploded View
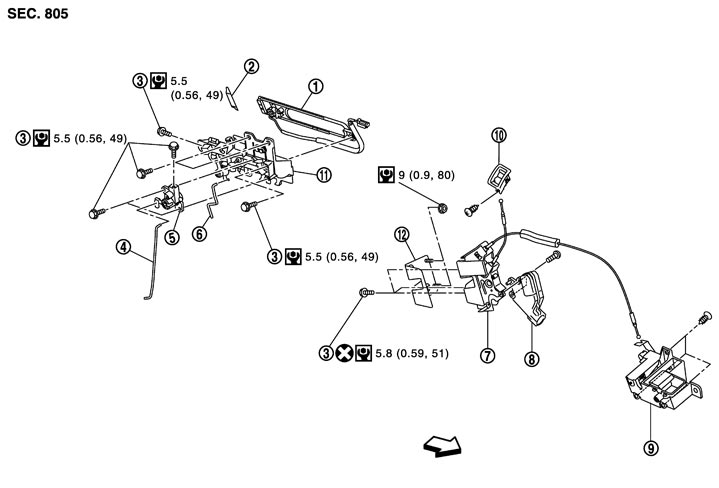
|
1. |
Outside handle escutcheon |
2. |
Outside handle cap |
3. |
TORX bolt |
|
4. |
Key cylinder rod (driver side) |
5. |
Key cylinder (driver side) |
6. |
Outside handle rod |
|
7. |
Door lock assembly (standard model) |
8. |
Door actuator assembly (standard model) |
9. |
Inside handle |
|
10. |
Door lock knob |
11. |
Outside handle assembly |
12. |
Door lock stiffener |
 : Vehicle front : Vehicle front |
|||||
|
Refer to Components for the symbols shown in the figure. |
|||||
Removal and Installation
 REMOVAL
- 1.Remove the door finisher. Refer to Removal and Installation.
- 2.Remove the door squawker. (Models with door squawker) Refer to Removal and Installation.
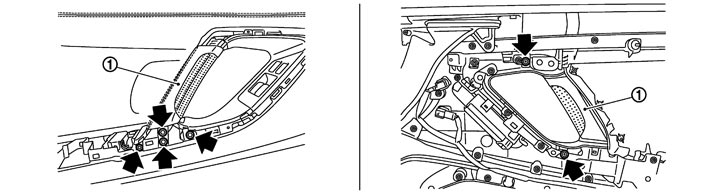
- 3.Remove the pull handle (1) mounting bolt by the arrows in the figure.
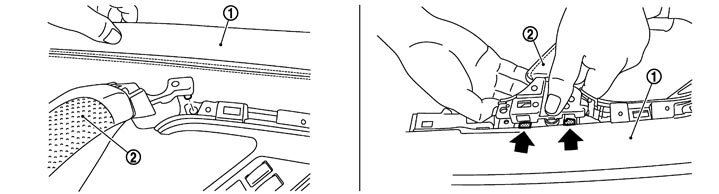
- 4.Remove the pull handle (2) from the door finisher (1).
- Disengage the positioning pole on the pull handle upper side.
- Lift up the pull handle lower side, and then disengage the pawls by the arrows in the figure.
- 5.Remove the inside handle assembly mounting bolt by the arrows in the figure.
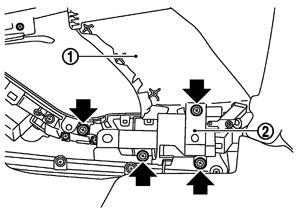
| 1. | Door finisher |
| 2. | Inside handle assembly |
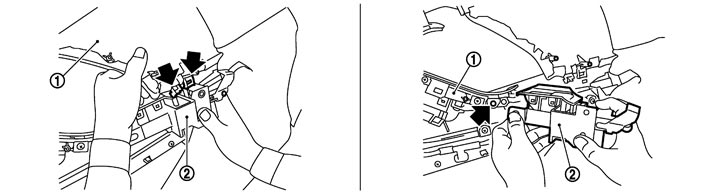
- 6.Remove the inside handle assembly (2) from the door finisher (1).
- Lift up the door finisher, and then disengage the pawls by the arrows in the figure.
- Pull the inside handle assembly forward, and then disengage the joint of inside handle assembly front side.
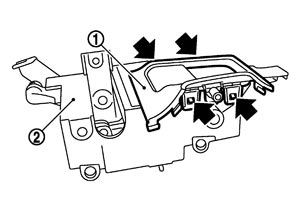
- 7.Disengage the pawls by the arrows in the figure of inside handle finisher (1), and then remove the inside handle finisher from the inside handle (2).
 INSTALLATION
Install in the reverse order of removal.
■ CAUTION ■
- Check door lock cables are properly engaged with inside handle.
- After installation, check door open/close operation.