CATALYST
Exploded View
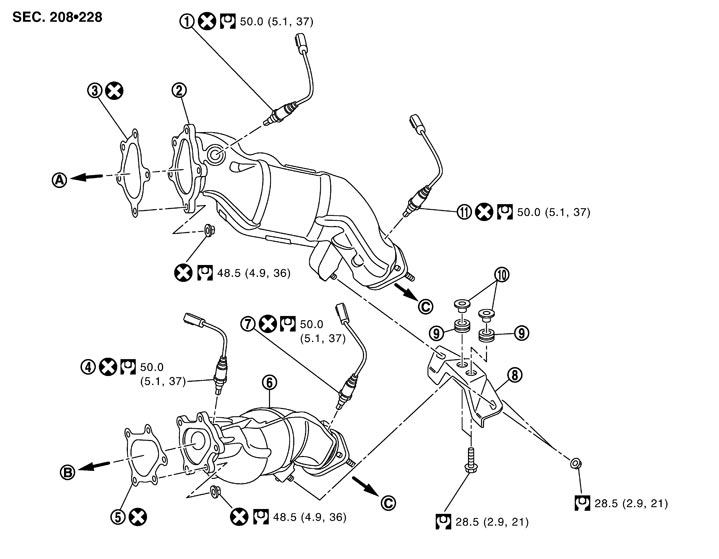
|
1. |
Air fuel ratio sensor (bank 1) |
2. |
Three way catalyst (bank 1) |
3. |
Gasket |
|
4. |
Air fuel ratio sensor (bank 2) |
5. |
Gasket |
6. |
Three way catalyst (bank 2) |
|
7. |
Heated oxygen sensor (bank 2) |
8. |
Bracket |
9. |
Mounting rubber |
|
10. |
Collar |
11. |
Heated oxygen sensor (bank 1) |
|
|
|
A. |
To exhaust manifold and turbocharger assembly (bank 1) |
B. |
To exhaust manifold and turbocharger assembly (bank 2) |
C. |
To sub muffler |
|
Refer to Components for symbols in the figure. |
|||||
Disassembly and Assembly
 DISASSEMBLY
- 1.Using the heated oxygen sensor wrench [SST: KV10114400 (J38365)] (A), remove heated oxygen sensor 2 (1).
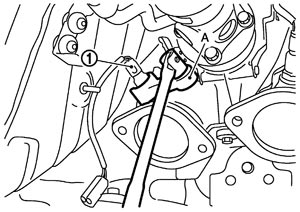
■ CAUTION ■
Heated oxygen sensor 2 is not reusable. Never remove it except when necessary.NOTE:
Heated oxygen sensor 2 is removable under the car-mounted condition.- 2.Using the heated oxygen sensor wrench [SST: KV10117100 (J3647-A)] (A), remove air fuel ratio sensor 1 (1).
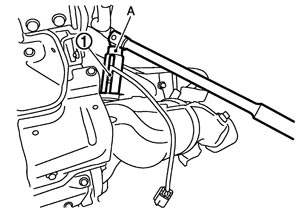
■ CAUTION ■
Air fuel ration sensor 1 is not reusable. Never remove it except when necessary.NOTE:
Air fuel ration sensor 1 is removable under the car-mounted condition.- 3.Remove bracket.
- 4.Remove three way catalyst.
■ CAUTION ■
Be careful not to damage three way catalyst.NOTE:
Apply penetrating lubricant to nuts before operation.- 5.Remove gaskets.
■ CAUTION ■
Cover engine openings to avoid entry of foreign materials. ASSEMBLYNote the following, and install in the reverse order of removal.
 Air Fuel Ratio Sensor 1 and Heated Oxygen Sensor 2
■ CAUTION ■
- The shape of air fuel ratio sensor 1 depends on bank position. Refer to the figure to install.
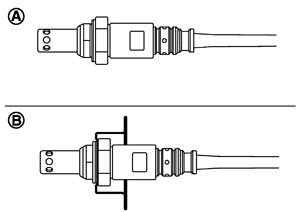
A : Bank 1 B : Bank 2 - Before installing a new air fuel ration sensor 1 and heated oxygen sensor 2, clean exhaust system threads using heated oxygen sensor thread cleaner tool (Commercial Service Tool: J-43897-18 or J-43897-12) and apply anti-seize lubricant.
- Set the tool in the hexagonal part to tighten new air fuel ration sensor 1 and heated oxygen sensor 2.
- Never over torque new air fuel ration sensor 1 and heated oxygen sensor 2. Doing so may cause damage to them, resulting in the “MIL” coming on.