Previous Next

Driven Disc and Pressure Plate

REMOVAL & INSTALLATION

CAUTION
The clutch driven disc may contain asbestos, which has been determined to be a cancer causing agent. Never clean clutch surfaces with compressed air! Avoid inhaling any dust from any clutch surface! When cleaning clutch surfaces, use a commercially available brake fluid.

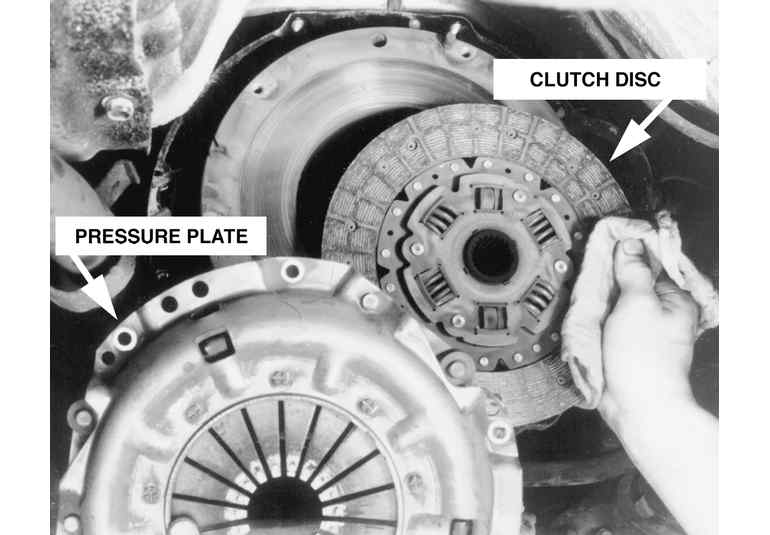
Fig. 1: Exploded view of the clutch assembly found on Subarus

  1. Disconnect the negative (-) battery cable.
  2. Depending on model, remove the engine and transaxle or just the transaxle as outlined earlier in this section.

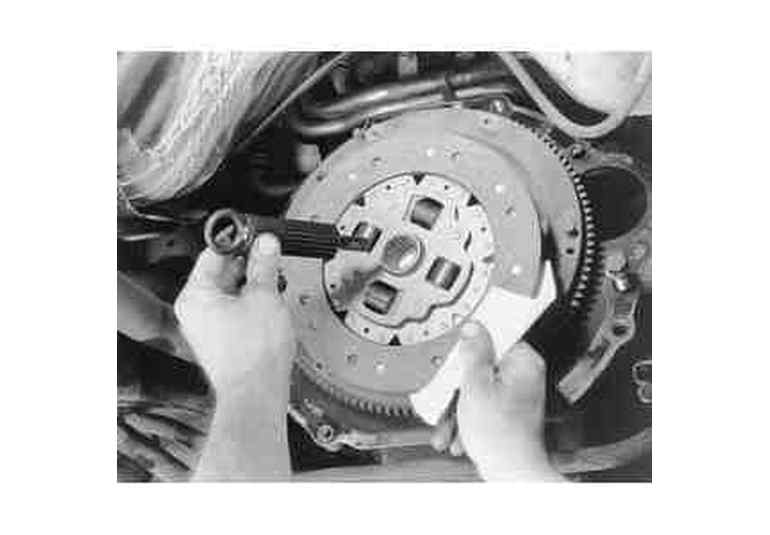
    Fig. 2: Removing the clutch and pressure plate bolts

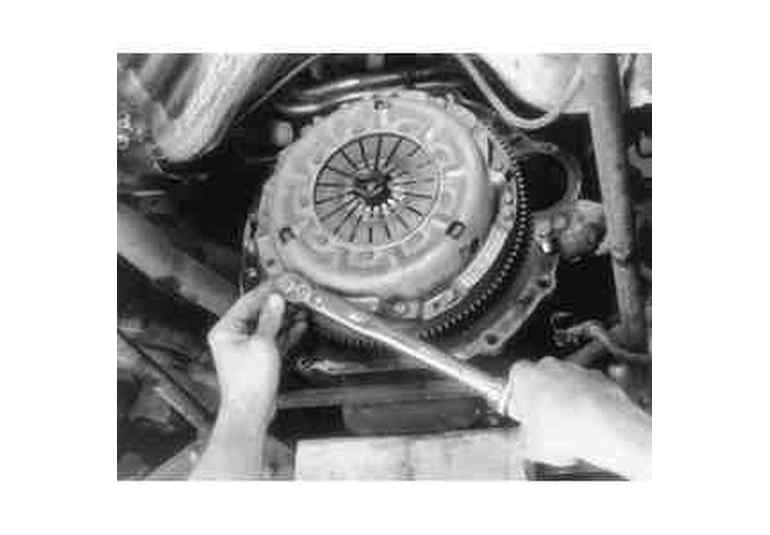
    Fig. 3: Removing the clutch and pressure plate

  3. Gradually unscrew the six bolts (6mm) which hold the pressure plate assembly on the flywheel. Loosen the bolts only one turn at a time, working around the pressure plate. Do not unscrew all the bolts on one side at one time.
  4. When all of the bolts have been removed, remove the clutch plate and disc.

    Fig. 4: Install a clutch alignment arbor, to align the clutch assembly during installation

    Fig. 5: Be sure to use a torque wrench to tighten all bolts

  5. Remove the two retaining springs and remove the throwout bearing and the release fork.

    NOTE: Do not disassemble either the clutch cover or disc. Inspect the parts for wear or damage and replace any parts as necessary. Replace the clutch disc if there is any oil or grease on the facing. Do not wash or attempt to lubricate the throwout bearing. If it requires replacement, the bearing may be removed and a new one installed in the holder by means of a press.

    To install:

  6. Fit the release fork boot on the front of the transaxle housing.
  7. Install the release fork.
  8. Insert the throwout bearing assembly and secure it with the two springs.
  9. Coat the inside diameter of the bearing holder and the fork-to-holder contact points with grease.
  10. Insert a pilot shaft through the clutch cover and disc, then insert the end of the pilot into the needle bearing.
  11. 1970–76 models should be tightened to 7–9 ft . lbs. (9–12 Nm), 1977–84 models to 12 ft. lbs. (16 Nm)
  12. Tighten the pressure plate bolts gradually, one turn at a time, until the proper torque is reached.

    WARNING
    When installing the clutch pressure plate assembly, make sure that the

    O marks on the flywheel and the clutch pressure plate assembly are at least 120°apart. These marks indicate the direction of residual unbalance. Also, make sure that the clutch disc is installed properly, noting the FRONT and REAR markings.

  13. After installation of the transaxle and engine in the car, perform the necessary adjustments.

Previous Next