Previous Next

REAR SUSPENSION

Torsion Bars

REMOVAL AND INSTALLATION

1970–72 Models
  1. Raise the rear of the vehicle and support it with jackstands.
  2. Remove the wheel.
  3. Using a hex key (8mm), loosen the center arm and spring to relax the torsion bars.
  4. Remove the nut and retaining plate from the crossmember mounting bracket.
  5. Back out the lockbolts at each end of the torsion bar to be removed, thread a bolt into the bar, and pull it out of the crossmember.

    WARNING
    Torsion bars are marked R or L, and must be installed on the correct side. Installation on the incorrect side will result in premature failure of the bars.

  6. To install reverse Steps 1 through 5, and adjust ride height.

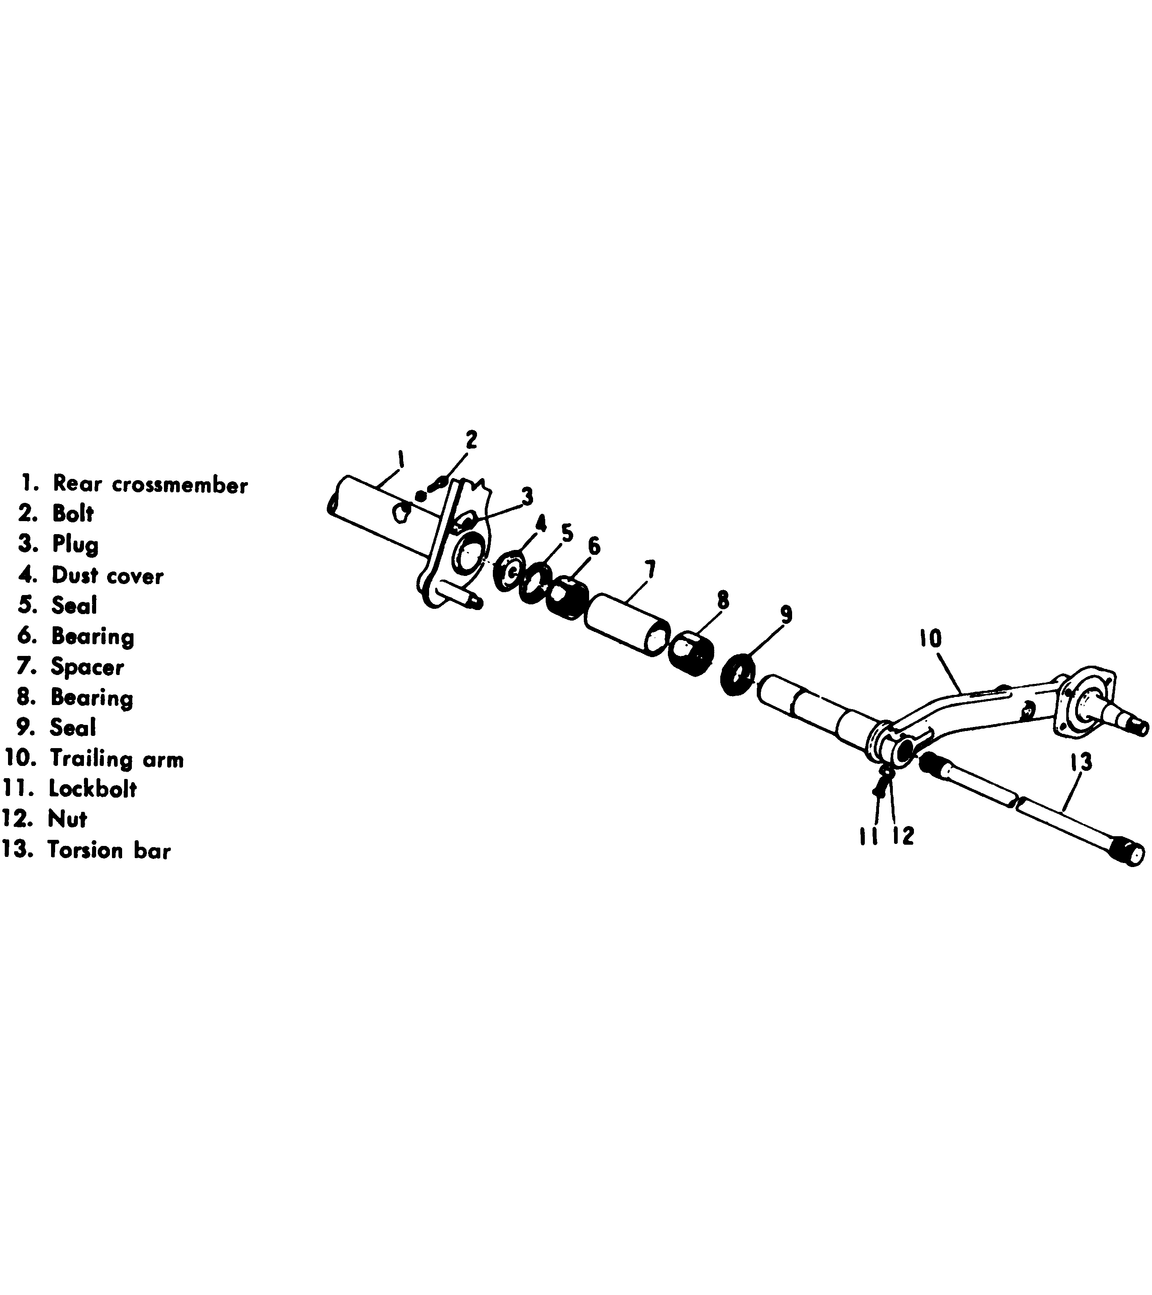
    Fig. 1: Exploded view of a typical trailing arm and torsion bar assembly — 1970–72 ff–1 sedans and wagons, 1300G wagons

1972–1979 Models
  1. Remove the shock absorber lower retaining nut, and separate the shock absorber from the trailing arm.
  2. Raise the vehicle, support it with jackstands, and remove the wheels.
  3. Index mark the splines on the outside and inside of the torsion bar, to indicate mounting position for installation.
  4. Remove the lockbolt from the outer torsion bar bushing.
  5. Position the trailing arm so as to remove all load from the torsion bar, and tap the torsion bar out.

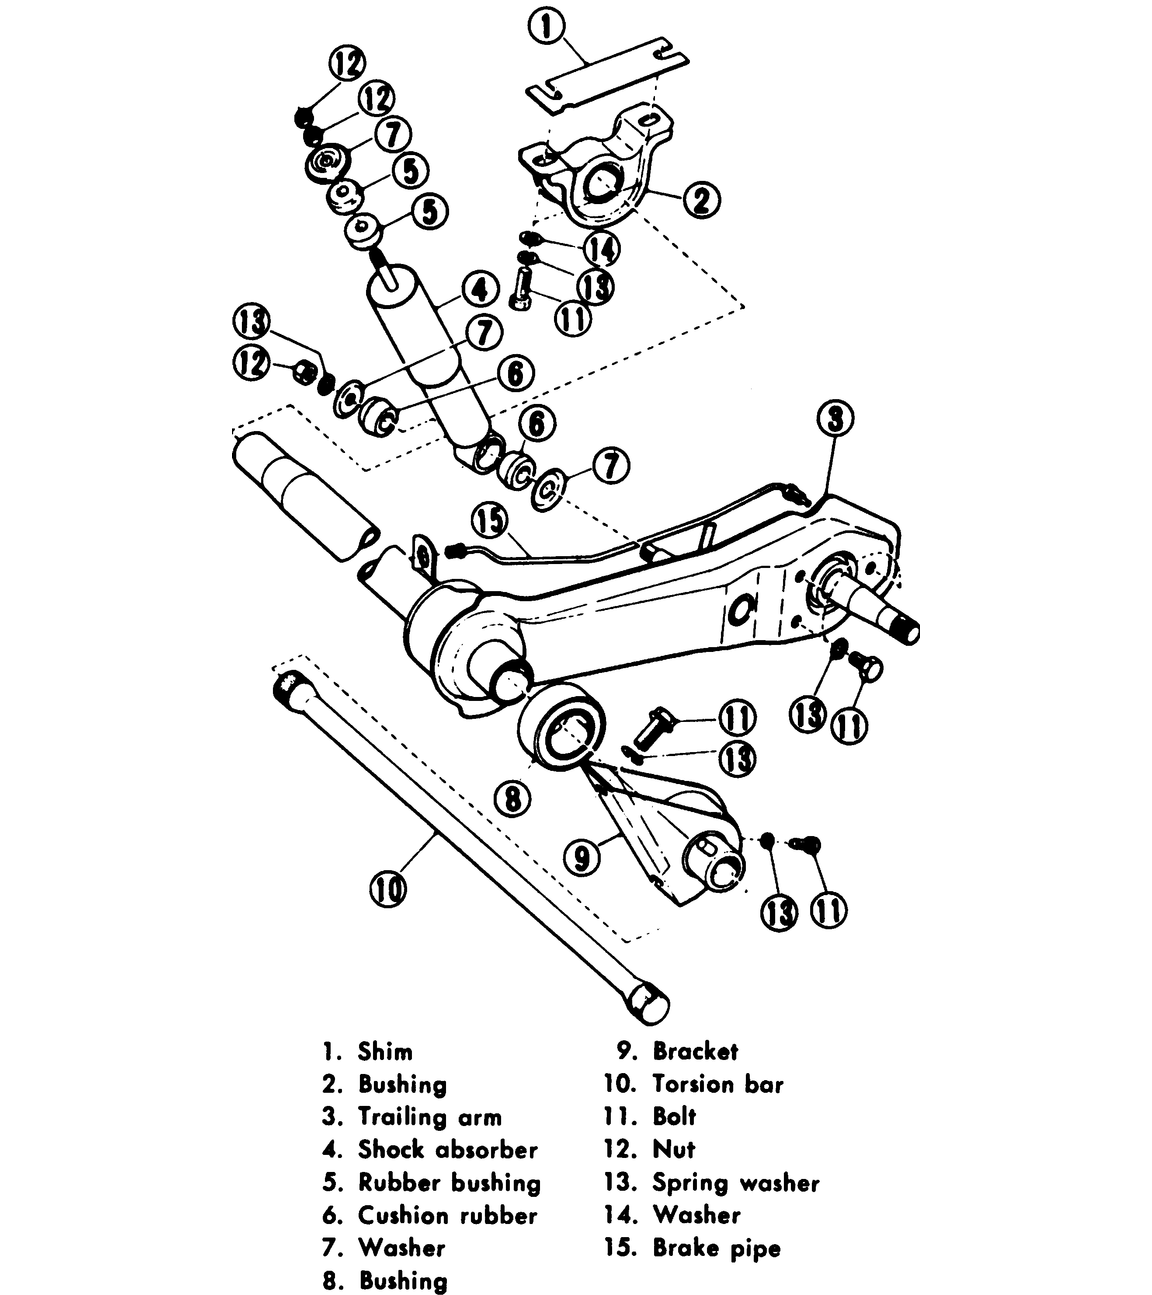
    Fig. 2: Exploded view of a typical rear suspension (except ff–1 and 1300G and 4WD)

    To install:

  6. When installing the torsion bars, reverse S teps 1 through 5.
  7. Each torsion bar is marked R or L, on the outer end, to indicate on which side it is installed.

    WARNING
    Installation on the incorrect side will result in premature failure of the bars.

  8. Index the splines according to the marks made during removal, install the wheel and check ride height.
  9. If necessary, adjust ride height as indicated below.
  10. Remount the shock absorber after the vehicle has been lowered.
1980–84 Models
  1. Raise the vehicle and support it with jackstands.
  2. Remove the rear wheel.
  3. Support the brake drum in a position eliminating load from the torsion bar.
  4. Remove the lockbolt for the outer bushing and the three outer arm to inner arm connecting bolts.
  5. Pull the outer arm and torsion bar out of the crossmember. The torsion bar may not be removed from the outer arm.

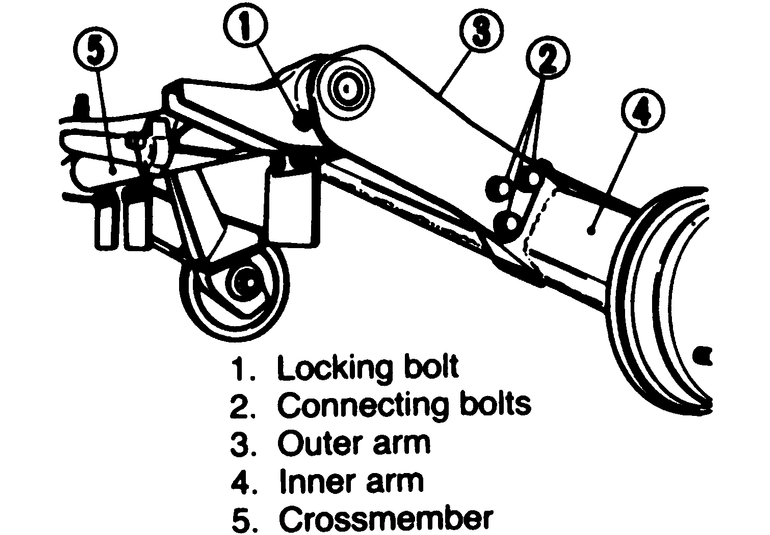
    Fig. 3: Rear torsion bar suspension components — 1980–84 models

    To install:

  6. Installation is the reverse of removal, keeping the following points in mind:
    1. The torsion bar's splines must be aligned with those in the outer arm and crossmember so that the outer arm lines up with the inner arm as it did during removal, or ride height will be affected.
    2. If you are removing both torsion bars, make sure the markings (R or L) correspond with the side of the car you're installing the bar on.
    3. Use the following torques:
      • Inner arm to outer arm: 87–101 ft. lbs. (117–136 Nm)
      • Outer bushing lockbolt: 23–29 ft. lbs. (31–39 Nm)

Previous Next