Previous Next

Brake Drums

REMOVAL & INSTALLATION

Except 4WD Models
  1. Block the front wheels. Raise the vehicle and support it with jackstands.
  2. Remove the wheel and tire.
  3. Remove the 3 cap retaining bolts, spring washers, cap, bearing retaining plate (if equipped), or the covering cap.

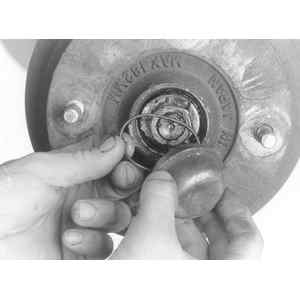
    Fig. 1: Remove the dust cap and seal

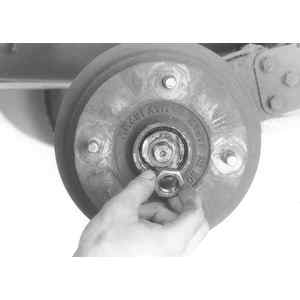
    Fig. 2: Remove the axle shaft nut

  4. Remove the cotter pin or straighten out the lockwasher, and loosen and unfasten the nut taking care not to damage the bearing seal.
  5. Remove the lockwasher and lockplate on 1980–84 models.
  6. Remove the brake drum with a puller.

    WARNING
    Do not depress the brake pedal with the brake drum removed.

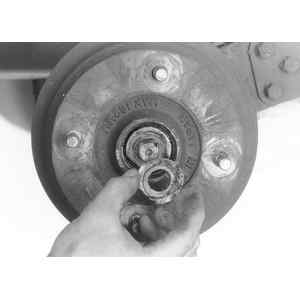
    Fig. 3: Remove the lockwasher and lockplate

    To install:

  7. Reverse the above process to install the drums.
  8. On 1970–73 models, tighten the axle shaft castle nut to 80–145 ft. lbs. (108–196 Nm).
  9. On all 1974–84 models and on ff–1 and 1300G station wagons, do not tighten the bearing adjusting nut. Instead perform the bearing preload adjustment as detailed in this section.
  10. Tighten the 3 bearing cap securing plate bolts to 20–50 inch lbs. (2–5 Nm) on models so equipped.
4WD Models
  1. Block the front wheels. Raise the rear of the vehicle and support it with jackstands.
  2. Remove the wheel and tire.
  3. On 1980–84 models, straighten and disengage the cotter pin, then remove the castellated nut, spring washer, spacer and pull off the brake drum. Note parts orientation. If necessary to use a puller, its center should bear on the center of the rear spindle only.

    Fig. 4: Brake drum and spindle assembly

  4. On 1970–79 models, using a chisel with a flat blade about 0.23 in. (6mm) across, straighten the staked portion of the axle nut.
  5. Apply oil on the threads and groove in the axle shaft. Have someone hold the brakes on while you repeatedly loosen and tighten the nut just 0.23 in. (6mm) or so. This is done to force metal chips created in straightening the staked portion of the nut into the groove.
  6. Then, loosen the nut. Remove the spring washer and spacer and then pull the drum off the spindle. If you need a puller, bear on the center of the spindle, only.

    Fig. 5: On 1980–84 4WD cars, install the cotter pin (1), castellated nut (2), spring washer (3), and spacer (4) as shown

    To install:

  7. Put the drum onto the spindle.
  8. Install the spacer, spring washer (in original position), and the plain or castellated nut onto the spindle.
  9. Note that on late model cars, the spring washer has a paint mark on one side which must face outward.
  10. On models 1970–79, install the nut and tighten it to 174 ft. lbs. (235 Nm), with someone holding the brakes on.
  11. Then, stake the flanged portion of the retaining nut down into the groove in the spindle until it touches the bottom of the groove, using a center punch.
  12. On 1980–84 models, tighten the castellated nut, with the brakes applied, to 145 ft. lbs. (196 Nm).
  13. Then tighten the castellated nut just enough further to align holes on nut and spindle.
  14. Install a new cotter pin and bend its ends until it's firmly secured.

Previous Next