NOTE: An inductive timing light is highly recommended, as it
is not susceptible to cross-firing or false triggering.
| Fig. 1: Loosen the distributor hold-down bolt and rotate
the distributor until the timing marks are aligned
|
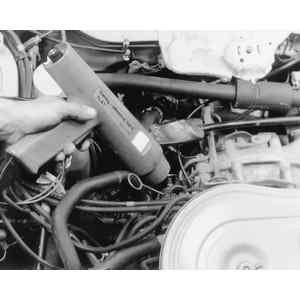
| Fig. 2: Rotate the distributor clockwise to advance the
timing, or counterclockwise to retard it
|
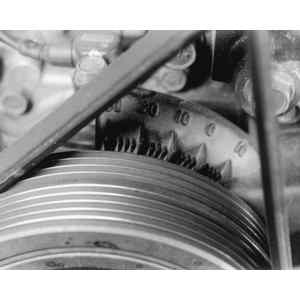
| Fig. 3: Timing light pointed at the bell housing timing
marks
|
- On carbureted models, disconnect and plug the distributor vacuum advance
line. This line is easily identified by the red mark on the line.
- On fuel injected models, ensure that the idle switch is ON.
Refer to Electronic Engine Controls in Section 4 for more details. Connect
the (green) test mode connector, located in the front part of the trunk on
XT and under the left side of the dash on all other models.
NOTE: When the test mode connector is connected, the Check
Engine light will illuminate. The ignition timing must not be adjusted and
cannot be check while the idle switch is OFF or the test mode connector
is disconnected.
- Start the engine and check and the idle speed. Adjust to specification as
needed.
- Aim the timing light at the timing marks. The timing mark should align with
the timing mark indicator.
- If adjustment is needed, loosen the distributor hold-down bolt, then rotate
the distributor to adjust the timing to specification.
NOTE: Do not fully remove the distributor hold-down bolt
when adjusting the timing.
- After adjustment, tighten the distributor hold-down bolt and recheck the
ignition timing.
- Recheck the idle speed and correct as necessary. Turn the engine OFF.
- Disconnect the test mode connector on fuel injected engines. Reconnect the
vacuum advance line on carbureted engines.
- Remove the timing light and tachometer.
| Fig. 4: Timing marks on lower portion of the engine block — 2.2L
and 2.5L engines
|
| Fig. 5: With the engine running, point the timing light
at the marks

|
- Clean the timing marks so they are easy to read. If necessary, use white
paint to identify the marks.
- Connect a timing light and a tachometer to the engine following the manufacturer's
instruction.
- Start the engine and allow it to reach normal operating temperature.
- Check and adjust the idle speed to specification.
- Aim the timing light at the timing marks. The correct timing mark should
align with the timing mark indicator.
NOTE: To increase stability on automatic transaxle models,
engine idling is controlled by the ECU. Therefore, ignition timing can vary
up to 8°from specification.
- If the ignition timing is not within specification, a component in the ignition
control system may be faulty. Perform a fault diagnosis of the ignition control
system.
- When complete, remove the timing light and tachometer.
- Start the engine and allow it to reach normal operating temperature.
- Connect a Subaru Select Monitor and measure the ignition timing (function
mode 07).
- If the ignition timing is not correct, a component in the ignition control
system may be faulty. Perform a fault diagnosis of the ignition control system.
- When complete, disconnect the monitor and turn the engine OFF.


