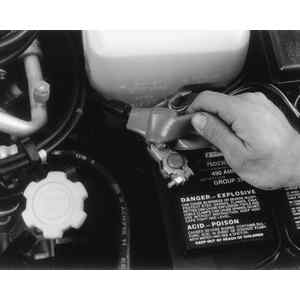
| Fig. 1: Before beginning any engine removal procedure,
disconnect the negative battery cable
|
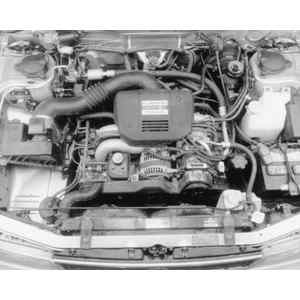
| Fig. 2: It may look like an impossible job, but with
organization and patience, this engine can be removed
|
CAUTION
The EPA warns that prolonged contact with used engine oil may cause a number
of skin disorders, including cancer! You should make every effort to minimize
your exposure to used engine oil. Protective gloves should be worn when changing
the oil. Wash your hands and any other exposed skin areas as soon as possible
after exposure to used engine oil. Soap and water, or waterless hand cleaner
should be used.
CAUTION
Never open, service or drain the radiator or cooling system when hot; serious
burns can occur from the steam and hot coolant. Also, when draining engine coolant,
keep in mind that cats and dogs are attracted to ethylene glycol antifreeze
and could drink any that is left in an uncovered container or in puddles on
the ground. This will prove fatal in sufficient quantities. Always drain coolant
into a sealable container. Coolant should be reused unless it is contaminated
or is several years old.
- Disconnect the negative battery cable.
- Raise and safely support the vehicle on jackstands.
- Scribe alignment marks around the hood hinges, then remove the retainer
boots and hood.
- Drain the cooling system into a suitable container.
- Remove the front bumper and the grille. Refer to Section 10 for removal
and installation steps.
- Tag and disconnect the electrical harnesses and hoses from the radiator,
Remove the radiator. Refer to the procedure in this section.
- Disconnect the hood release cable and remove the radiator upper support
member.
- Tag and disconnect the hoses and cables to the air cleaner, fuel distribution
system, heater unit, brake booster, clutch, if equipped with a manual transaxle,
accelerator and speedometer cables and wiring to the distributor.
- Disconnect the pitching stopper from the bracket.
- Remove the engine splash covers and the exhaust pipes to the manifold.
- Disconnect the gearshift rod and stay from the transaxle.
- Remove the transverse link. Using a suitable prytool, remove the halfshafts
from the transaxle.
- Remove the engine/transaxle mounting brackets. Refer to the procedures in
this section.
- Using a suitable engine hoist and a cable, attach the cable to the lifting
points on the engine and lift slightly.
- Remove the center member and crossmember from the vehicle.
- Lift the engine/transaxle assembly carefully and remove from the vehicle.
- If necessary, separate the engine from the transaxle, If you intend to work
on the engine, secure it to a suitable workstand.
- Installation is the reverse of removal. Secure all components to specifications.
Refer to the following for reference:
- Attach the engine to the transaxle. Attach the engine assembly to the
hoist and cable at the appropriate lifting points.
- Slowly lower the engine/transaxle assembly into the vehicle.
- With the engine/transaxle assembly slightly raised, install the center
member and crossmember to the vehicle. Tighten the bolts to 27–49
ft. lbs. (37–67 Nm).
- Completely lower the engine/transaxle into place and install the mounting
brackets. Tighten the bolts to 13–23 ft. lbs. (18–31 Nm).
- Start the vehicle. Adjust the timing, if needed and check for leaks.
NOTE: On all models, the engine is removed separately from
the transaxle.
- Open the hood and scribe alignment marks around the hood hinge. Remove the
hinge retainer bolts and hood. Place the hood aside.
- Disconnect the negative battery terminal from the battery.
- Remove the ground cable-to-intake manifold bolt and disconnect the cable.
It is unnecessary to remove the cable fully: leave it routed along the side
of the body.
- Remove the spare tire from the engine compartment.
- Remove the emission control hoses from the air cleaner. Remove the air cleaner
brackets and the wingnut, then lift the air cleaner assembly off the carburetor.
- Position a drain pan under the fuel line union. At the union, remove the
hose clamp, then pull the hose(s) off. Cap the open hose ends to prevent fuel
spillage.
- Position a drain pan under the engine, remove the drain plug and drain the
oil from the crankcase.
- Drain and recycle the engine coolant.
- If equipped with an automatic transaxle, disconnect the oil cooler lines
from the radiator.
- Disconnect the and label all wiring in conjunction with engine removal.
- If equipped with an automatic transaxle, disconnect the neutral safety switch
harness and downshift solenoid harness.
- Remove the radiator-to-chassis bolts, then remove the ground lead from the
upper side of the radiator and remove the radiator.
NOTE: On 4WD models, remove the engine fan.
- Remove the crankshaft damper.
- Remove the starter-to-engine bolts and wires followed by the starter.
- Loosen the screw on the carburetor throttle lever. Remove the outer end
of the accelerator cable.
- Tag and remove the vacuum hose and the purge hose from the vapor canister.
- If equipped with a manual transaxle, remove the clutch return spring and
clutch cable from the lever.
- If equipped with an automatic transaxle, disconnect the vacuum hose from
the transaxle.
- Disconnect the vacuum hose from the brake booster unit (if equipped).
- On 4WD models, remove the skid plate-to-chassis bolts and the plate.
- Remove the Y-shaped exhaust pipe.
- If equipped with an automatic transaxle, remove the torque converter bolts.
NOTE: Be careful that the bolts DO NOT fall into the torque
converter housing.
- Connect a chain hoist or equivalent to the engine, with hooks at the front
and rear engine hangers. Adjust the hoist so that the weight of the engine
is supported, but DO NOT raise the engine.
- Position a floor jack under the transaxle to support the transaxle weight
when the engine is removed.
- Remove the engine-to-transaxle nuts.
- Remove the front engine mount-to-crossmember nuts.
- Using the hoist to raise the engine slightly, about 1 inch (25mm). Keeping
it level, move the engine forward, off the transaxle input shaft.
CAUTION
DO NOT raise the engine more than 1 inch (25mm) prior to removing it from
the input shaft or damage may occur to the driveshaft double offset joints.
If equipped with a manual transaxle, be sure that the input shaft does not
interfere with the clutch spring assembly; if equipped with an automatic
transaxle, leave the torque converter on the transaxle input shaft.
- Hoist the engine carefully until it is completely out of the vehicle, then
secure it onto a workstand.
- Installation is the reverse of removal. Secure all components accordingly.
- Use new gaskets and observe the following torque specifications. Tighten
the transaxle-to-engine bolts to 34–40 ft. lbs. (46–54 Nm), the
torque converter-to-drive plate bolts to 17–20 ft. lbs. (23–27
Nm), the engine mount-to-crossmember bolts to 14–24 ft. lbs. (19–33
Nm), the crankshaft damper nut to 7–10 ft. lbs. (9–14 Nm), the
exhaust pipe-to-engine bolt to 19–22 ft. lbs. (26–30 Nm), the
exhaust pipe-to-pre-muffler nuts to 31–38 ft. lbs. (42–51 Nm)
and the radiator-to-chassis bolts to 6–10 ft. lbs. (8–14 Nm).
Adjust the clutch and accelerator linkage. Refill the crankcase and cooling
system.
NOTE: Use care not to damage the input shaft splines or
the clutch spring when lowering the engine in place.
- When installing the crankshaft damper, perform the following adjustments:
- Tighten the body bracket nut.
- Turn the front nut until there is no clearance between the front washer
and rubber cushion.
- Insert the bushing and tighten the front nut.
- Refill the crankcase with oil, the radiator with coolant and check the transmission
fluid. Start the engine and check for leaks.
- Open the hood and scribe alignment marks around the hood hinge. Remove the
hinge retainer bolts and hood. Place the hood aside.
- Remove the spare tire and tire bracket.
- If equipped with Turbo or MPFI, disconnect the fuel pump electrical harness
connector.
- Crank the engine for at least 5 seconds. If the engine starts, allow
it to run until it stalls.
- Reconnect the fuel pump connector.
- Disconnect the negative battery cable.
- Remove the air cleaner assembly.
- Tag and disconnect the fuel system hoses and the evaporative emissions system
hoses.
- Tag and disconnect the vacuum hoses for the cruise control, Master-Vac® ,
air intake shutter and the heater air intake door.
- Disconnect the electrical wiring from the alternator, EGR, thermoswitch,
cooling fan (if electric), A/C condenser and the ignition coil. Unfasten the
main engine harness.
- Tag and disconnect the spark plug wires, the engine ground strap and the
fusible link assembly.
- Disconnect the accelerator linkage. Remove the windshield washer reservoir
and position it behind the right strut tower.
- Remove the power steering pump.
- Loosen the air intake duct hose clamps and remove the duct. Seal the openings
to keep dirt out of the intake passages.
- Remove the air intake-to-flow meter line and cover the openings.
- Remove the horizontal damper and clip.
- Remove the center exhaust.
- If equipped, disconnect the turbocharger oil supply and drain lines. Remove
the turbo-to-exhaust bolts, the turbo assembly, the lower cover and the gasket.
- Unfasten the electrical connector from the O2sensor. Remove the torque converter/flywheel-to-drive
plate bolts.
- Using a hoist and suitable engine lift, connect the hoist to the crankshaft
damper bracket and lifting eye. Support the engine, but do not lift. Remove
the upper engine-to-transaxle bolts; leave the starter in place.
- Drain the engine coolant into a suitable container. Disconnect the upper/lower
radiator hoses, oil cooler lines at the radiator, if equipped, ground wire
and radiator.
- Disconnect the oil cooler lines from the engine. Drain the crankcase oil
into a suitable container. Disconnect the heater hoses from the side of the
engine.
- Remove the front engine mount, then the lower engine-to-transaxle nuts.
- Position a floor jack under the transaxle, then raise the engine/transaxle
slightly. Pull the engine forward until the transaxle shaft clears the torque
converter/clutch, then carefully raise the engine out of the engine compartment.
- Installation is the reverse of removal. Tighten all components to specifications.
- Carefully install the engine into the engine compartment. Push the engine
rearward and engage it with the transaxle. Mark sure the clutch clears the
transaxle shaft.
- Install the front engine mount.
- Install the upper engine-to-transaxle bolts and remove the engine lifting
fixture. Tighten the bolts to 34–40 ft. lbs. (44–52 Nm).
- Install the torque converter-to-driveplate bolts. Tighten the bolts one
at a time to 17–20 ft. lbs. (22–26 Nm).
- Install and the crankshaft damper by tightening the nuts on the body side
of the damper until the clearance is 0.08 inch (2mm). Tighten the locknuts
to 6–9 ft. lbs. (8–12 Nm).
- Adjust the accelerator pedal so there is 0.4–1.2 inch (10–30mm)
between the pin and stop. Adjust the cable for an end-play of 0–0.08
inch (0–2mm) on the actuator side.
- Refill the crankcase with oil, the radiator with coolant and check the transmission
fluid. Start the engine and check for leaks.
CAUTION
Fuel injection systems remain under pressure after the engine has been turned
OFF. Properly relieve fuel pressure before disconnecting any fuel lines. Failure
to do so may result in fire or personal injury.
- Properly relieve the fuel system pressure.
- Disconnect the battery cables, negative first then positive. Remove the
battery from the vehicle.
- Drain the engine oil and coolant into suitable containers.
- Disconnect the radiator hoses and fan motor harness, then remove the radiator.
- If equipped with A/C, discharge the system using an approved recovery/recycling
machine. Disconnect and cap the lines from the compressor.
- Remove the air intake duct.
- Remove the air cleaner element and upper cover.
- Remove the evaporator canister and bracket.
- Unfasten all electrical wiring that may hinder engine removal.
- Label and disconnect the brake booster and heater inlet and outlet hoses.
- Remove the alternator drive belt.
- Disconnect the wires from the spark plugs on the left side of the engine.
- Remove the power steering pump line bracket then, extract the power steering
pump leaving the lines connected and position it aside.
- Raise and support the engine safely. Remove the exhaust Y-pipe then loosen
the lower starter nuts.
- Remove the lower engine-to-transaxle nuts and the front engine mount-to-crossmember
nuts.
- Lower the vehicle and remove the starter.
- If equipped with an automatic transaxle, remove the torque converter service
hole plug. Rotate the engine remove the torque converter-to-drive plate bolts
as they become accessible.
- Remove the pitching stopper.
- Disconnect the fuel delivery, return and evaporation hoses.
- Support the engine with a suitable lifting device attached to the engine
lifting eyes.
- Slightly raise the engine.
- Raise the transaxle with a floor jack.
- Slowly remove the engine from the vehicle.
- Installation is the reverse of removal. Tighten all components to specifications
and pay close attention to the following:
- Position the engine in the engine compartment and align it with the transaxle.
- Install the engine and tighten the upper bolts to 34–40 ft. lbs.
(44–54 Nm).
- Remove the lifting device and floor jack.
- Install the pitching stopper and tighten the bolts to — Body
side — 49 ft. lbs. (67 Nm) — Bracket side — 40
ft. lbs. (54 Nm)
- Tighen the lower engine-to-transaxle nuts to 34–40 ft. lbs. (44–52
Nm).
- Tighten the lower engine mounting nuts to 61 ft. lbs. (83 Nm) in the inner
most elliptical hole in the front crossmember so the clearance is 0.16–0.24
inch (4–6mm).
- Fill the engine with the recommended oil.
- Fill and bleed the cooling system.
- Charge the A/C system using an approved recovery/recycling machine.
- Adjust the clutch cable.
- If equipped, check the automatic transaxle fluid level and add Dexron
II® if necessary.
- Start the engine and allow it to reach normal operating temperature. Check
for leaks.
- Properly relieve the fuel system pressure.
- Disconnect the negative battery cable.
- Matchmark and remove the hood.
- Raise and support the vehicle safely on jackstands.
- Discharge the air conditioning system, if equipped using an approved recovery/recycling
machine. Drain the engine oil and cooling system into suitable containers.
- Tag and disconnect the canister hose and the hose bracket.
- Disconnect and plug the fuel lines.
- Disconnect the power brake vacuum line booster. If equipped with manual
transaxle and 4WD, disconnect the differential lock vacuum hose.
- Disconnect the engine wiring harnesses, oxygen sensor plug, bypass air valve
control harness, ignition coil and the distributor connector to the crank
sensor.
- Unfasten the alternator wires, A/C compressor, engine ground, radiator fan
motor and thermo-switch electrical connector.
- Disconnect the accelerator and cruise control cables. Disconnect and plug
the heater hoses.
- Disconnect the hill holder cable on the clutch release fork side of the
assembly, if equipped with a manual transaxle.
- Separate the front exhaust pipe from the manifold.
- Lower the vehicle. Disconnect and plug the air conditioning compressor hoses,
if equipped.
- Remove the radiator fan and shroud assembly. If equipped with an automatic
transaxle, disconnect and plug the cooler lines. Remove the radiator from
the vehicle.
- Remove the timing hole plug. Remove the bolts that retain the torque converter
to the driveplate, if equipped with an automatic transaxle.
- Unbolt and lower the starter.
- Remove the buffer rod mounting bolts. Unbolt the engine mount attached to
the front crossmember. Unbolt the lower side of the engine to the transaxle
assembly.
- Install the proper engine lifting equipment using the engine lifting eyes.
Properly support the transaxle assembly with a suitable transmission jack.
- Remove the upper transaxle retainer bolts.
- Carefully remove the engine from the vehicle. If equipped with manual transaxle,
move the engine toward the rear of the vehicle until the mainshaft is withdrawn
from the clutch cover.
- Installation is the reverse of removal. Secure all components accordingly.
- If equipped with a manual transaxle, be careful to align the mainshaft.
Install the retainer bolts and tighten to 34–40 ft. lbs. (44–52
Nm).
- On automatic transaxle equipped models, connect the torque converter to
the engine flywheel. Tighten the bolts to 17–20 ft. lbs. 22–26
Nm).
- Tighten the front rubber cushion mounts to 28–50 ft. lbs. (36–65
Nm).
- Install the hill holder, if equipped. Attach all vacuum lines and hoses
disconnected earlier. Reconnect all electrical harnesses taking care to clean
all connectors and ground locations.
- Install the fuel lines. Fill the crankcase with oil, the transaxle with
fluid and the cooling system with coolant. Start the engine and allow it to
reach operating temperature. Check for leaks and test drive the vehicle.
CAUTION
Fuel injection systems remain under pressure after the engine has been turned
OFF. Properly relieve fuel pressure before disconnecting any fuel lines. Failure
to do so may result in fire or personal injury.
- Raise and support the vehicle safely on jackstands.
- Scribe alignment marks on the hood hinges, then remove the hinge retainer
bolts and hood.
- Release the fuel system pressure.
- Disconnect the negative battery cable.
- Remove the underbody cover and drain the engine coolant.
- Remove the radiator and all coolant hoses.
- If equipped with A/C, discharge the air conditioning system using an approved
recovery/recycling machine. Disconnect and plug the air conditioning lines.
- Remove the air cleaner assembly.
- Disconnect the accelerator cable.
- Disconnect the cruise control cable.
- Label and disconnect all wiring harnesses and cables.
- Tag and remove the evaporation canister, vacuum hoses and bracket.
- Disconnect the exhaust system from the exhaust manifold.
- Place a drain pan beneath the power steering lines and disconnect.
- Disconnect the automatic transaxle cooler lines from the radiator, if equipped.
- Remove the nuts which secure the lower side of the engine to the transaxle.
- Remove the starter.
- Remove the nuts which attach the front cushion rubber to the subframe.
- If equipped with an automatic transaxle, separate the torque converter from
the drive plate by removing the converter retainer bolts.
- Remove the pitching stopper and bracket.
- Disconnect the fuel delivery hose, return hose and evaporation hoses.
- Support the engine with a suitable lifting device and the transaxle with
a suitable transmission jack.
- Remove the bolts which secure the engine to the transaxle.
- Slowly raise the engine and remove from the vehicle.
- Installation is the reverse of removal. Secure all components accordingly.
- Install the engine to the transaxle and tighten the bolts which secure the
right upper side of the engine to 37 ft. lbs. (50 Nm).
- Remove the lifting device and transmission jack.
- Install the pitching stopper and tighten to 37 ft. lbs. (50 Nm).
- If equipped with an automatic transaxle, install the torque converter to
drive plate bolts and tighten to 19 ft. lbs. (25 Nm).
- Connect all hoses disconnected earlier.
- Install the nuts which hold the lower side of the engine to the transaxle,
then tighten the bolts to 37 ft. lbs. (50 Nm).
- Install the nuts which hold the front cushion rubber to the subframe and
tighten to 50 ft. lbs. (84 Nm).
- Check the all fluid levels and add as required.
- Charge the A/C system using an approved recovery/recycling machine.
- Start the engine and allow it to reach normal operating temperature. Check
for leaks.

