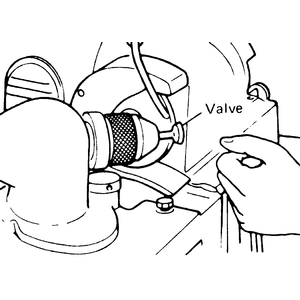
| Fig. 1: Using a valve grinder to reface a valve
|
Using a valve grinder, resurface the valves according to specifications. The valve head thickness should be greater than the minimum specification after refacing. The valve stem top should also be squared and resurfaced, by placing the stem in the V-block of the grinder, and turning it while pressing lightly against the grinding wheel.
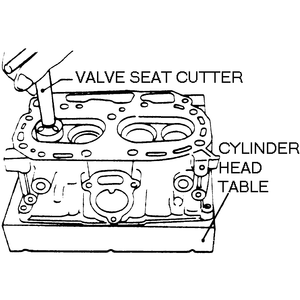
| Fig. 2: Reaming a valve seat
|
Select a reamer of the correct seat angle, slightly larger than the diameter of the valve seat, and assemble it with a pilot of the correct size. Install the pilot into the valve guide, and using steady pressure, turn the reamer clockwise.
WARNING
Do not turn the reamer counterclockwise.
Remove only as much material as necessary to clean the seat. Check the concentricity of the seat. Coat the valve face with Prussian blue dye, install and rotate it on the valve seat. Using the dye marked area as a centering guide, center and narrow the valve seat to specifications with correction cutters.
After making correction cuts, recheck the position of the valve seat on the valve face using Prussian blue dye.
Select a pilot of the correct size, and a coarse stone of the correct seat angle. Lubricate the pilot if necessary, and install the tool in the valve guide. Move the stone on and off the seat at approximately two cycles per second, until all flaws are removed from the seat. Install a fine stone, and finish the seat. Center and narrow the seat using correction stones, as described above.
Due to the pressure differential that exists at the ends of the intake valve guides (atmospheric pressure above, manifold vacuum below), oil is drawn through the valve guides into the intake port. This has been alleviated somewhat since the addition of positive crankcase ventilation, which lowers the pressure above the guides. To reduce blow-by, Subaru employs valve stem seals which must be pressed (or tapped) into position over the valve stem and guide boss. Recently, Teflon® guide seals have become popular. Consult a parts supplier or machinist concerning availability and suggested usages.
NOTE: When installing seals, ensure that a small amount of oil is able to pass by the seal to lubricate the valve guides. Otherwise, excessive wear may result.
Factory seals should be inspected and replaced if the seal lip is damaged or the spring is out of place. Also, whenever the seating surfaces of valve and seat are reconditioned or the guide is replaced, the seal should be replaced.