NOTE: The EGR system on the Legacy, Impreza and SVX is diagnosed
and tested via the on-board diagnostics.
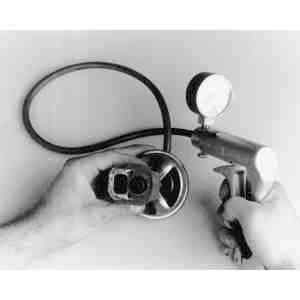
| Fig. 1: Checking the EGR valve with a vacuum pump. This
can be done with the valve on or off the engine
|
- Start the engine and allow it to reach normal operating temperature.
- Looking through the opening in the EGR valve body, check if the valve shaft
moves when the engine is revved to 3000–3500 rpm under a no load condition.
If the shaft moves, proceed to Step 4.
NOTE: During the test in Step 2, the EGR solenoid valve
should be removed from SPFI engines.
- If the shaft does not move, check the EGR valve with a hand vacuum pump.
Apply 8 in. Hg (27 kPa) of vacuum and see if the shaft moves. If not, remove
the valve and clean or replace as needed. If the valve functions properly,
check for leaks in the EGR vacuum lines.
- With the engine idling, connect a hand vacuum pump to the EGR valve. Apply
8 in. Hg (27 kPa) of vacuum to the valve. The engine should stall or idle
roughly. If not, clean the obstruction from the exhaust gas passages in the
cylinder head.
| Fig. 2: Using a plastic hammer to clean an EGR valve
|
NOTE: Do not wash the EGR valve in solvent, as permanent damage
could result.
- Hold the valve assembly in hand and lightly tap with a plastic hammer to
remove the exhaust deposits from the valve seat.
- With a wire brush, remove the deposits from the mounting surfaces of the
valve.
- Depress the valve and look at the seat area. If valve and seat are not clean,
repeat the cleaning procedure.
- Look for deposits in the valve outlet and remove with an appropriate tool.
- Blow any remaining deposits from the valve with compressed air.
- Check the EGR valve for proper operation using a hand vacuum pump.
- Inspect the EGR gas inlet to intake manifold for carbon or oil deposits.
Remove any deposits present with a hooked awl, taking care to minimize the
amount of material falling into the intake manifold.
- Remove all deposits using a vacuum.
- Remove the EGR pipe and lightly tap with a plastic hammer to loosen deposits.
Blow clean using compressed air.
NOTE: This valve is used only on non-computer controlled engines.
- Drain the cooling system and remove the thermo-vacuum valve.
- With the valve at 86°F (30°C) or less, air should pass through
the first and second port when the third port is plugged. Air should pass
through the second and third port when the first port is plugged.
- Heat the valve to 104°F (40°C) and repeat the tests in Step 2.
Air should not pass any of the ports.
- If the valve does not function properly, remove and replace it.
- Disconnect the electrical harness.
- Check the resistance between the positive and negative terminals of the
valve. Resistance should be 33–40 ohms.
- Check the resistance between the positive or negative terminals and the
body. Resistance should be 1M ohm or more.
- Check the vacuum passage for opening and closing operation while applying
electric current on both the positive and negative terminals. With no electricity
applied, the passage between the EGR and intake manifold ports should be open.
When the electricity is applied, the passage between the EGR and intake manifold
ports should be closed.
- If the valve does not function properly, it should be replaced.

