Previous Next

OVERHAUL

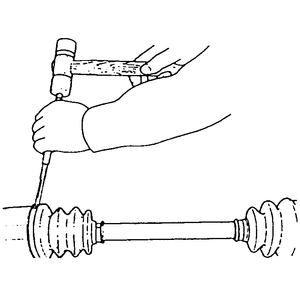
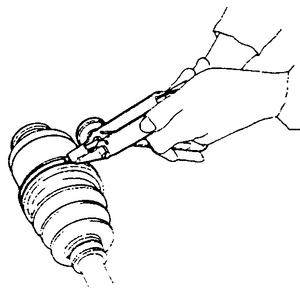
Fig. 1: Removing the bands from the joint

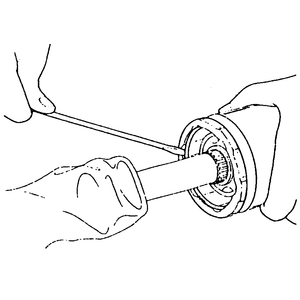
Fig. 2: Remove the large circlip from the outer race

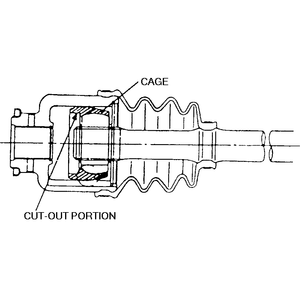
Fig. 3: Orientation of the CV-joint when assembled

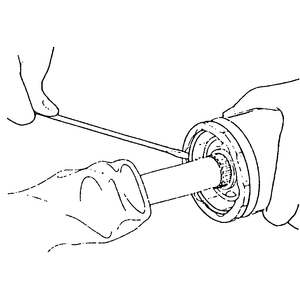
Fig. 4: Remove the snapring to separate the joint

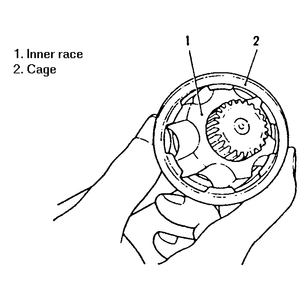
Fig. 5: Inner race and cage — align the cage with the protruding part of the inner race

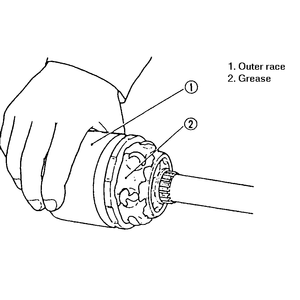
Fig. 6: Install the inner race and ball assembly into the outer race

Fig. 7: Make sure the circlip is securely in the outer race, and not in the ball groove

Fig. 8: Install the CV-boot and band — make sure to pull the band snug

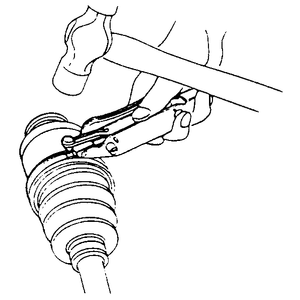
Fig. 9: Use a hammer to tap the band end down until it is snug — use care not to rip the boot

  1. Remove the bands from the boots at both the constant velocity and double offset joints, and slide the boots away from the joints.
  2. Pry the circlip out of the double offset joint, and slide the outer race of the joint off the shaft.
  3. Remove the balls from the cage, rotate the cage slightly, and slide the cage inward on the axle shaft.
  4. Using snapring pliers, remove the outer snapring which retains the inner race to the shaft.
  5. Slide the inner race, cage, and boot off the axle shaft.

    WARNING
    Exercise care to avoid damaging the boot on the inner snapring.

  6. Pull back the constant velocity joint boot and pivot the stub axle around the joint far enough to expose a ball.
  7. Remove the exposed ball, and continue this procedure until all balls are removed, at which time the outer race (stub axle) may be removed from the axle shaft.
  8. Remove the retaining snapring, and slide the inner race off the shaft.
  9. Inspect the parts of both joints for wear, damage, or corrosion, and replace if necessary. Examine the axle shaft for bending or distortion, and replace if evident. Should the boots be dried out, cracked, or distorted, they must be replaced.
  10. Install the constant velocity joint inner race on the axle shaft, and retain with a snapring.
  11. Assemble the joint in the opposite order of disassembly.
  12. Slide the double offset joint cage onto the shaft, with the counterbore toward the end of the shaft.
  13. Install the inner race on the shaft, and install the retaining snapring.
  14. Position the cage over the inner race, and fill the cage pockets with grease.
  15. Insert the balls into the cage.
  16. Fill the well in the outer race with approximately 1 oz. grease, and slide the outer race onto the axle shaft.
  17. Align the outer race track and ball positions and place it into the part where the shaft, inner cage and balls were previously installed, then install it into the outer race.
  18. Install the retaining circlip in the grove on the outer race.

    NOTE: Assure that the balls, cage and inner race are completely fitted in the outer race of the joint. Exercise care not to place the matched position of the circlip in the ball groove of the outer race. Finally, pull lightly on the shaft and assure that the circlip is completely fitted in the groove.

  19. Add 1 oz. more grease to the interior of the joint. Fill the boot with approximately 1 oz. grease, and slide it into position over the double offset joint.
  20. Fill the constant velocity joint boot with 3 oz. grease, and install the boot over the joint.
  21. Band the boots on both joints tightly enough that they cannot be turned by hand.

    WARNING
    Use only grease specified for use in constant velocity joints.

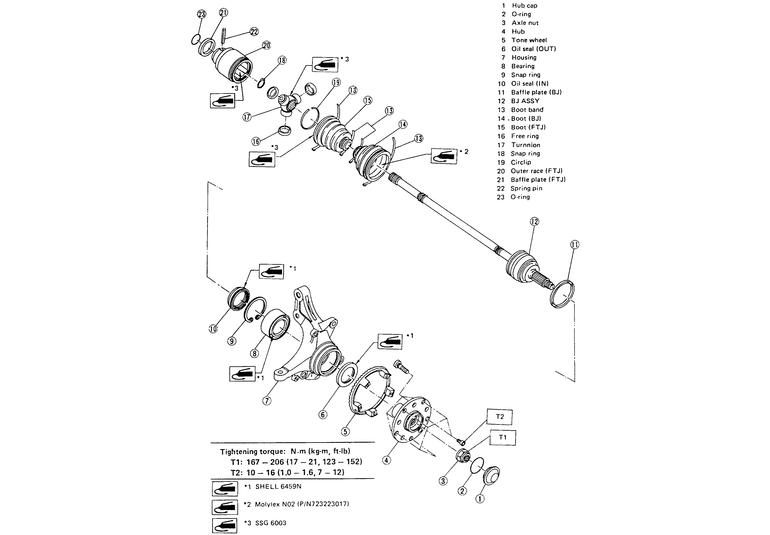
    Fig. 10: Exploded view of the front halfshaft assembly with free-tripod joint — SVX shown

Previous Next