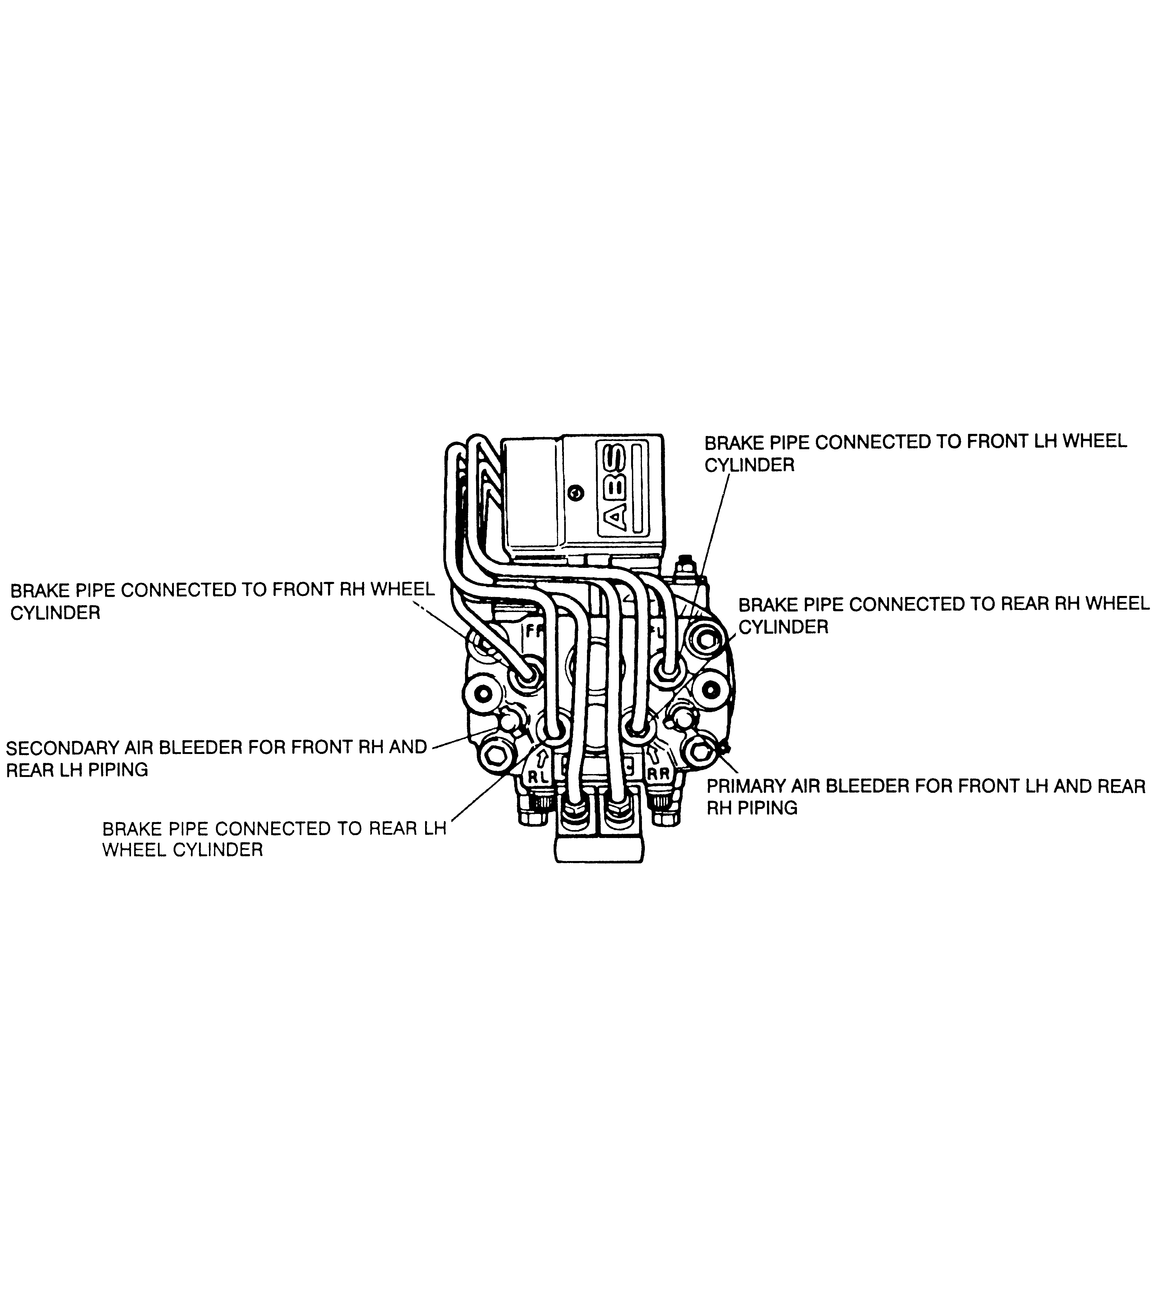
| Fig. 3: ABS hydraulic unit bleeding points — Nippon
model
|
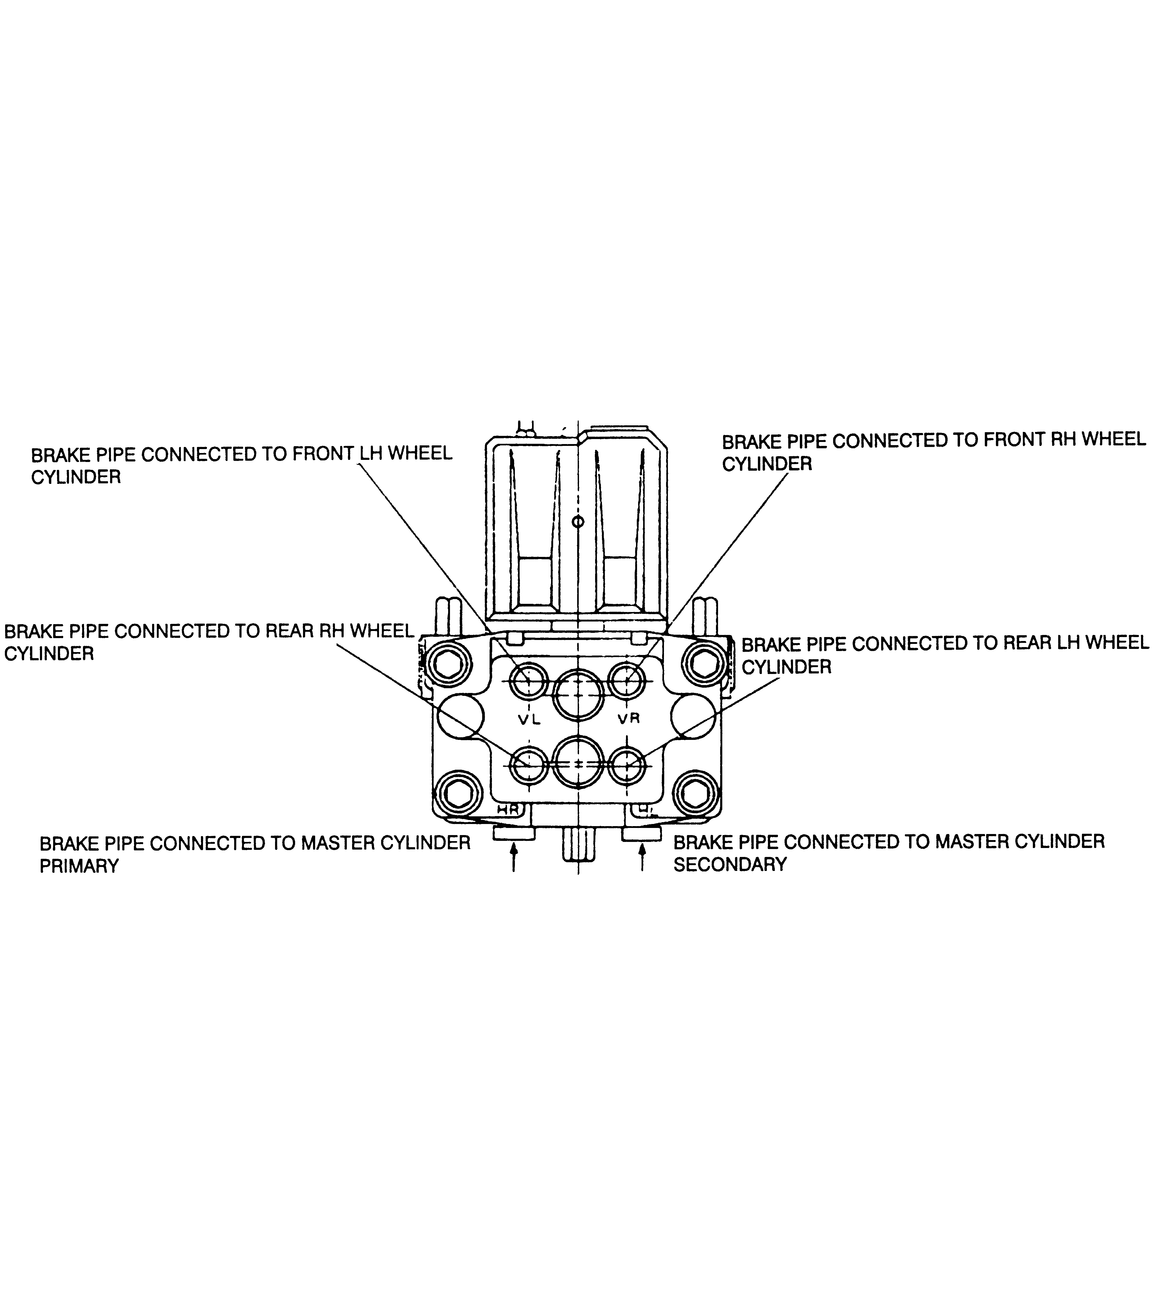
| Fig. 4: ABS hydraulic unit bleeding points — Bosch
model

|
Bleeding the brake lines and components in the ABS system is performed using
the common 2-person, manual bleeding method. A vinyl hose should be attached
to each bleeder port, with the other end placed into a clear container partially
filled with brake fluid.
If only one brake line, caliper or wheel cylinder has been loosened or replaced,
then only that individual wheel needs bleeding. If any system component, such
as master cylinder, proportioning valve or ABS hydraulic unit has been replaced,
the entire system requires bleeding.
When bleeding the entire system, always begin with the wheels in the secondary
brake circuit, then proceed to the primary circuit. The correct order is right
front, left rear, left front and right rear. When bleeding, slowly depress the
brake pedal and hold it down while the bleeder is opened for 1–2 seconds.
Close the bleeder and release the pedal. Wait 3–4 seconds before the next
pedal application. Rapid pedal pumping will actually complicate the bleeding
and extend the procedure. When air bubbles are no longer seen in the escaping
brake fluid, tighten the bleeder to 6 ft. lbs. (8 Nm).
If the hydraulic unit has been replaced or drained of fluid, it must be bled
using specific procedures. This bleeding is not necessary under normal repair
conditions not involving the hydraulic unit. To bleed the hydraulic unit:
- Bleed the brake lines at all 4 wheels in the normal fashion.
- Attach the vinyl hose to one of the bleeders on top of the hydraulic unit.
Bleed this port in the same fashion as the wheels. Move the hose to the other
bleeder port and repeat the bleeding. Both of these ports bleed the primary
brake circuit in the actuator — front left and right rear.
- Remove the cone screw from the secondary bleeder port and install a bleeder
screw. Install the clear vinyl tube on the bleeder.
- Open the bleeder and depress the brake pedal slowly; hold the pedal depressed.
- With the pedal depressed, intermittently apply the AV electrical signal
to the solenoid valve. To apply the AV signal:
- Disconnect both battery terminals.
- Disconnect the 2-pin and 12-pin connectors at the hydraulic assembly.
- At the 12-pin connector, connect terminals 1 and 3 to battery ground.
Connect terminals 5 and 7 to the positive terminal of the battery. Take
great care not to short terminals 5 and 7 to the grounded terminals nearby.
- When the last connection is made, the AV signal is transmitted to the
solenoids. Do not send this signal for more than 5 seconds. Break the
connection at the positive terminal after 2–3 seconds.
- When the brake pedal moves to the end of its stroke, close the bleeder and
allow the pedal to return. If the AV signal is not transmitted for any reason,
the bleeder need not be closed before returning the pedal.
- Repeat Steps 4, 5 and 6 until the fluid in the tube contains no air.
- With the AV signal disconnected and the brake pedal released, remove the
bleeder fitting and re-install the cone screw. Tighten the cone screw to 6
ft. lbs. (8 Nm).
- Repeat the procedure from Step 3 for the other secondary bleeder port. Both
secondary ports must be bled.
- Carefully remove the jumper wires from the 12-pin connector. Do not allow
the terminals to short to each other or to ground.
- Connect the 2- and 12-pin connectors at the hydraulic unit. Connect the
battery cables with the ignition OFF.