Previous Next

Power Rack and Pinion Steering Gear

REMOVAL & INSTALLATION

Legacy, Legacy Outback and SUS Models

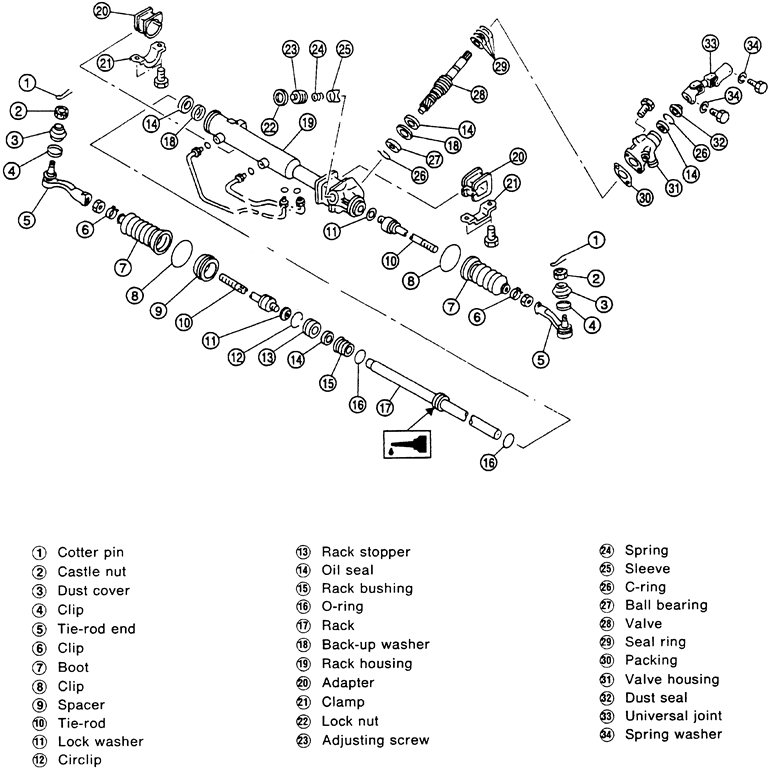
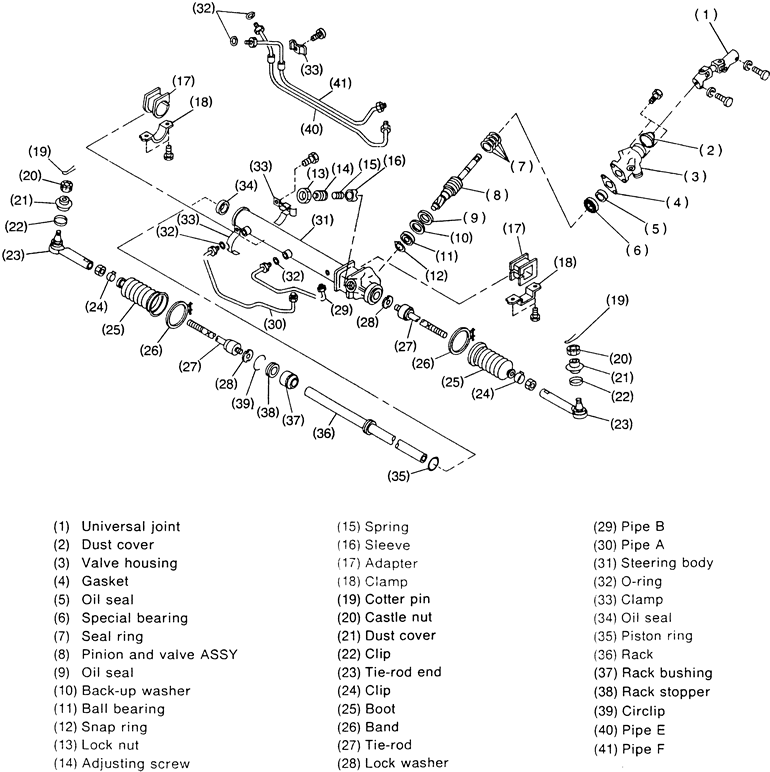
Exploded view of the steering rack assembly — Legacy models

  1. Before servicing the vehicle, refer to the precautions in the beginning of this section.
  2. Remove or disconnect the following:
  3. From the power steering rack, remove the center pressure pipe, connect a vinyl hose to the pipe and joint, then turn the steering wheel to discharge the fluid into a container.

    NOTE: When discharging the power steering fluid (line A and B), turn the steering wheel fully, left and right. Be sure to disconnect the other pipe and drain the fluid in the same manner.

  4. From the control valve of the gearbox assembly, remove the power steering C and D pressure pipes. Remove pipe D first and pipe C second.
  5. If not disconnected when draining the fluid from the control valve of the gearbox assembly, remove the power steering A and B pressure pipes. Remove pipe A first and pipe B second.
  6. Remove or disconnect the following:

    To install:

  7. Install or connect the following:
  8. Partially lower the vehicle, then refill and bleed the power steering system.
  9. Check for fluid leaks and the fluid level, then install the jack up plate.
  10. Check and adjust the toe-in and the steering angle.
Impreza, Impreza Outback and Impreza Outback Sport Models
  1. Before servicing the vehicle, refer to the precautions in the beginning of this section.
  2. Remove or disconnect the following:
  3. Matchmark the universal joint to the serration in the steering rack for installation reference.
  4. Remove or disconnect the following:

    To install:

  5. Install or connect the following:
  6. Align the steering rack to the universal joint. Push the long yoke of the joint all the way into the serrated position of the steering shaft, setting the bolt hole in the cut-out. Pull the short yoke all the way out of the serrated portion of the rack and pinion, setting the bolt hole in the cut-out. Insert the bolt through the short yoke. Pull the yoke and ensure the bolt is properly engaged in the cut-out. Fasten the short yoke side with the spring washer and bolt, then fasten the yoke side. Tighten the bolts to 17 ft. lbs. (24 Nm).
  7. Install or connect the following:
  8. Fill and bleed the steering system.
SVX

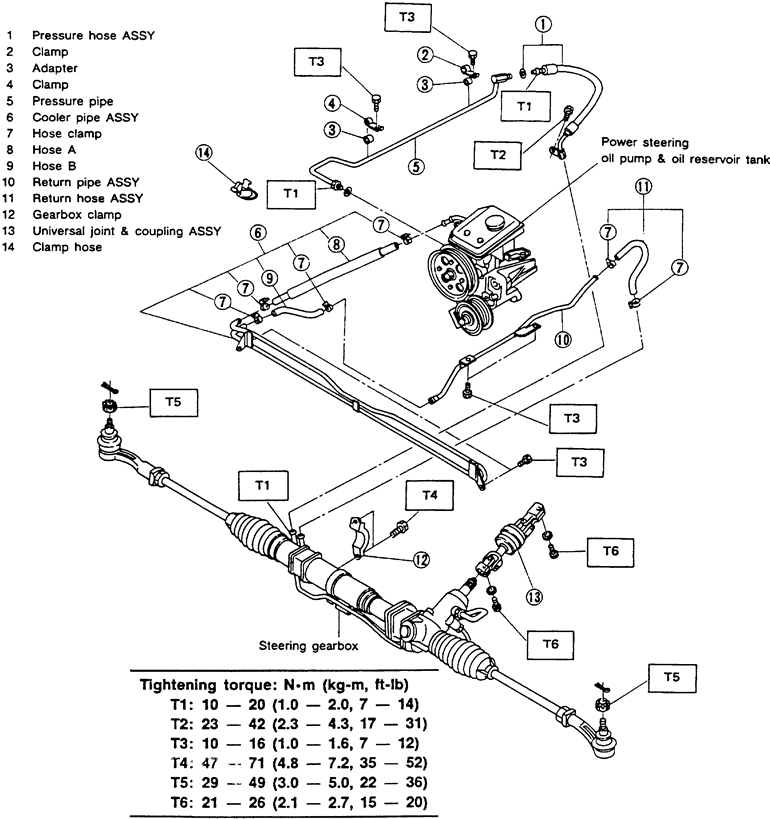
Exploded view of the power steering assembly — SVX model

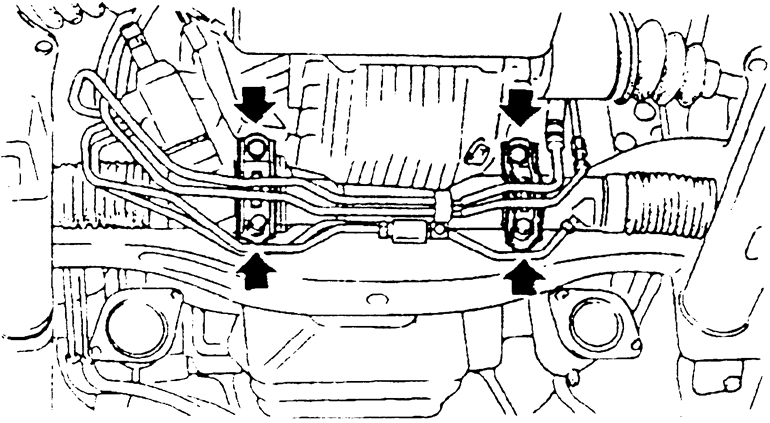
Removing the steering rack retainer bolts

  1. Before servicing the vehicle, refer to the precautions in the beginning of this section.
  2. Remove or disconnect the following:
  3. Matchmark the universal joint to the rack and pinion unit and the steering shaft.
  4. Remove or disconnect the following:
  5. Remove the rack by performing the following:
    1. Turn the rack so the control valve faces the rear.
    2. Move the rack to the right so the left tie rod can be removed from the rack assembly.
    3. Remove the rack from the vehicle.

      To install:

  6. Remove or disconnect the following:
  7. Check the front end alignment and adjust as necessary.

Previous Next