- Before servicing the vehicle, refer to the precautions in the beginning
of this section.
- With the engine cold, rotate the engine so that the No. 1 piston is at Top
Dead Center (TDC) of its compression stroke.
- Check the clearance of both the intake and exhaust valves of the No. 1 cylinder
by inserting a feeler gauge between each valve stem and rocker arm.
- If the clearance is not within specifications, loosen the locknut with the
proper size wrench and turn the adjusting stud either in or out until the
valve clearance is correct.
NOTE: Proper valve clearance is obtained when the feeler
gauge slides between the valve stem and the rocker arm with a minimum amount
of resistance.
- Tighten the locknut and recheck the valve stem-to-rocker clearance.
- The rest of the valves are adjusted in the same way. Bring each piston to
TDC of its compression stroke, then check and adjust the valves for that cylinder.
The proper valve adjustment sequence is 1–3–2–4.
- Rotate the crankshaft at least 2 revolutions, then recheck the valve clearance.
- Tighten the rocker arm locknuts to 10–13 ft. lbs. (14–18 Nm).
- Install the valve covers using new gaskets. Tighten the retaining nuts to
24–36 inch lbs. (3–4 Nm).
NOTE: The valve adjustment should be performed while the engine
is cold. A Shim Replacer Kit 498187100 will be needed to perform the valve adjustment.
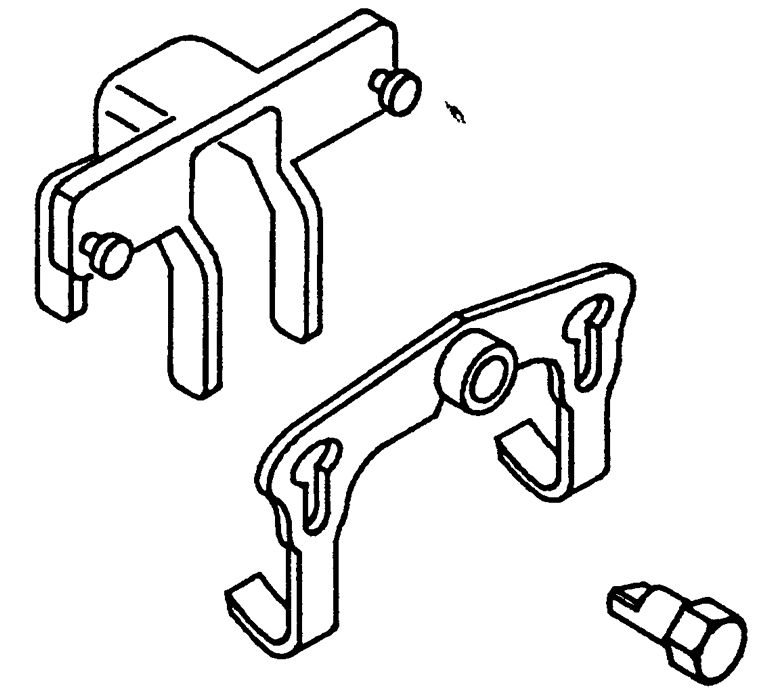
| Exploded view of the shim replacer kit

|
- Before servicing the vehicle, refer to the precautions in the beginning
of this section.
- Remove or disconnect the following:
- Negative battery cable
- Mass Air Flow (MAF) sensor electrical connector
- Air intake duct with the air cleaner assembly
- Blow-by hose
NOTE: Label the spark plug wires before disconnecting them.
- Spark plug wires
- Battery and tray
- Washer tank
- Place a drip tray under the vehicle, and remove the valve covers.
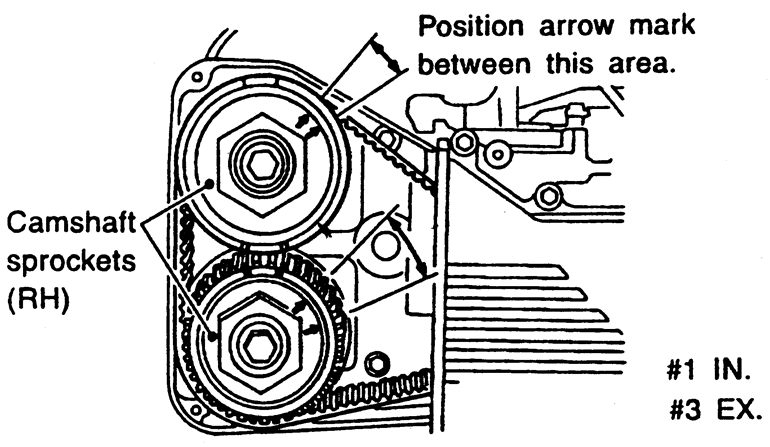
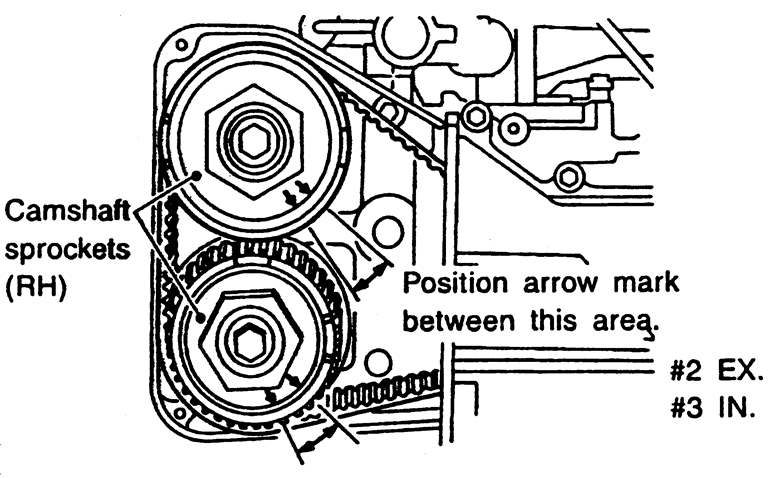
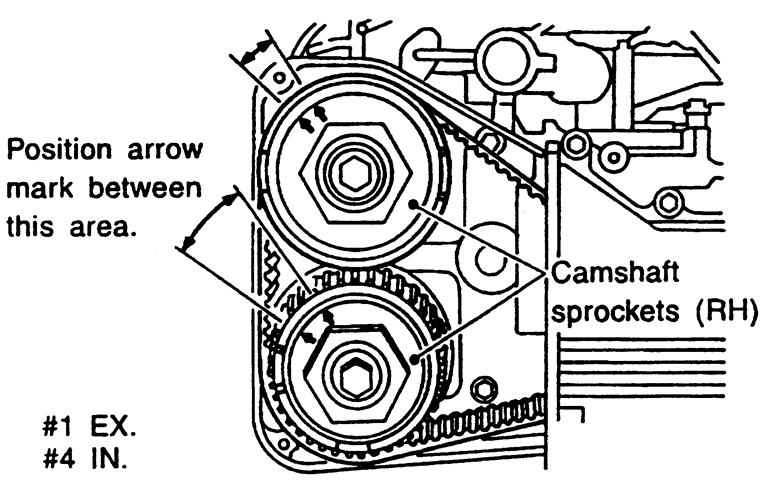
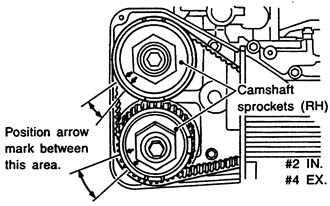
- Turn the crankshaft pulley clockwise until the arrow mark on the camshaft
is set to the position as shown.
NOTE: The checking or adjusting the exhaust valve is performed
from under the vehicle.
- Check the valve clearance using the appropriate sized feeler gauge as follows:
- Intake valve clearance specification is 0.0071–0.0087 in. (0.18–0.22mm).
- Exhaust valve clearance specification is 0.0090–0.0106 in. (0.23–0.27mm).
- If any valve needs adjustment, perform the following, while referring to
the accompanying illustrations:
| Position the lifter notch as shown, to remove the
shim

|
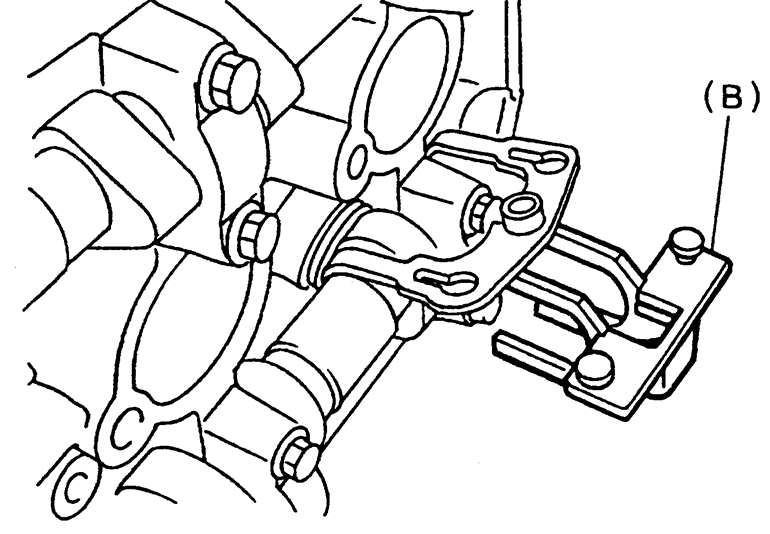
| First install part "A" of the tool to the camshaft...
|
| ...then part "B" under part "A" as shown

|
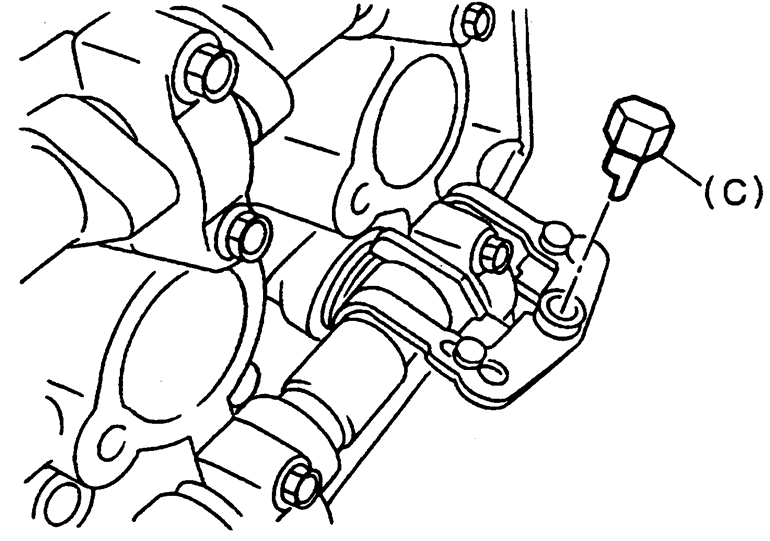
| Turn part "C" until the adjusting shim can be removed

|
- Rotate the notch of the lifter outward by 45°.
- Install part "A" of the Replacer on to the camshaft.
- Install part "B" of the Replacer as shown.
- Install part "C" and turn until part "B" pushes the lifter away.
- Insert tweezers into the notch of the valve lifter, and take out the
shim.
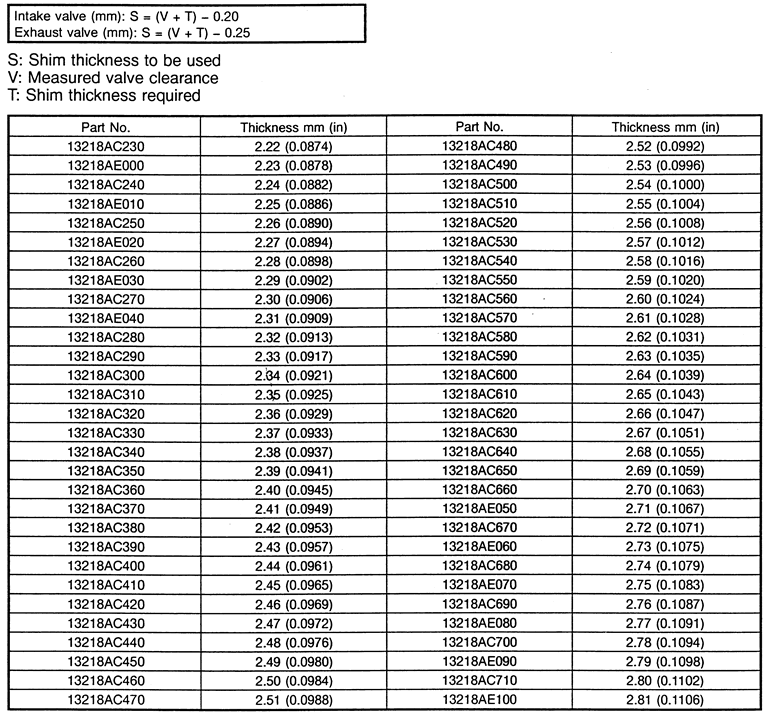
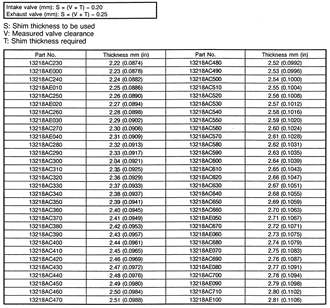
- Measure the thickness of the shim, then using the chart select and install
a new shim and recheck the clearance.
- Remove the adjusting tools.
- Install or connect the following:
- Valve covers
- Spark plug wires
- All components removed to access the valve covers
- Battery tray and battery
- Check the engine oil level. Position the camshaft as shown to adjust No.
1 intake valve and No. 3 exhaust valve
| Position the camshaft as shown to adjust No. 3 intake
valve and No. 2 exhaust valve

|
| Position the camshaft as shown to adjust No. 2 intake
valve and No. 4 exhaust valve
|
| Position the camshaft as shown to adjust No. 4 intake
valve and No. 1 exhaust valve

|
| Valve adjusting shim chart
|
The 3.3L engine is equipped with hydraulic lash adjusters and does require
periodic valve lash adjustment.