Oil Pan
REMOVAL & INSTALLATION
2.2L and 2.5L Engines
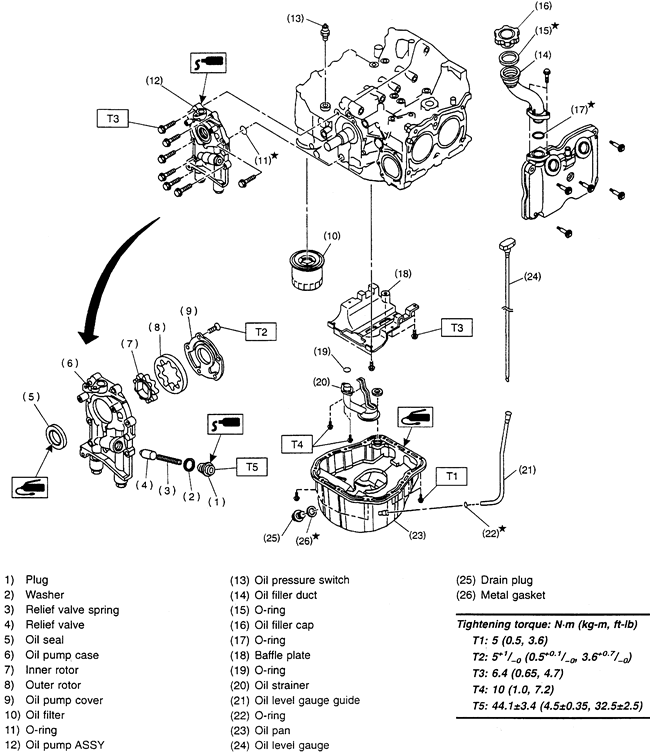
Fig. 1: Exploded view of the oil pan and lubrication components-2.2L and 2.5L engines
Before servicing the vehicle, refer to the precautions in the beginning of this section.
Remove or disconnect the following:
Negative battery cable
Air intake duct
Front Oxygen (O2S) sensor electrical connector
Pitching stopper
Upper radiator brackets
Support the engine with a suitable lifting device.
Front wheel and tire assemblies
Lift up the engine slightly.
Engine under cover
Drain the oil from the engine into a suitable container.
Install the drain plug with a new gasket and tighten it to 33-36 ft. lbs. (43-47 Nm).
Remove or disconnect the following:
Rear O2S sensor electrical connector
Exhaust Y-pipe
Nuts that secure the front engine mounts to the front crossmember
Oil pan mounting bolts
While supporting the oil pan, use a rubber mallet and tap the oil pan to free it from the engine.
Clean all gasket material from both mating surfaces.
To install:
Apply a continuous bead of sealer to a new oil pan gasket.
Install the oil pan assembly. Tighten the bolts to 36-48 inch lbs. (4-5 Nm).
Lower the engine onto the front crossmember.
Install or connect the following:
Front engine mount nuts and tighten to 61 ft. lbs. (83 Nm)
Y-pipe with new gaskets. Tighten the pipe-to-engine nuts to 23 ft. lbs. (30 Nm)
Rear O2S sensor electrical connector
Engine under cover
Front wheel and tire assemblies
Remove the engine lifting device.
Front O2S sensor electrical connector
Pitching stopper. Tighten the front bolt to 40 ft. lbs. (54 Nm) and the rear bolt to 49 ft. lbs. (67 Nm).
Upper radiator brackets
Air intake duct
Negative battery cable
Fill the engine to the proper level with the recommended oil and run the engine. Check for leaks.