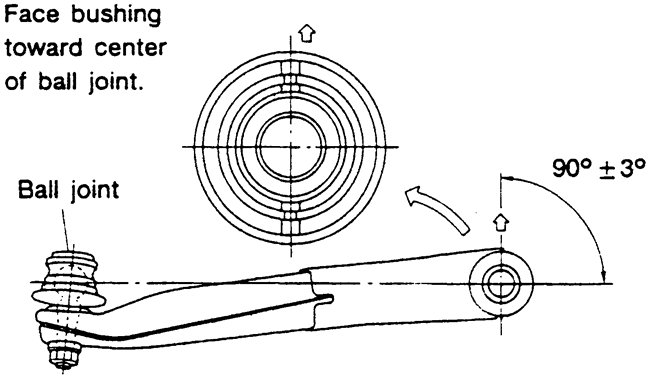
Fig. 1: The front control arm bushing must be installed
in the proper direction
Remove the control arm from the vehicle.
Mount the control arm in a soft jawed vise.
Use either a press or a control arm bushing fixture (C-clamp like tool)
along with a slotted washer and a piece of pipe (slightly larger than the
bushing) and press out the old bushing.
Clean the inside bushing contact surfaces of rust and old rubber.
To install:
Apply a light coating of grease to both the replacement busing and bushing
contact surfaces on the control arm.
Align the bushing according to the illustration.
Install the bushing using the press tool. A bushing install clamp can also
be used to compress the bushing into the control arm.