The following engine disassembly instructions assume that you have the engine mounted on an engine stand. If not, it is easiest to disassemble the engine on a bench or the floor with it resting on the transmission mounting surface. You must be able to access the connecting rod fasteners and rotate the crankshaft during disassembly. Also, all engine covers (timing, front, side, oil pan, etc.) should have already been removed. Engines that are seized or locked up may not be able to be completely disassembled, and a core (salvage yard) engine should be purchased. You may also elect to use a seized engine as a core for a new short-block assembly.
Remove the pushrods and lifters If not already done when the cylinder heads were removed, Remove the timing gears and/or timing chain assembly, then remove the oil pump drive assembly and remove the camshaft from the engine block. Remove the oil pick-up and oil pump assembly. Remove any balance or auxiliary shafts if equipped. Remove the cylinder ridge from the top of the bore. See the "Cylinder Ridge Removal" procedure.
Remove the oil pick-up and pump assembly and, if necessary, the oil pump drive. Remove any balance or auxiliary shafts if necessary. Remove the cylinder ridge from the top of any cylinder bore when required. See the "Cylinder Ridge Removal" procedure.
Turn the engine over so that the crankshaft is exposed. Use a number punch and mark each connecting rod (on the rod and cap) with its respective cylinder number. On V-block engines, always stamp the rods and caps on the side closest to the exterior of the block for proper installation. The cylinder closest to the front of the engine is always number 1. However, depending on the engine placement, the front of the engine could either be the flywheel or damper/pulley end. Generally the front of the engine faces the front of the vehicle. Use a number punch or scribe and also mark the main bearing caps from front to rear with the front most cap being number 1.
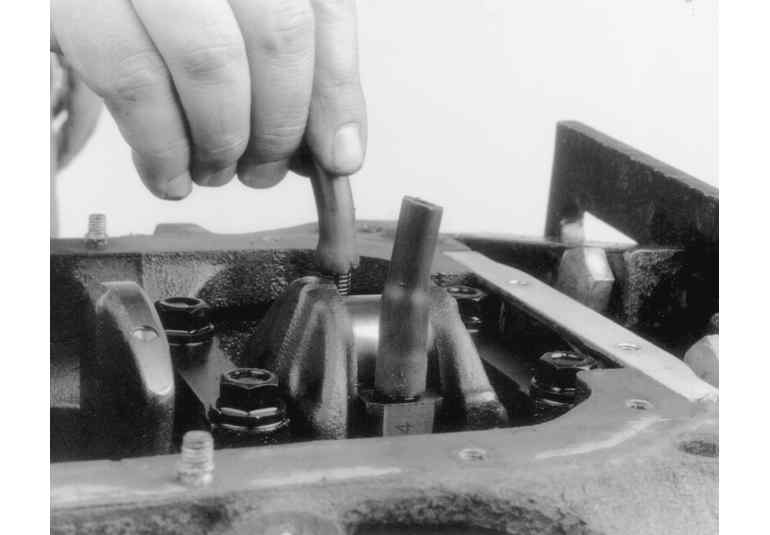
| Place rubber hose over the connecting rod studs to protect the crankshaft and cylinder bores from damage
|
WARNING
Take special care when pushing the piston and connecting rod assembly out of the engine. The sharp threads of the rod bolts/studs can score crankshaft journal. Install special plastic caps over the rod bolts. Rubber hose can be used to do the same.
| Carefully tap the piston out of the bore using a wooden hammer handle or piston knocker
|
Reposition the engine block, so that the number one cylinder bore (head surface) is facing up. Rotate the crankshaft until the number one piston is at the bottom of its travel. This will allow the maximum access to its connecting rod. Remove the connecting rod fasteners and cap. Place two lengths of rubber hose over the rod bolts/studs to protect the crankshaft from damage. Using a wooden hammer handle (or piston hammer), push the connecting rod up about 1 in. (25mm) from the crankshaft and remove the upper bearing insert. Continue pushing or tapping the connecting rod up until the piston rings are out of the cylinder bore. Remove the piston and rod by hand, put the upper half of the bearing insert back into the rod, install the cap with its bearing insert installed, and hand-tighten the cap fasteners. If the parts are kept in order in this manner, they will not get lost and you will be able to tell which bearings came from what cylinder if any problems are discovered. Remove all the other piston assemblies in the same manner. On V-style engines, remove all of the pistons from one bank, then reposition the engine with the other cylinder bank head surface up, and remove that bank's piston assemblies.
The only remaining component in the engine block should now be the crankshaft. Loosen the main bearing caps evenly until the fasteners can be turned by hand, and then remove them and the caps. Remove the crankshaft from the engine block. Thoroughly clean all of the components.