Previous Next

Tire And Wheel Removal & Installation

To Remove:

  1. Park the vehicle on a level surface. Place the vehicle in PARK (automatic) or REVERSE (manual) with the engine OFF, and apply the parking brake. If you are removing a rear tire, chock the front wheels to prevent movement. If you are removing a front tire, chock the rear wheels.

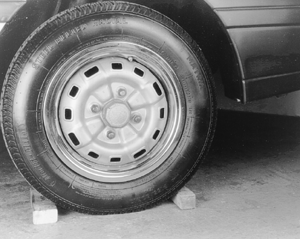
    Before jacking the vehicle, block the diagonally opposite wheel with one or, preferably, two chocks

    NOTE: Wheel chocks may be purchased at your local auto parts store, or a block of wood cut into wedges may be used. If possible, keep one or two of the chocks in your tire storage compartment, in case any of the tires has to be removed roadside.

  2. Remove the jack, tire iron and, if necessary, the spare tire from the storage compartment.
  3. Check the owner’s manual or refer to the jacking placard in the trunk area. Then, place the jack in the proper position.

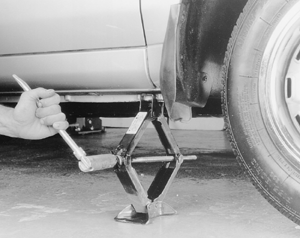
    Place the jack at the proper lifting point on your vehicle

  4. If equipped with lug nut trim caps, remove them by either unscrewing or pulling them off the lug nuts, as appropriate. Consult the owner’s manual, if necessary.
  5. If equipped with a wheel cover or hub cap, insert the tapered end of the tire iron in the groove and pry off the cover.
  6. With the tires still on the ground use the tire iron/wrench to break the lug nuts loose, but do not remove the lug nuts until the vehicle has been safely raised off the ground.

    With the vehicle still on the ground, break the lug nuts loose using the wrench end of the tire iron

    NOTE: If a nut is stuck, never use heat to loosen. Damage to the wheel and bearings may occur. If the nuts are seized use penetrating oil on the lug nuts and soak for a period of time to loosen the rust. If the lug nuts are still difficult to break loose, place a long pipe over the lug wrench to apply increased leverage.

  7. Using the jack, raise the vehicle until the tire is clear of the ground. Support the vehicle safely using jack stands.
  8. Remove the lug nuts, then remove the tire and wheel assembly.

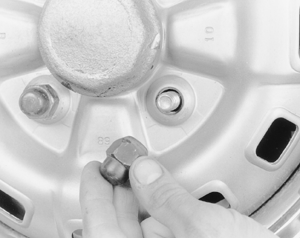
After the lug nuts have been loosened, raise the vehicle using the jack until the tire is clear of the ground

Remove the lug nuts from the studs

Remove the wheel and tire assembly from the vehicle

To Install:

  1. Ensure that the wheel and hub mating surfaces, as well as the wheel lug studs, are clean and free of all foreign material. Always remove rust from the wheel mounting surface and the brake rotor or drum. Failure to do so may cause the lug nuts to loosen.
  2. Place a small amount of anti-seize compound on the lug studs.
  3. Install the tire and wheel assembly and hand-tighten the lug nuts.
  4. Using the tire wrench, tighten all the lug nuts, in a star pattern, until they are snug. This will allow you to distribute the proper torque to the lug nuts without distorting the rim, or brake rotor.
  5. Raise the vehicle and withdraw the jackstand, then lower the vehicle.
  6. Using a torque wrench torque the lug nuts in a star pattern to the recommended torque. Check your owner’s manual or refer to Wheels for the proper tightening sequence and torque specification.

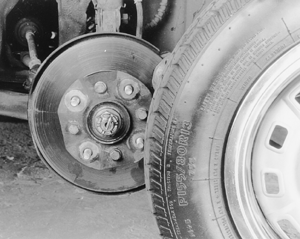
    Typical wheel lug tightening sequence

    WARNING
    Do not over tighten the lug nuts, as this may cause the wheel studs to overstretch or the brake disc (rotor) to warp.

  7. If so equipped, align the valve stem and install the wheel cover or hubcap. Use a rubber mallet to properly install the cover without damage.
  8. If equipped, install the lug nut trim caps by pushing or screwing them on, as applicable.
  9. Remove the jack from under the vehicle, and place the jack and tire iron/wrench in their storage compartment. Remove the wheel chock(s).
  10. If you have removed a flat or damaged tire, place it in the storage compartment of the vehicle and take it to your local repair station to have it repaired or replaced as soon as possible.

Previous Next