 |
Prepare the vehicle according to the following conditions:
- Place the vehicle in a location that is dark enough to clearly observe the cutoff line. The cutoff line is a distinct line, below which light from the headlights can be observed and above which it cannot.
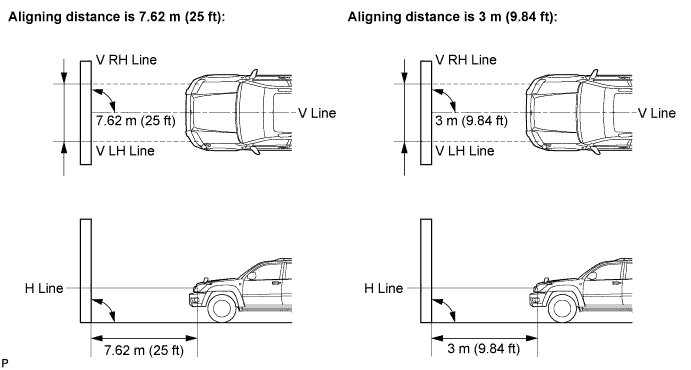
- Place the vehicle at a 90° angle to the wall.
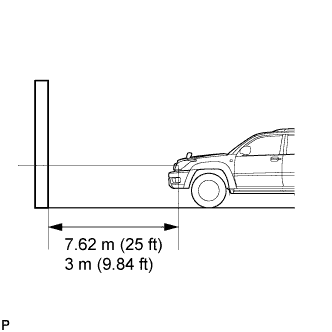
- Position the vehicle (headlight bulb center) 7.62 m (25 ft) away from the wall.
- Place the vehicle on a level surface.
- Bounce the vehicle up and down to settle the suspension.
- NOTICE:
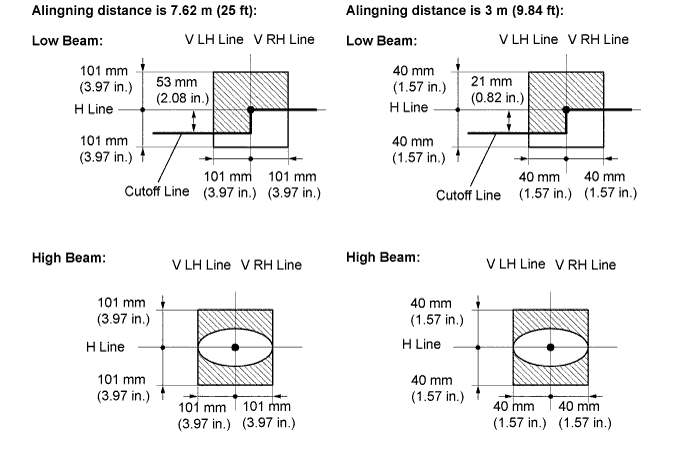
- A distance of 7.62 m (25 ft) between the vehicle (headlight bulb center) and the wall is necessary for proper aim adjustment. If it is not possible to achieve this distance, secure a distance of exactly 3 m (9.84 ft) for checking and adjustment. (The target zone will change with the distance so follow the instructions in the illustration.)