WINDSHIELD GLASS > REMOVAL |
| 1. REMOVE ROOF HEADLINING ASSEMBLY |
Remove the front door weatherstrip LH.
Remove the front door weatherstrip RH.
Remove the 2 assist grips.
Remove the front pillar garnish LH.
Remove the front pillar garnish RH.
Remove the LH Visor assembly.
Remove the RH Visor assembly.
Remove the LH visor.
Remove the RH visor.
Remove the 2 visor holders.
Remove the roof console box assembly.
Remove the roof headlining assembly.
| 2. REMOVE INNER REAR VIEW MIRROR ASSEMBLY |
| 3. REMOVE COWL TOP VENTILATOR LOUVER SUB-ASSEMBLY |
Remove the 2 front wiper arm head caps.
Remove the FR wiper arm LH.
Remove the FR wiper arm RH.
Remove the front fender to cowl side seal LH.
Remove the front fender to cowl side seal RH.
Remove the cowl top ventilator louver.
| 4. REMOVE WINDSHIELD MOULDING OUTSIDE LH |
|
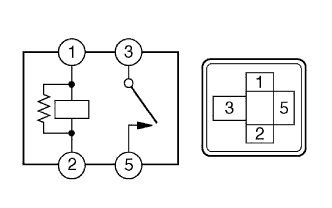
Measure the resistance of the DEFOG relay.
| Tester Condition | Specified Condition |
| 1 - 2 | Continuity |
| 3 - 5 | No continuity (when battery voltage is not applied between terminals) |
| 3 -5 | Continuity (when battery voltage is applied to terminals 1 and 2) |
| 5. REMOVE WINDSHIELD MOULDING OUTSIDE RH |
| 6. REMOVE WINDSHIELD MOULDING OUTER UPPER |
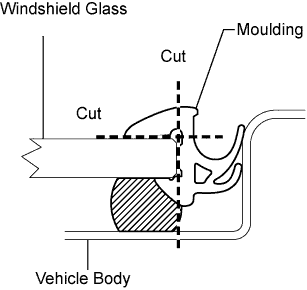 |
Using a knife, cut off the moulding, as shown in the illustration.
Remove the remaining moulding.
w/ Deicer:
Disconnect the connector, as shown in the illustration.
| 7. REMOVE WINDSHIELD GLASS |
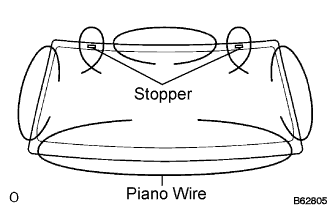 |
Pass a piano wire between the vehicle body and glass from the interior.
Tie both wire ends to wooden blocks or similar objects.
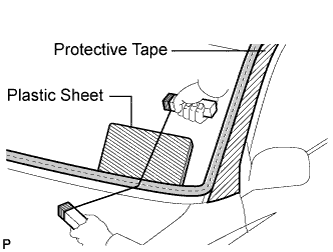 |
Cut off the adhesive by pulling piano wire around the glass.
Disengage the stoppers.
Using a suction cup, remove the glass.
| 8. CLEAN WINDSHIELD GLASS |
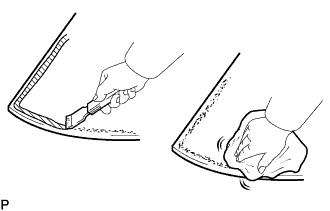 |
Using a scraper, remove the damaged stoppers, dams and adhesive sticking to the glass.
Clean the outer circumference of the glass with white gasoline.