Home › BODY › EXTERIOR › ROOF DRIP SIDE FINISH MOULDING

ROOF DRIP SIDE FINISH MOULDING > INSTALLATION

for Preparation Click here


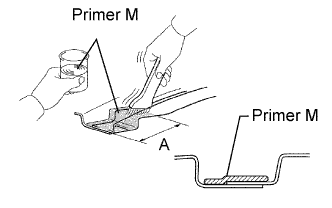
1. INSTALL ROOF DRIP SIDE FINISH MOULDING CLIP NO. 1


    B065596E01
  1. Using a brush, coat the exposed part of the body on the vehicle side with Primer M.

    Dimension (A):
    40 mm (3.125 in.)

    NOTICE:
    1. Dry the primer coating for 3 minutes or more.
    2. Do not coat the adhesive with Primer M.
    3. Do not keep any of the opened Primer M for later use.


    1. Using a heat light, heat the body and moulding.
      Heating temperature: 
      Body
      40 to 60 °C (104 to 140°F)
      Moulding
      20 to 30 °C (68 to 86°F)

      NOTICE:
      Do not heat the moulding and body excessively.


    B063875E01
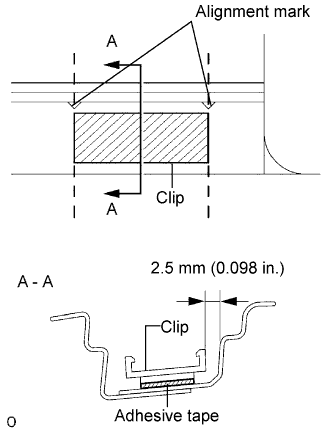
  1. Apply new adhesive tape to the clip as shown in the illustration.

    1. Attach the clip to the protrusion on the vehicle body with adhesive tape.


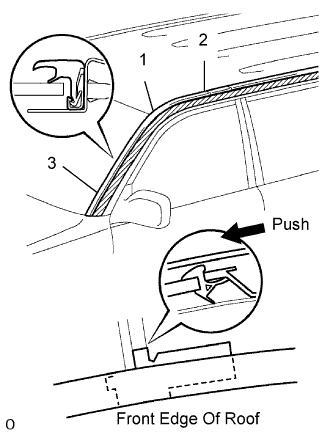
2. INSTALL WINDSHIELD MOULDING OUTSIDE LH


    B063877E01
  1. Install the moulding as shown in the illustration.

    1. Install the middle of the moulding onto the front edge of the roof.

    2. Install the rear end of the moulding along the side edge of the roof.

    3. Install the front end of the moulding along the side edge of the windshield.


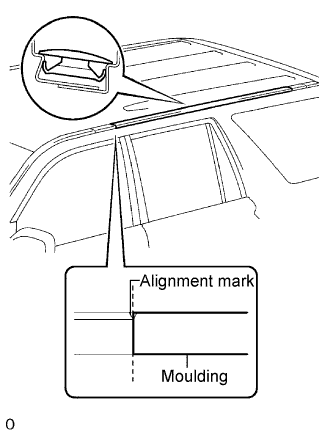
3. INSTALL ROOF DRIP SIDE FINISH MOULDING CENTER NO. 2 LH


    B063874E01
  1. Install the moulding as shown in the illustration.

    1. Aligning the front end of the moulding with the alignment mark on the body, install the moulding.


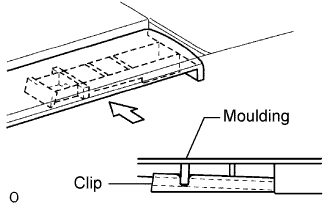
4. INSTALL ROOF DRIP SIDE FINISH MOULDING REAR LH


    B063873E01
  1. Install the moulding as shown in the illustration.