 |
Coat a new O-ring with power steering fluid and install it on steering rack.
POWER STEERING LINK > REASSEMBLY |
| 1. INSTALL STEERING RACK PISTON RING |
|
Coat a new O-ring with power steering fluid and install it on steering rack.
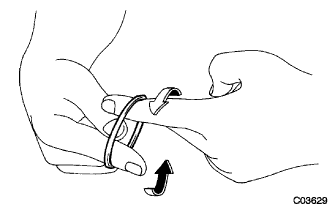
Expand a new teflon ring with your fingers.
Coat the teflon ring with power steering fluid.
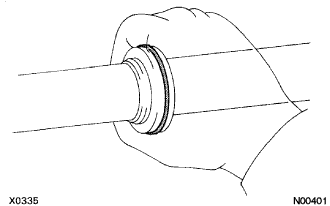 |
Install the teflon ring to the steering rack, and settle it down with your fingers.
| 2. INSTALL POWER STEERING RACK |
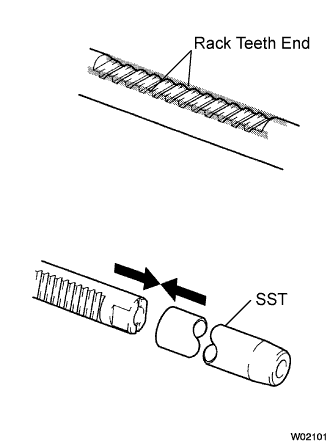 |
Coat SST with power steering fluid.
Install SST to the rack.
Install the rack into the rack housing.
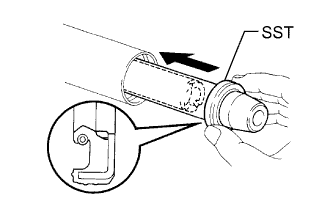 |
Coat SST with power steering fluid.
Install SST to the steering rack opposite end.
Coat a new oil seal lip with power steering fluid, and install the oil seal by pushing it without tilting.
Remove the SST.
| 3. INSTALL CYLINDER END STOPPER |
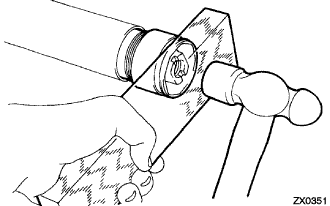 |
Coat a new O-ring with power steering fluid, and install it to the stopper.
Using a wooden block and a hammer, drive in the stopper until it is tightly installed.
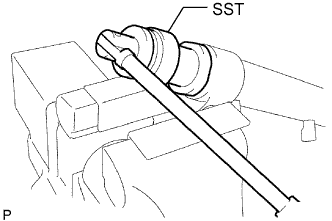 |
Using SST, torque the stopper.
| 4. INSPECT AIR TIGHTNESS |
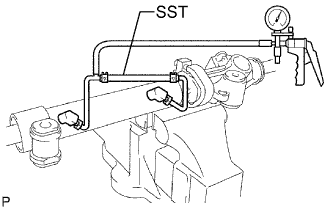 |
Install the SST to the unions of the rack housing.
Apply 53.33 kPa (400 mmHg, 15.75 in Hg) of vacuum for about 30 seconds.
Check that there is no change in the vacuum.
If there is change in the vacuum, check the installation of the oil seals.
| 5. INSTALL POWER STEERING CONTROL VALVE UPPER OIL SEAL |
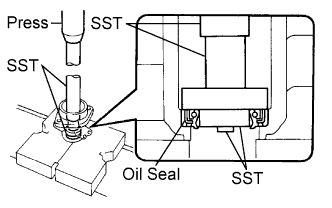 |
Coat a new oil seal lip with power steering fluid.
Using SST, press in the oil seal.
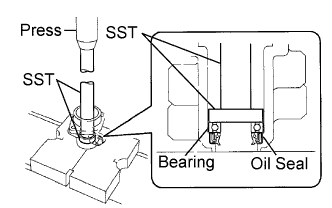 |
Coat a new bearing with molybdenum disulfide lithium base grease.
Using SST, press in the bearing.
| 6. INSTALL POWER STEERING CONTROL VALVE |
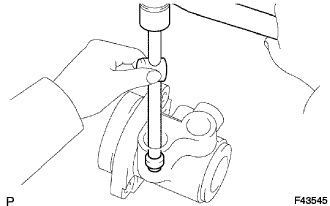 |
Using a plastic hammer and a sliding handle, lightly tap in a new union seat.
|
Coat the rings with power steering fluid.
Expand 4 new rings with your fingers.
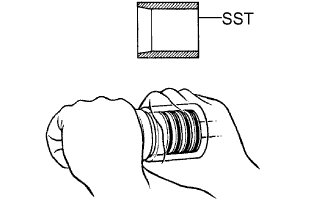 |
Install the rings to the control valve assembly, and settle them down with your fingers.
Carefully slide the tapered end of SST over the rings until the ring fits to the steering rack.
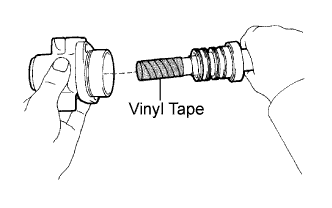 |
Coat the teflon rings with power steering fluid.
To prevent oil seat lip damage, wind vinyl tape on the serrated port of the control valve shaft.
Push the valve assembly into the control valve housing.
Coat a new O-ring with power steering fluid, and install it to the bearing guide nut.
Coat a new oil seal lip with power steering fluid.
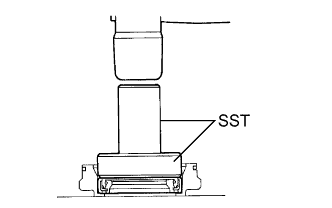 |
Using SST and a hammer, drive in the oil seal.
Lightly mount the control valve assembly between aluminum plates in a vise.
To prevent oil seal lip damage, wind vinyl tape on the pinion part of the control valve shaft.
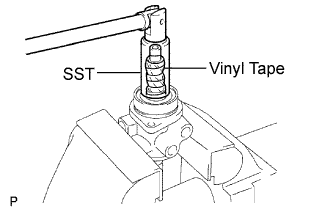 |
Using SST, torque the guide nut.
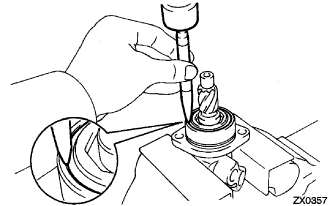 |
Using a punch and a hammer, stake the nut.
Coat a new O-ring with power steering fluid, and install it to the valve housing.
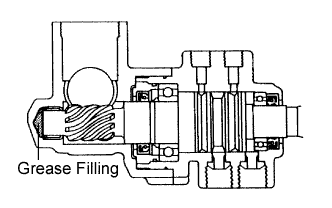 |
Apply molybdenum disulfide base grease for the needle roller bearing inside the rack housing in the illustrated portion.
Install the control valve assembly with the 2 bolts.
| 7. INSTALL RACK GUIDE |
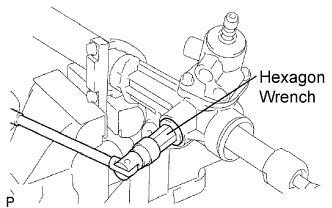 |
Install the rack guide and spring.
Apply sealant to 2 or 3 threads of the rack guide spring cap.
Using a hexagon wrench (24 mm), temporarily install the spring cap.
| 8. ADJUST TOTAL PRELOAD |
To prevent the steering rack teeth from damaging the oil seal lip, temporarily install the RH and LH rack ends.
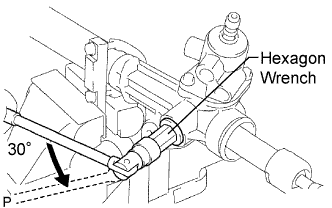 |
Using a hexagon wrench (24 mm), tighten the rack guide spring cap.
Return the cap 30°.
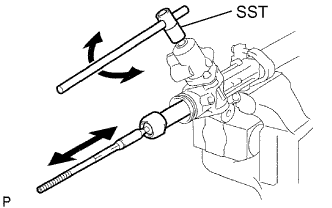 |
Using SST, turn the control valve shaft right and left 1 or 2 times.
Using a hexagon wrench (24 mm), loosen the cap until the rack guide spring is not functioning.
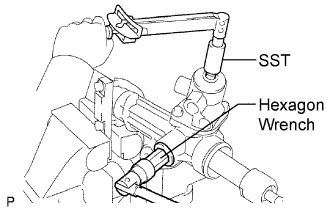 |
Using SST, a torque wrench and a hexagon wrench (24 mm), tighten the cap until the preload is within specification.
Apply sealant to 2 or 3 threads of the lock nut.
Temporarily install the lock nut.
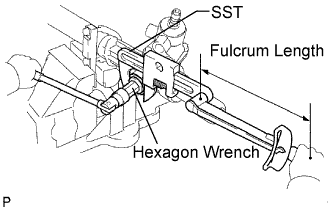 |
Using a hexagon wrench (24 mm), holding the rack guide spring cap rotating, and using SST, torque the nut.
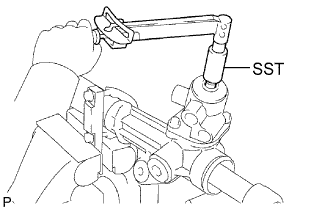 |
Recheck the total preload.
Remove the RH and LH rack ends.
| 9. INSTALL STEERING RACK END SUB-ASSEMBLY |
Install a new claw washer, and temporarily tighten the rack end.
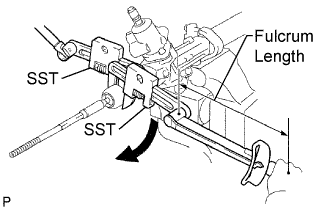 |
Using SST to hold the steering rack steady, and using another SST, torque the rack end LH.
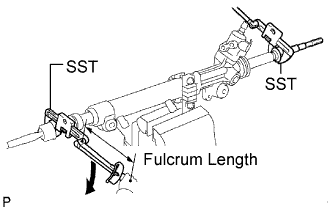 |
Using SST to hold the rack end LH steady, and using another SST, torque the rack end RH.
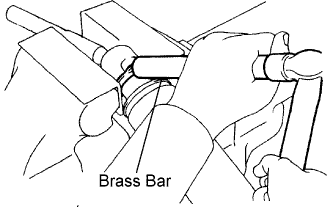 |
Using a brass bar and a hammer, stake the washer.
Employ the same manner described above to the other side.
| 10. INSTALL STEERING RACK BOOT LH |
Install the boot.
| 11. INSTALL STEERING RACK BOOT RH |
| 12. INSTALL STEERING RACK BOOT CLAMP LH |
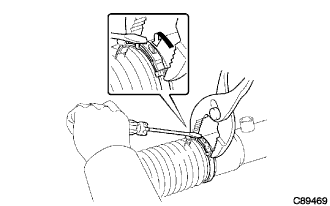 |
Using pliers and a screwdriver, install the clamp.
| 13. INSTALL STEERING RACK BOOT CLAMP RH |
| 14. INSTALL STEERING RACK BOOT CLIP LH |
Using pliers, install the clip.
| 15. INSTALL STEERING RACK BOOT CLIP RH |
| 16. INSPECT POWER STEERING GEAR |
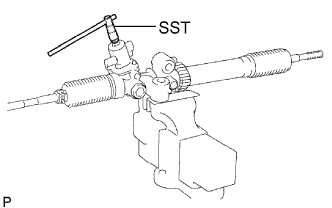 |
Using SST, check that the rack boot stretches smoothly when the control valve shaft is being rotated.
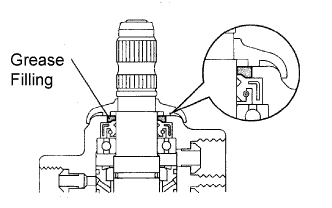 |
Apply MP grease in the illustrated portion.
Install the dust cover.
| 17. INSTALL STEERING TURN PRESSURE TUBE |
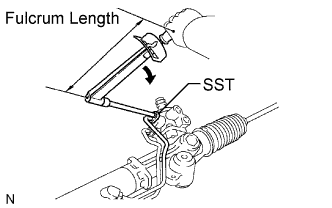 |
Using SST, install the 2 turn pressure tubes.
| 18. INSTALL TIE ROD END SUB-ASSEMBLY LH |
Screw the lock nut and tie rod end onto the rack end until the matchmarks are aligned.
After adjusting toe-in, torque the nut.
| 19. INSTALL TIE ROD END SUB-ASSEMBLY RH |