Home › HEATER & AIR CONDITIONING SYSTEM › AIR CONDITIONING › AIR CONDITIONING UNIT

AIR CONDITIONING UNIT > INSTALLATION

for Preparation Click here


1. INSTALL AIR CONDITIONING UNIT ASSEMBLY


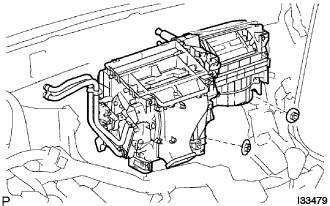
    I033479
  1. Install the air conditioner unit assembly with the 2 nuts.

    Torque:
    5.4 N*m{ 55 kgf*cm , 48 in.*lbf }

  1. Connect the connectors.


2. INSTALL INSTRUMENT PANEL REINFORCEMENT


  1. Install the instrument panel reinforcement with the 7 bolts.
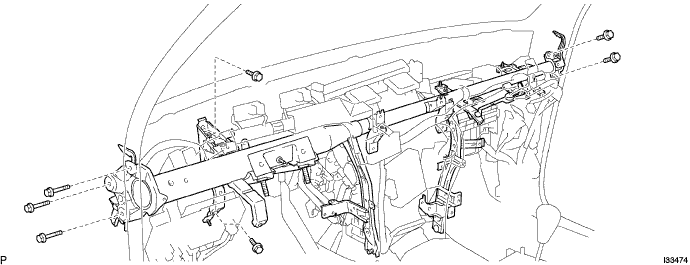

    I033474


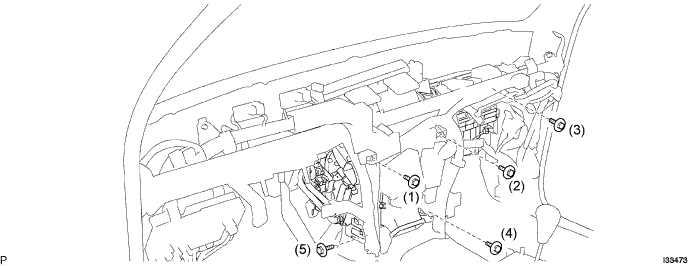
  1. Install the 5 bolts.

    Torque:
    9.8 N*m{ 100 kgf*cm , 87 in.*lbf }

    CAUTION:
    Tighten the bolts in the following order shown in the illustration to install the air conditioner unit assembly.


    I033473E01

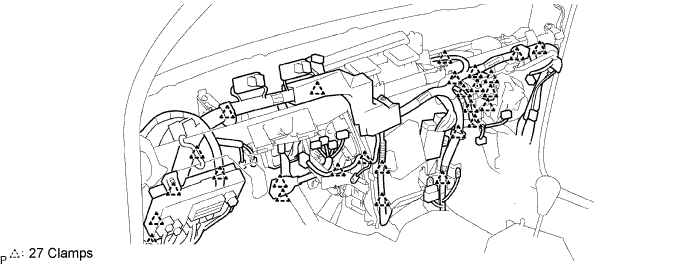
  1. Install the 27 clamps.


  1. Connect the connectors.


    I033472E01


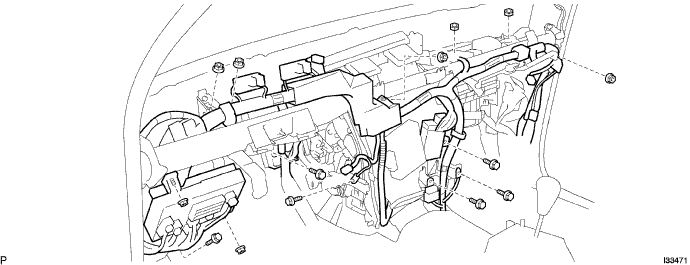
  1. Install the 6 bolts and 8 nuts.

    Torque:
    8.3 N*m{ 85 kgf*cm , 73 in.*lbf }


    I033471


3. INSTALL STEERING COLUMN ASSEMBLY


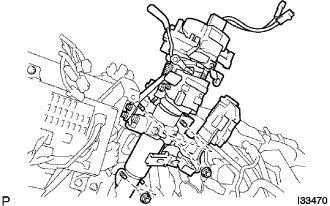
    I033470
  1. Install the steering column assembly with the 4 nuts.
    Torque:
    26 N*m{ 265 kgf*cm , 19 in.*lbf }


    I033469E01
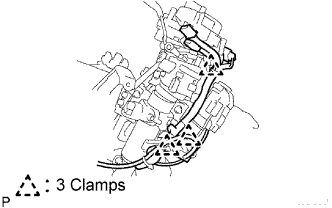
  1. Install the 3 clamps and connect the connectors.


4. INSTALL ECM
  1. Click here for 1GR-FE.
  2. Click here for 2UZ-FE.


5. INSTALL INSTRUMENT PANEL SAFETY PAD SUB-ASSEMBLY

HINT:
Refer to the instructions for installation of the instrument panel safety pad sub-assembly (Click here).


6. INSTALL COOLER REFRIGERANT LIQUID PIPE C


    I006878E01
  1. Lubricate new O-ring with compressor oil and install them on the hose.

    Compressor oil:
    ND-OIL 8 or equivalent

  1. Install the cooler refrigerant liquid pipe C and piping clamp.

    HINT:
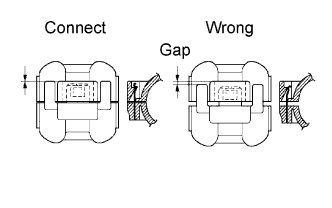
    After connection, check the fitting for the claw of the piping clamp.


7. INSTALL COOLER REFRIGERANT SUCTION PIPE C
  1. Lubricate a new O-ring with compressor oil and install it to the pipe.

    Compressor oil:
    ND-OIL 8 or equivalent

  1. Install the cooler refrigerant suction pipe C and piping clamp.

    HINT:
    After connection, check the fitting for the claw of the piping clamp.


8. CHARGE REFRIGERANT
  1. Perform vacuum purging using a vacuum pump.


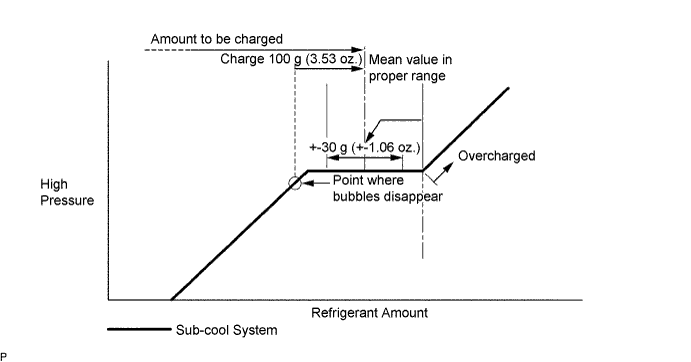
  1. Charge refrigerant HFC-134a (R134a).

    Standard:
    600 +- 30 g (21.16 +- 1.06 oz.)

    SST
    07110-58060   (07117-58060, 07117-58070, 07117-58080, 07117-58090, 07117-78050, 07117-88060, 07117-88070, 07117-88080)


    I037365E06

    NOTICE:
    1. Do not operate the cooler compressor before charging refrigerant as the cooler compressor will not work properly without any refrigerant, and will overheat.
    2. Approximately 100 g (3.53 oz.) of refrigerant may need to be charged after bubbles disappear. The refrigerant amount should be checked by measuring its quantity, and not with the sight glass.


9. WARM UP ENGINE
  1. Warm up the engine at less than 1,850 rpm for 2 minutes or more after charging the refrigerant.

    NOTICE:
    Be sure to warm up the compressor when turning the A/C switch ON after removing and installing the cooler refrigerant lines (including the compressor), to prevent damage to the compressor.


10. INSPECT LEAKAGE OF REFRIGERANT
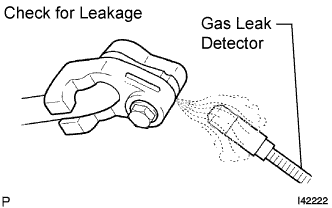
  1. After recharging the refrigerant gas, check for refrigerant gas leakage using a halogen leak detector.

  1. Perform the operation under the following conditions:
    1. Stop the engine.
    2. Secure good ventilation (the gas leak detector may react to volatile gases other than refrigerant, such as evaporated gasoline or exhaust gas).
    3. Repeat the test 2 or 3 times.
    4. Make sure that some refrigerant remains in the refrigeration system. When compressor is off: approximately 392 to 588 kPa (4 to 6 kgf*cm2 57 to 85 psi)


    I042222E10
  1. Using a gas leak detector, check the refrigerant line for leakage.

  1. If a gas leak is not detected on the drain hose, remove the blower motor control (blower resistor) from the cooling unit. Insert the gas leak detector sensor into the unit and perform the test.

  1. Disconnect the connector and leave the pressure switch on for approximately 20 minutes. Bring the gas leak detector close to the pressure switch and perform the test.