Home › BODY › ENGINE HOOD / DOOR › REAR DOOR

REAR DOOR > ADJUSTMENT

for Preparation Click here


HINT:
  1. Before adjusting the door position for vehicles equipped with side airbags and curtain shield airbags, be sure to disconnect the battery. After adjustment, inspect the SRS warning light, the side airbag system and the curtain shield airbag system for normal operation. Then initialize both systems.
  2. Use the same procedure for the RH side and LH side.
  3. The procedures listed below are for the LH side.


1. INSPECT REAR DOOR PANEL SUB-ASSEMBLY LH


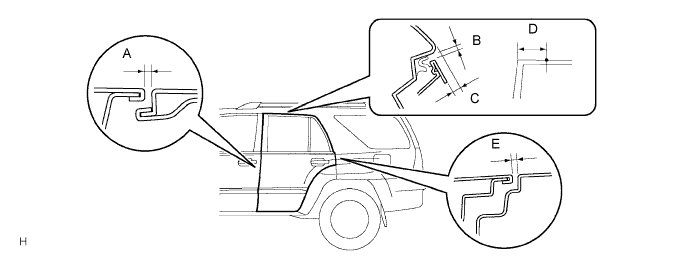
  1. Check that the clearance is within the standard value.


    B062431E01

    Standard clearance:
    Area
    Measurement
    A
    5.0 +- 1.5 mm (0.197 +- 0.059 in.)
    B
    5.6 +- 1.5 mm (0.024 +- 0.059 in.)
    C
    8.8 +- 1.5 mm (0.343 +- 0.059 in.)
    D
    160 mm (6.30 in.)
    E
    4.5 +- 1.5 mm (0.177 +- 0.059 in.)


2. ADJUST REAR DOOR PANEL SUB-ASSEMBLY LH


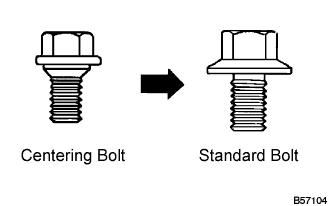
    B057104E01
  1. Adjust the rear door panel position.

    HINT:
    1. Centering bolts are used to mount the door hinge to the vehicle body and door. The door cannot be adjusted with the centering bolts on. Substitute the centering bolts with standard bolts (w/ washers) when making adjustments.
    2. A bolt without a torque specification is shown in the standard bolt chart .


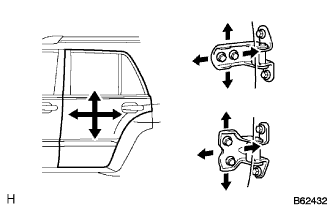
      B062432
    1. Adjust the door forward/rearward and vertically by loosening the body side hinge bolts.

    2. Tighten the body side hinge bolts after the adjustment.

      Torque:
      26 N*m{ 265 kgf*cm , 19 ft.*lbf }


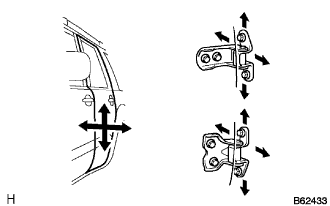
    3. B062433
    4. Horizontally and vertically adjust the door by loosening the door side hinge bolts.

    5. Tighten the body side hinge bolts after the adjustment.

      Torque:
      26 N*m{ 265 kgf*cm , 19 ft.*lbf }


    6. B062439E01
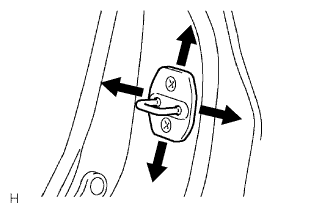
    7. Adjust the striker position by slightly loosening the striker mounting screws and hitting the striker with a plastic-faced hammer.

    8. Tighten the striker mounting screws after the adjustment.

      Torque:
      23 N*m{ 235 kgf*cm , 17 ft.*lbf }

    9. Connect the negative (-) terminal cable from the battery.

    10. Initialize both systems.

    11. Check the SRS warning lamp.