 |
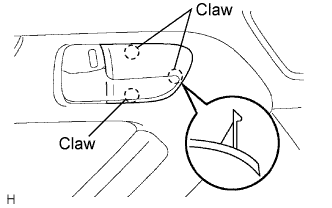
Using a screwdriver, disengage the 3 claws.
- HINT:
- Tape the screwdriver tip before use.
REAR DOOR > DISASSEMBLY |
| 1. REMOVE REAR DOOR INSIDE HANDLE BEZEL LH |
|
Using a screwdriver, disengage the 3 claws.
Remove the inside handle bezel.
| 2. REMOVE REAR ARMREST ASSEMBLY LH |
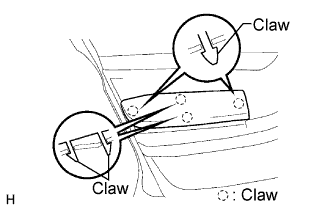 |
Disengage the 4 claws, remove the armrest assembly.
| 3. REMOVE REAR DOOR TRIM BOARD SUB-ASSEMBLY LH |
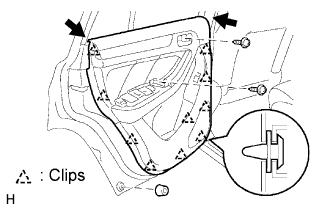 |
Remove the cushion rubbers.
Remove the 2 screws.
Using a clip remover, disengage the 12 clips, remove the 12 clips.
Remove the trim board upward.
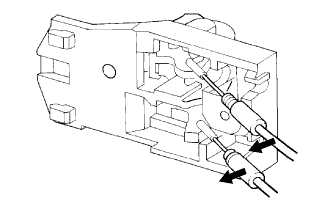 |
Disconnect the 2 cables from the inside handle.
Remove the trim board.
Remove the inner weatherstrip.
| 4. REMOVE REAR DOOR SERVICE HOLE COVER LH |
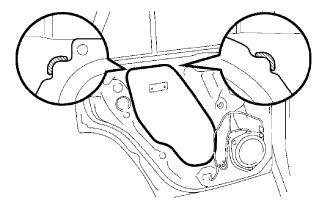 |
Remove the rear door service hole cover LH.
| 5. REMOVE REAR SPEAKER ASSEMBLY |
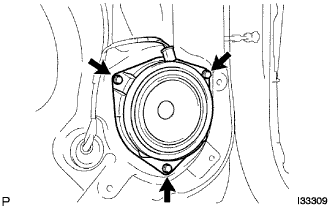 |
Disconnect the connector.
Remove the 3 screws and rear speaker.
| 6. REMOVE REAR DOOR WINDOW FRAME MOULDING FRONT LH |
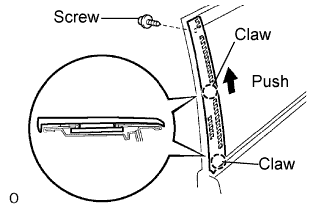 |
Remove the screw.
Using a heat light, heat the moulding to 40 to 60°C (104 to 140°F).
Disengage the 2 claws by pushing the moulding and remove the moulding.
| 7. REMOVE REAR DOOR GLASS WEATHERSTRIP OUTER |
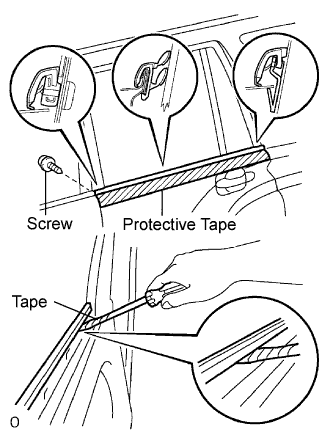 |
Remove the screw.
Put protective tape under the glass weatherstrip.
Using a screwdriver or moulding remover, disengage the claw and remove glass weatherstrip.
| 8. REMOVE REAR DOOR WINDOW DIVISION BAR SUB-ASSEMBLY LH |
Open the door glass until the bolts appear in the service hole.
Remove the door glass from the glass bracket and lower the door glass into the door panel.
Remove the rear door glass run.
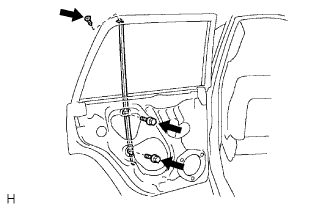 |
Remove the 2 bolts, screw and the division bar.
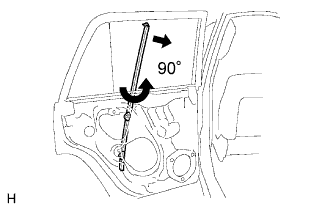 |
Rotate the division bar by 90° and pull it upward as shown in the illustration.
| 9. REMOVE REAR DOOR QUARTER WINDOW GLASS LH |
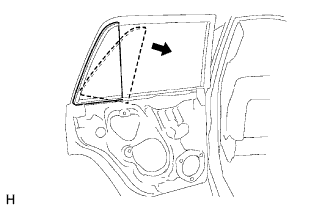 |
Remove the quarter glass, as shown in the illustration.
Remove the quarter window weatherstrip from the glass.
| 10. REMOVE REAR DOOR GLASS SUB-ASSEMBLY LH |
Carefully pull up the glass out of the panel.
| 11. REMOVE REAR DOOR WINDOW REGULATOR SUB-ASSEMBLY LH |
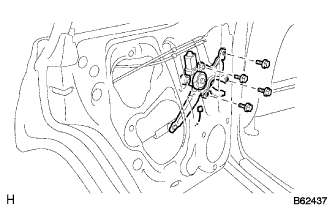 |
Disconnect the window regulator connector.
Remove the 4 bolts and window regulator.
| 12. REMOVE POWER WINDOW REGULATOR MOTOR ASSEMBLY LH |
Place matchmarks on the window regulator motor gear and regulator gear.
Using a "torx" driver (T25), remove the 3 screws and window regulator motor.
| 13. REMOVE REAR DOOR W/MOTOR LOCK ASSEMBLY LH |
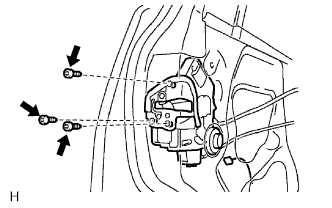 |
Disconnect the door lock connector.
Using a "torx" socket wrench (T30), remove the 3 screws and door lock.
Remove the door lock wire harness packing.
| 14. REMOVE REAR DOOR OUTSIDE HANDLE COVER LH |
Using a "torx" socket wrench (T30), loosen the screw and remove the outside handle cover.
| 15. REMOVE REAR DOOR OUTSIDE HANDLE ASSEMBLY LH |
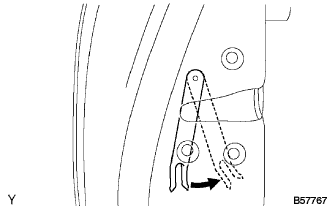 |
Pull and hold the release plate of the outside handle frame, as shown in the illustration.
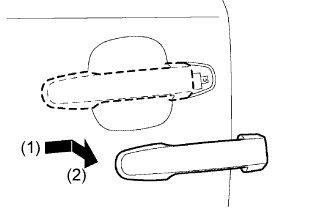 |
Pushing and pulling the outside handle in the arrow mark direction as shown in the illustration, remove the outside handle.
Remove the 2 outside handle pad front and rear.
| 16. REMOVE REAR DOOR OUTSIDE HANDLE FRAME SUB-ASSEMBLY LH |
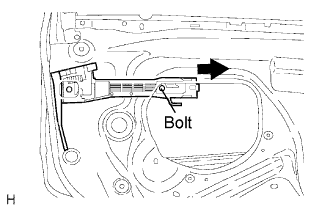 |
Using a "torx" socket wrench (T30), loosen the screw.
Slide the outside handle frame from to remove it.
| 17. REMOVE REAR DOOR CHECK ASSEMBLY LH |
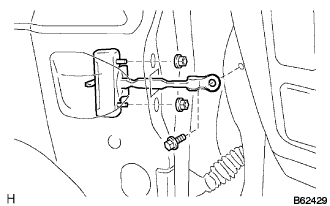 |
Remove the 2 nuts, bolt and door check.
| 18. REMOVE REAR DOOR WEATHERSTRIP LH |
Using a clip remover, disengage the clip, remove the weatherstrip.