 |
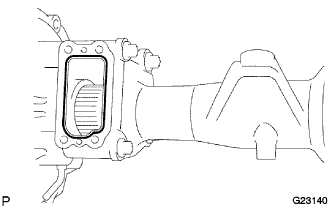
Remove the any oil FIPG material and be careful not to drop oil on the contact surfaces of the actuator and clutch case.
1GR-FE DIFFERENTIAL VACUUM ACTUATOR (for 4WD) > INSTALLATION |
| 1. INSTALL DIFFERENTIAL VACUUM ACTUATOR ASSEMBLY |
|
Remove the any oil FIPG material and be careful not to drop oil on the contact surfaces of the actuator and clutch case.
Clean connecting surfaces of any residual FIPG material using gasoline or alcohol.
Apply FIPG to the differential tube, as shown.
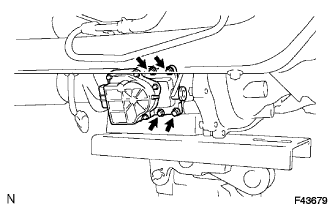 |
Clean the threads of the 4 bolts and retainer bolt holes with toluene or trichloroethylene.
Install the differential vacuum actuator assembly to the differential tube.
Apply adhesive to 2 to 3 threads of the bolts end.
Install the 4 bolts.
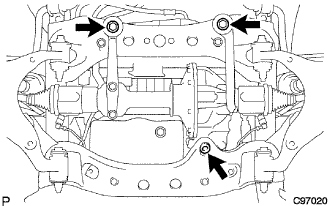 |
Connect the actuator hose and connector.
Install the No. 1 mounting support with the 3 bolts.
Install the No. 2 mounting support with the 2 bolts.
Install the front differential support No. 3 with the 2 bolts.
Support the front differential with a jack.
Install the 2 front mounting bolts and nuts.
Install the front differential mount nuts No. 1.
Install the front differential breather tube bracket with a bolt.
Lower the jack.
| 2. INSTALL FRONT PROPELLER SHAFT ASSEMBLY |
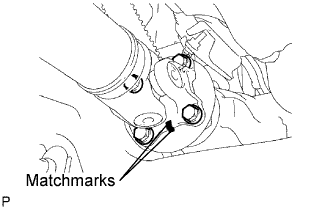 |
Align the matchmarks on the yoke and differential flange.
Install the propeller shaft assembly with the 4 bolts, 4 nuts and 4 washers.
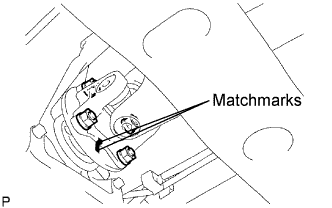 |
Align the matchmarks on the yoke and transfer flange.
Install the propeller shaft assembly with the 4 nuts and 4 washers.
| 3. INSPECT DIFFERENTIAL OIL |
 |
Stop the vehicle on a level place.
Remove the differential filler plug and gasket.
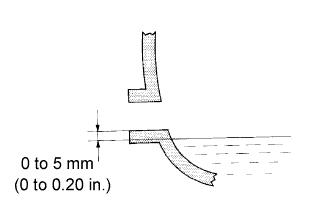
Check that the oil level is within 5mm (0 to 0.20 in.) of the bottom of the filler plug opening.
Check for oil leakage if the oil level is low.
Install the differential filler plug and a new gasket.
| 4. INSPECT AND ADJUST DIFFERENTIAL OIL |
|
Stop the vehicle on a level place.
Remove the differential filler plug and gasket.
Check that the oil level is within 5mm (0 to 0.20 in.) of the bottom of the filler plug opening.
Check for oil leakage if the oil level is low.
Install the differential filler plug and a new gasket.
| 5. INSTALL NO. 1 ENGINE UNDER COVER SUB-ASSEMBLY |
Install the engine under cover sub-assembly No. 1 with the 4 bolts.
| 6. INSTALL ENGINE UNDER COVER ASSEMBLY REAR |
Install the engine under cover assembly rear with the 6 bolts.