 |
Remove the service hole cover from the engine under cover No. 1.
RADIATOR > REMOVAL |
| 1. DRAIN ENGINE COOLANT |
Remove the radiator cap.
|
Remove the service hole cover from the engine under cover No. 1.
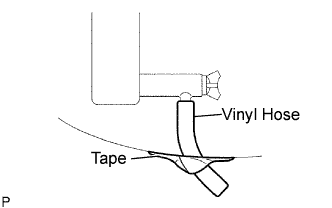
Install a vinyl hose onto the drain on the radiator side.
Fix the vinyl hose with tape.
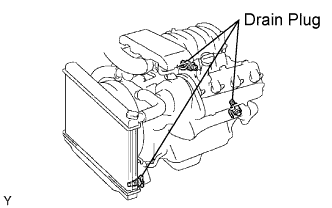 |
Loosen the 3 drain plugs on the engine and radiator, and drain the coolant.
Drain the coolant from the reservoir tank.
Tighten the 3 drain plugs.
Remove the vinyl hose from the radiator.
| 2. REMOVE ENGINE UNDER COVER SUB-ASSEMBLY NO.1 |
Remove the 4 bolts and engine under cover.
| 3. REMOVE RADIATOR SUPPORT SEAL UPPER |
Remove the 11 clips and radiator support upper.
| 4. REMOVE RADIATOR RESERVE TANK ASSEMBLY |
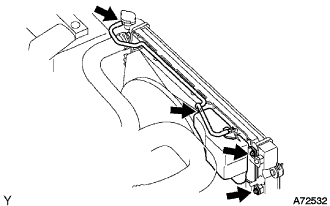 |
Disconnect the reserve tank hose from the radiator.
Remove the 3 bolts and reserve tank.
| 5. SEPARATE FAN SHROUD |
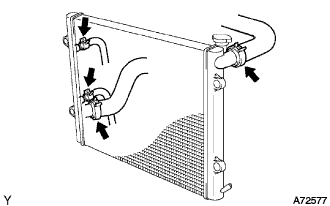 |
Disconnect the reserve tank hose from the radiator.
Disconnect the radiator hose No. 1 from the radiator.
Disconnect the oil cooler inlet hose from the radiator.
Disconnect the oil cooler outlet hose from the radiator.
Disconnect the radiator hose No. 2 from the radiator.
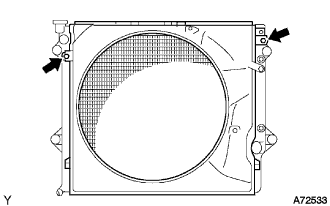 |
Remove the 2 bolts, and separate the fan shroud.
| 6. REMOVE RADIATOR ASSEMBLY |
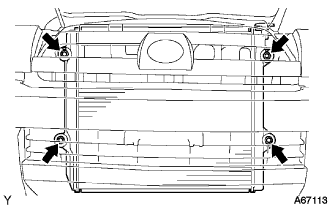 |
Remove the 4 bolts and radiator.
| 7. REMOVE RADIATOR SUPPORT NO.1 |
Remove the 2 radiator support No. 1.
| 8. REMOVE RADIATOR SUPPORT NO.2 |
Remove the 2 radiator support No. 2.
| 9. REMOVE RADIATOR SUPPORT NO.1 BUSH |
Remove the 4 radiator support No. 1 bush.