 |
Remove the service hole cover from the engine under cover No. 1.
TIMING BELT > REMOVAL |
| 1. DRAIN ENGINE COOLANT |
Remove the radiator cap.
|
Remove the service hole cover from the engine under cover No. 1.
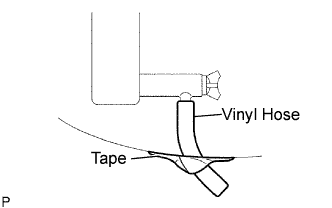
Install a vinyl hose onto the drain on the radiator side.
Fix the vinyl hose with tape.
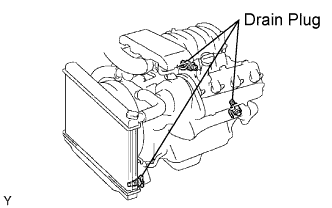 |
Loosen the 3 drain plugs on the engine and radiator, and drain the coolant.
Drain the coolant from the reservoir tank.
Tighten the 3 drain plugs.
Remove the vinyl hose from the radiator.
| 2. SEPARATE BATTERY NEGATIVE TERMINAL |
| 3. REMOVE THROTTLE BODY COVER SUB-ASSEMBLY |
Remove the 2 nuts and throttle body cover sub-assembly.
| 4. REMOVE AIR CLEANER HOSE ASSEMBLY |
| 5. REMOVE RADIATOR SUPPORT SEAL UPPER |
Remove the 11 clips and radiator support seal upper.
| 6. REMOVE FAN AND GENERATOR V BELT |
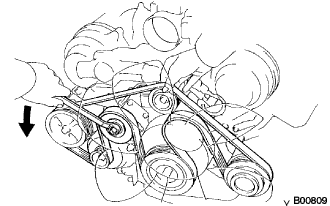 |
Loosen the belt tension by turning the belt tensioner counterclockwise, and then remove the fan and generator V belt.
| 7. REMOVE FAN WITH FLUID COUPLING |
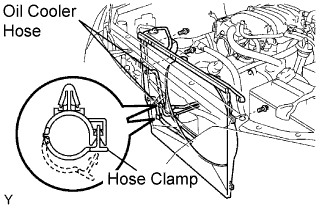 |
Unfasten each clip and the 2 hose clamps, and then separate the 2 oil cooler hoses from the fan shroud.
Remove the 3 bolts and separate the fan shroud from the radiator.
Remove the 4 nuts and separate the fan with fluid coupling from the engine.
Remove the fan shroud and fan with fluid coupling together from the vehicle.
Remove the fan pulley.
| 8. SEPARATE VANE PUMP ASSEMBLY |
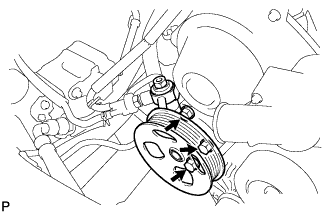 |
Disconnect the vacuum hose.
Remove the nut, 2 bolts and vane pump assembly.
| 9. REMOVE GENERATOR ASSEMBLY |
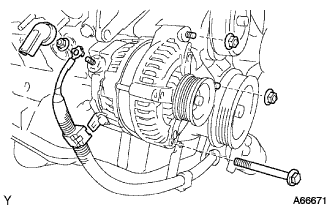 |
Disconnect the generator connector.
Remove the terminal cap and nut, and disconnect the generator wire.
Disconnect the alternator wire clamp from the cord clip on the generator.
Remove the bolt, 2 nuts and generator.
| 10. SEPARATE COMPRESSOR |
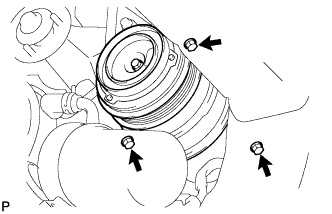 |
Disconnect the compressor connector.
Remove the nut, 3 bolts, compressor stay and compressor.
| 11. REMOVE NO. 2 IDLER PULLEY SUB-ASSEMBLY |
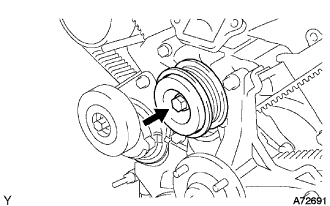 |
Remove the pulley bolt, cover plate and idler pulley.
| 12. REMOVE OIL COOLER PIPE |
Disconnect the 3 hoses.
Remove the bolt, nut and oil cooler pipe.
| 13. REMOVE NO. 3 TIMING BELT COVER SUB-ASSEMBLY LH |
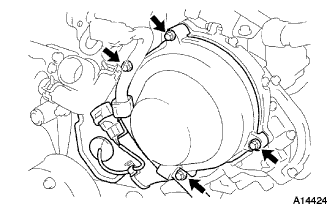 |
Remove the grommet and separate the cam position sensor connector from the No. 3 timing belt cover sub-assembly LH.
Remove the 4 bolts and No. 3 timing belt cover sub-assembly LH.
| 14. REMOVE NO. 2 TIMING CHAIN OR BELT COVER |
Remove the nut, 3 bolts and No. 2 timing belt cover.
| 15. REMOVE NO. 2 TIMING BELT COVER SUB-ASSEMBLY |
Remove the 2 bolts and No. 2 timing belt cover sub-assembly.
| 16. REMOVE V-RIBBED BELT TENSIONER ASSEMBLY |
Remove the bolt, 2 nuts and V-ribbed belt tensioner.
| 17. REMOVE FAN BRACKET SUB-ASSEMBLY |
Remove the 2 nuts, 2 bolts and fan bracket sub-assembly.
| 18. REMOVE CRANKSHAFT DAMPER SUB-ASSEMBLY |
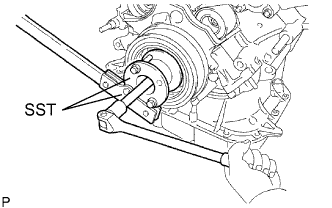 |
Using SST, remove the pulley bolt.
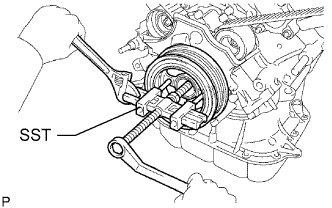 |
Using SST, remove the crankshaft pulley.
| 19. REMOVE TIMING BELT NO. 1 COVER |
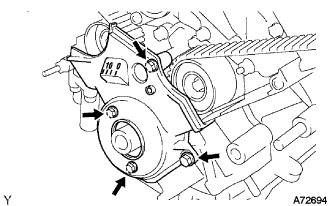 |
Remove the 4 bolts and timing belt cover.
| 20. REMOVE NO. 1 CRANKSHAFT POSITION SENSOR PLATE |
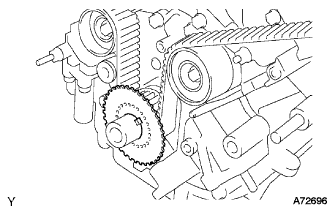 |
Remove the No. 1 crankshaft position sensor plate.
| 21. REMOVE TIMING BELT |
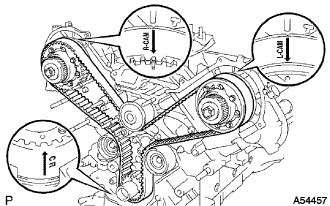 |
If reusing the timing belt, check the installation marks on the timing belt.
Check that there are 3 installation marks on the timing belt by turning the crankshaft as shown in the illustration.
If the installation marks have disappeared, put a new installation mark on the timing belt before removing each part.
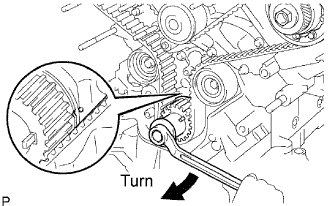 |
Set the No. 1 cylinder to approx. 50° BTDC/compression.
Using the crankshaft damper bolt, turn the crankshaft to align the timing marks of the crankshaft timing pulley and oil pump body.
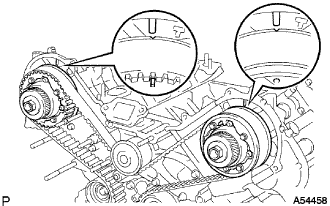 |
Check that the timing marks of the camshaft timing pulleys and timing belt plates are aligned.
If not, turn the crankshaft 1 complete revolution (360°).
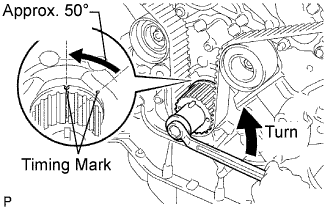 |
Using the crankshaft damper bolt, turn the crankshaft counterclockwise by approx. 50°.
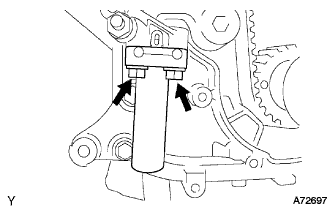 |
Alternately loosen the 2 bolts, then remove the bolts, the chain tensioner and dust boot.
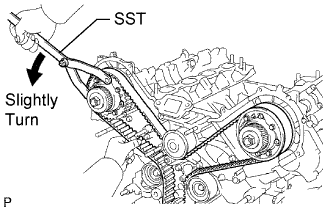 |
Using a SST, loosen the tension between the camshaft timing pulley (RH bank) and crankshaft timing pulley by turning the camshaft timing pulley (RH bank) counterclockwise slightly.
Disconnect the timing belt from the No. 1 timing belt idler and remove the timing belt.