 |
Remove the service hole cover from the engine under cover.
CAMSHAFT > REMOVAL |
| 1. DRAIN ENGINE COOLANT |
|
Remove the service hole cover from the engine under cover.
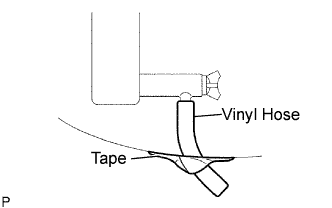
Install a vinyl hose onto the drain on the radiator side.
Fix the vinyl hose with tape.
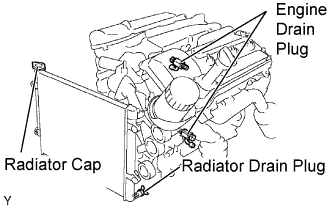 |
Loosen the 3 drain plugs on the engine and radiator, and drain the coolant.
Remove the radiator cap.
Drain the coolant from the reservoir tank.
Tighten the 3 drain plugs.
Remove the vinyl hose from the radiator.
| 2. REMOVE V-BANK COVER |
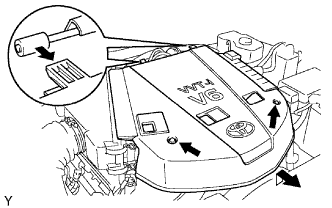 |
Remove the 2 nuts, then remove the V-bank cover.
| 3. DISCONNECT NO. 2 VENTILATION HOSE |
| 4. REMOVE AIR CLEANER ASSEMBLY |
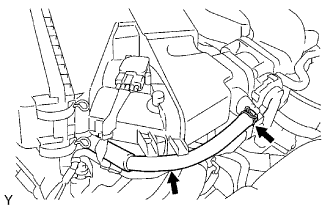 |
Disconnect the ventilation hose No. 2.
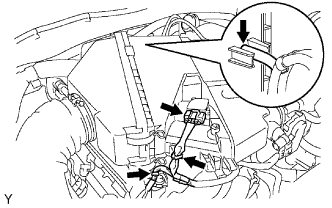 |
Disconnect the vacuum hose.
Disconnect the mass air flow meter connector.
Remove the 2 wire harness clamps.
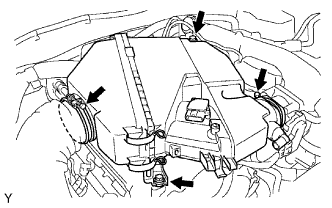 |
Loosen the 2 hose clamps.
Remove the 2 bolts, then remove the air cleaner.
| 5. REMOVE INTAKE AIR SURGE TANK |
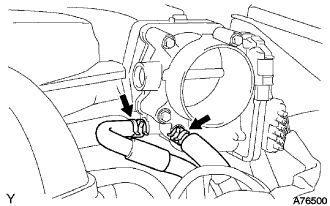 |
Disconnect the 2 water by-pass hoses.
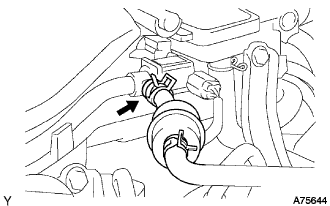 |
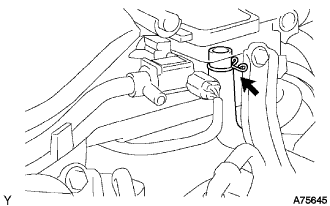
Disconnect the fuel vapor feed hose.
 |
Disconnect the ventilation hose.
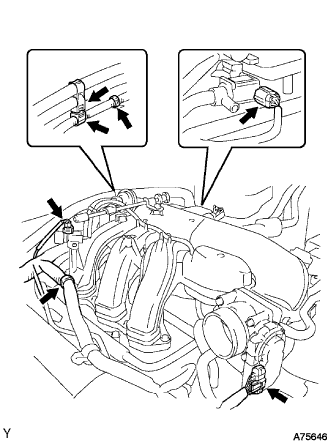 |
Disconnect the 2 VSV connectors.
Disconnect the throttle body with motor connector.
Separate the 3 wire harness clamps and hose clamp.
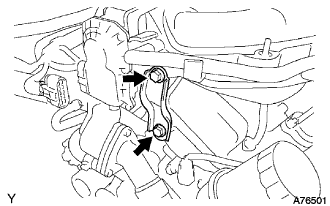 |
Remove the 2 bolts and throttle body bracket.
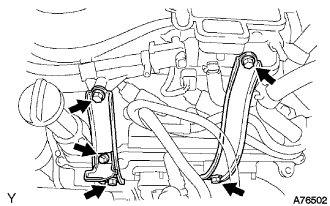 |
Remove the bolt and oil baffle plate.
Remove the 4 bolts and 2 surge tank stays.
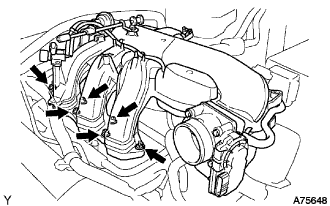 |
Remove the 2 nuts.
Using a socket hexagon wrench 8, remove the 4 bolts, intake air surge tank and gasket.
| 6. REMOVE IGNITION COIL ASSEMBLY |
| 7. REMOVE CYLINDER HEAD COVER SUB-ASSEMBLY |
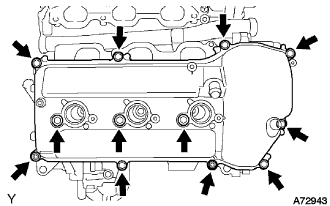 |
Remove the 10 bolts, 3 seal washers, 2 nuts, cylinder head cover and gasket.
| 8. REMOVE CYLINDER HEAD COVER SUB-ASSEMBLY LH |
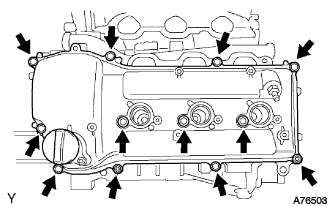 |
Remove the 10 bolts, 3 seal washers, 2 nuts, cylinder head cover and gasket.
| 9. SET NO. 1 CYLINDER TO TDC / COMPRESSION |
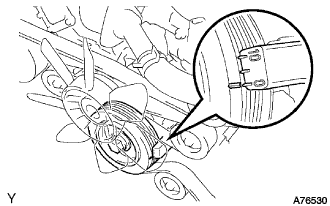 |
Turn the crankshaft pulley, and align the notch with the timing mark "0" of the timing chain cover.
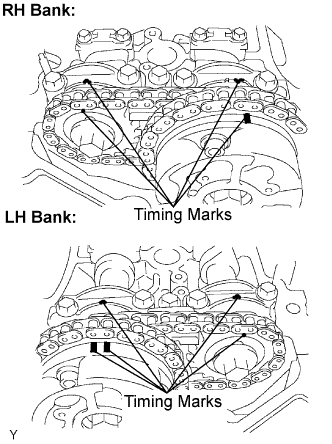 |
Check that the timing marks of the camshaft timing gears are aligned with the timing marks of the bearing caps as shown in the illustration.
If not, turn the crankshaft 1 complete revolution (360°) and align the timing marks as above.
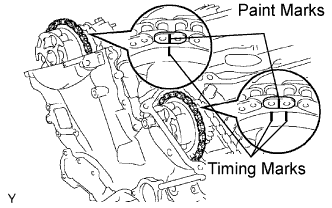 |
Place paint marks on the No. 1 chain links that correspond with the timing marks of the camshaft timing gears.
| 10. REMOVE NO. 1 CHAIN TENSIONER ASSEMBLY |
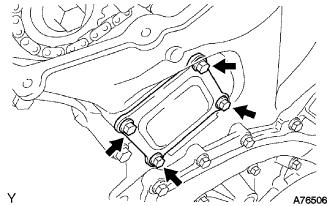 |
Remove the 4 bolts, timing chain cover plate and gasket.
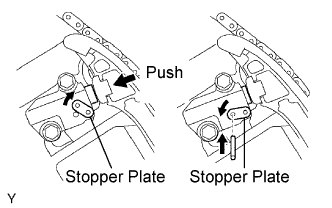 |
While turning the stopper plate of the tensioner clockwise, push in the plunger of the chain tensioner as shown in the illustration.
While turning the stopper plate of the tensioner counterclockwise, insert a bar of φ3.5 mm (0.138 in.) into the holes on the stopper plate and tensioner to fix the stopper plate.
Remove the 2 bolts and chain tensioner.
| 11. REMOVE NO. 2 CAMSHAFT |
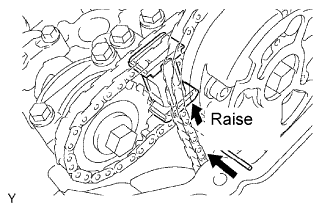 |
While raising up the No. 2 chain tensioner, insert a pin of φ1.0 mm (0.039 in.) into the hole to fix it.
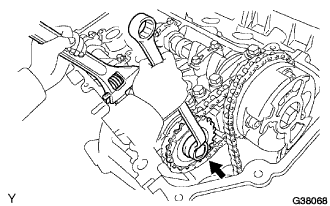 |
Hold the hexagonal portion of the No. 2 camshaft with a wrench, and remove the camshaft timing gear set bolt.
Separate the camshaft timing gear from the No. 2 camshaft.
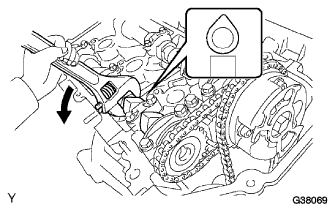 |
Rotate the camshaft counterclockwise using a wrench so that the cam lobes of No. 1 cylinder face upward as shown in the illustration.
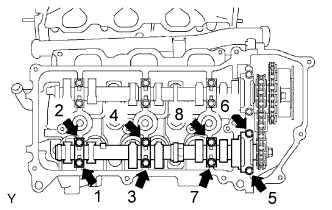 |
Using several steps, loosen and remove the 8 bearing cap bolts uniformly in the sequence as shown in the illustration.
Remove the 4 bearing caps and No. 2 camshaft.
| 12. REMOVE NO. 2 CHAIN TENSIONER ASSEMBLY |
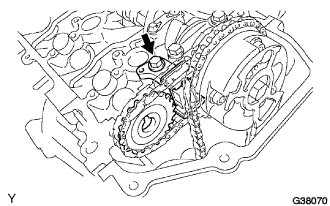 |
Remove the No. 2 chain tensioner bolt, and then remove the No. 2 chain tensioner and camshaft timing gear.
| 13. REMOVE CAMSHAFT |
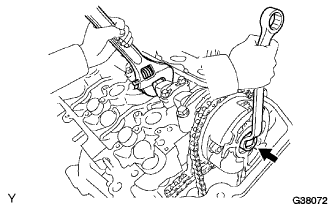 |
Hold the hexagonal portion of the No. 1 camshaft with a wrench, and loosen the camshaft timing gear set bolt.
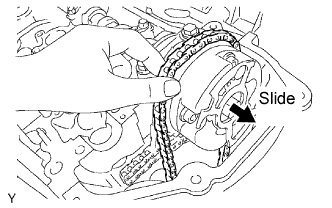 |
Slide the camshaft timing gear and separate the No. 1 chain from the camshaft timing gear.
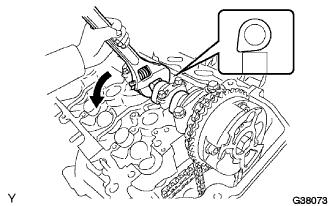 |
Rotate the No. 1 camshaft counterclockwise using a wrench so that the cam lobes of No. 1 cylinder face downward as shown in the illustration.
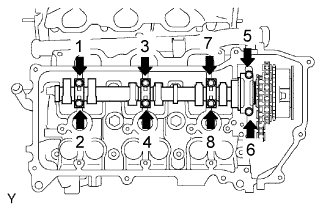 |
Using several steps, loosen and remove the 8 bearing cap bolts in the sequence as shown in the illustration.
Remove the 4 bearing caps.
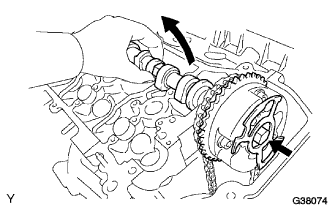 |
Remove the camshaft timing gear set bolt with the No. 1 camshaft lifted up, and then remove the No. 1 camshaft and camshaft timing gear with No. 2 chain.
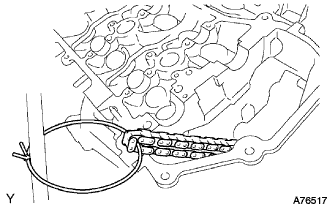 |
Tie the No. 1 chain with a string as shown in the illustration.
| 14. REMOVE NO. 4 CAMSHAFT SUB-ASSEMBLY |
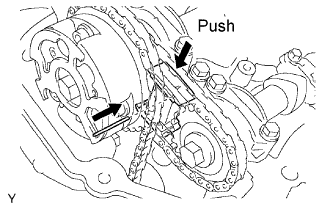 |
While pushing down the No. 3 chain tensioner, insert a pin of φ1.0 mm (0.039 in.) into the hole to fix it.
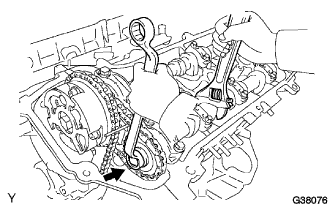 |
Hold the hexagonal portion of the No. 4 camshaft with a wrench, and remove the camshaft timing gear set bolt.
Separate the camshaft timing gear from the No. 4 camshaft.
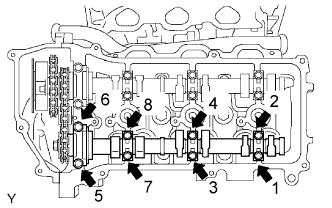 |
Using several steps, loosen and remove the 8 bearing cap bolts uniformly in the sequence as shown in the illustration.
Remove the 4 bearing caps and No. 4 camshaft.
| 15. REMOVE NO. 3 CHAIN TENSIONER ASSEMBLY |
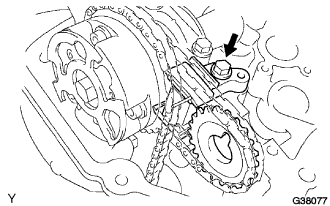 |
Remove the No. 3 chain tensioner bolt, and then remove the No. 3 chain tensioner and camshaft timing gear.
| 16. REMOVE NO. 3 CAMSHAFT SUB-ASSEMBLY |
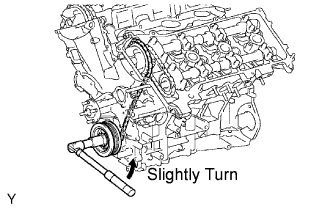 |
Release the chain tension between the camshaft timing gear (LH bank) and crankshaft timing gear by turning the crankshaft pulley counterclockwise slightly.
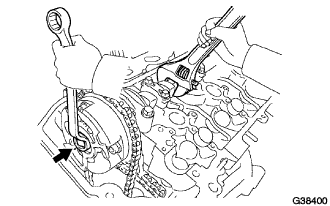 |
Hold the hexagonal portion of the No. 3 camshaft with a wrench, and loosen the camshaft timing gear set bolt.
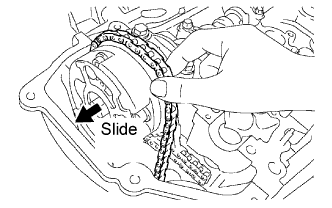 |
Slide the camshaft timing gear and separate the No. 1 chain from the camshaft timing gear.
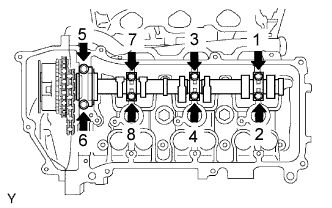 |
Using several steps, loosen and remove the 8 bearing cap bolts uniformly in the sequence as shown in the illustration.
Remove the 4 bearing caps.
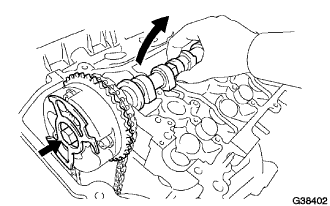 |
Remove the camshaft timing gear set bolt with the No. 3 camshaft lifted up, and then remove the No. 3 camshaft and camshaft timing gear with No. 2 chain.
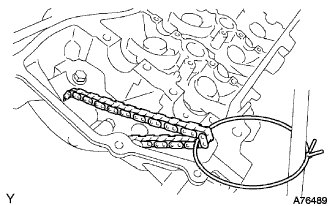 |
Tie the No. 1 chain with a string as shown in the illustration.