 |
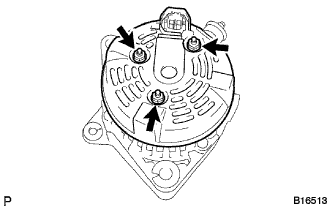
Remove the 3 nuts and end cover.
GENERATOR > DISASSEMBLY |
| 1. REMOVE GENERATOR REAR END COVER |
|
Remove the 3 nuts and end cover.
Remove the terminal insulator.
| 2. REMOVE GENERATOR BRUSH HOLDER ASSEMBLY |
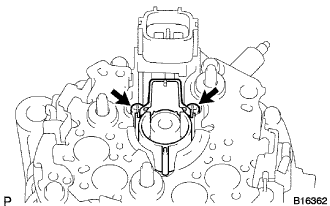 |
Remove the rear seal plate from the brush holder.
Remove the 2 screws and brush holder.
Remove the front seal plate from the coil assembly.
| 3. REMOVE GENERATOR PULLEY |
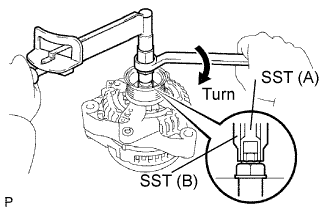 |
Hold SST (A) with a torque wrench, and tighten SST (B) clockwise to the specified torque.
Check that SST (A) is secured to the rotor shaft.
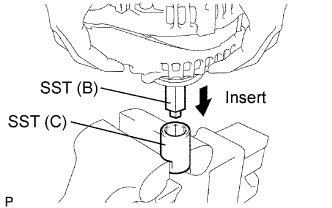 |
Mount SST (C) in a vise.
Insert SST (B) into SST (C), and attach the pulley nut to SST (C).
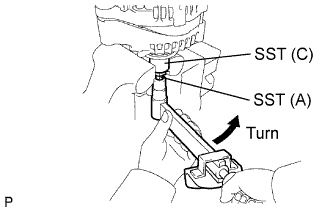 |
To loosen the pulley nut, turn SST (A) in the direction shown in the illustration.
Remove the generator from SST (C).
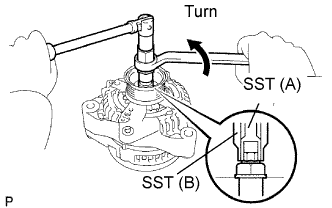 |
Turn SST (B), and remove SST (A and B).
Remove the pulley nut and pulley.
| 4. REMOVE GENERATOR COIL ASSEMBLY |
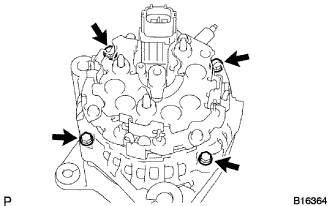 |
Remove the 4 bolts.
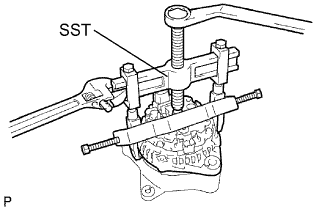 |
Using SST, remove the coil assembly.
Remove the generator washer.
| 5. REMOVE GENERATOR ROTOR ASSEMBLY |