 |
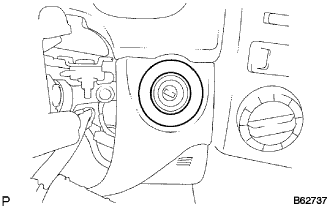
Remove the instrument panel finish plate.
NAVIGATION RECEIVER > REMOVAL |
| 1. REMOVE INSTRUMENT PANEL FINISH PLATE |
|
Remove the instrument panel finish plate.
| 2. REMOVE INSTRUMENT PANEL FINISH PANEL SUB-ASSEMBLY LOWER |
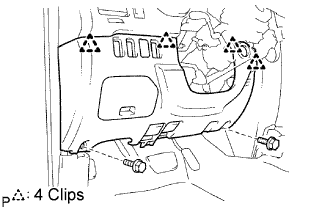 |
Remove the 2 bolts <B>.
Disconnect the hood lock control cable assembly and fuel lid lock control cable sub-assembly.
Disengage the 4 clips.
Disconnect the connectors and remove the lower instrument panel finish panel sub-assembly.
| 3. REMOVE INSTRUMENT CLUSTER FINISH PANEL SUB-ASSEMBLY |
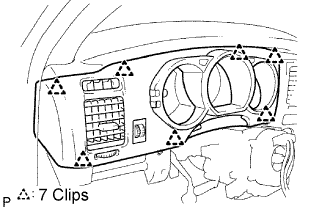 |
Disengage the 7 clips.
Disconnect the connectors and remove the instrument cluster finish panel sub-assembly.
| 4. REMOVE CONSOLE UPPER REAR PANEL SUB-ASSEMBLY |
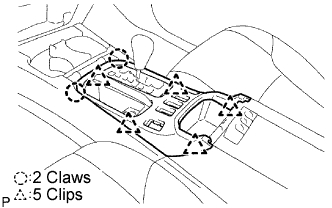 |
Disengage the 5 clips and 2 claws, and remove the console upper rear panel, and then disconnect the connectors.
| 5. REMOVE CONSOLE PANEL SUB-ASSEMBLY UPPER |
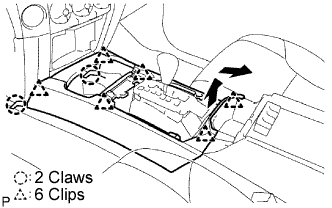 |
Disengage the 6 clips and 2 claws, and then remove the upper console panel sub-assembly.
| 6. REMOVE AIR CONDITIONING CONTROL ASSEMBLY |
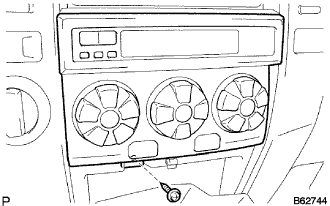 |
Remove the screw.
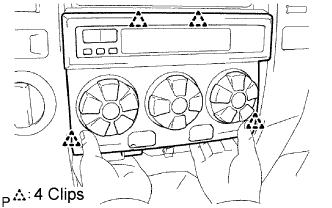 |
Disengage the 4 clips and remove the air conditioner, and then disconnect the connectors.
| 7. REMOVE INSTRUMENT CLUSTER FINISH PANEL SUB-ASSEMBLY CENTER |
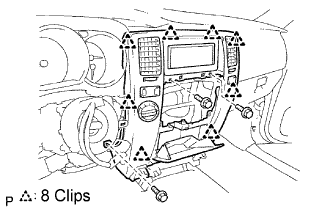 |
Remove the 3 bolts <C>.
Disengage the 8 clips and remove the center instrument cluster finish panel sub-assembly.
| 8. REMOVE RADIO AND NAVIGATION ASSEMBLY (w/ Bracket) |
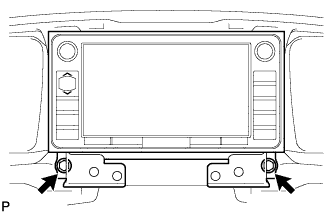 |
Remove the 2 bolts.
Disconnect the connectors and remove the radio and navigation assembly w/ bracket.
| 9. REMOVE RADIO NO. 1 BRACKET |
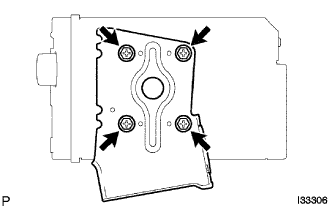 |
Remove the 4 screws and radio No. 1 bracket.
| 10. REMOVE RADIO NO. 2 BRACKET |
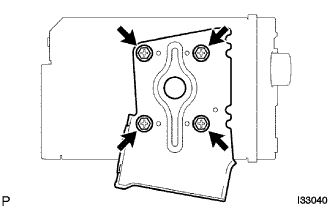 |
Remove the 4 screws and radio No. 2 bracket.