 |
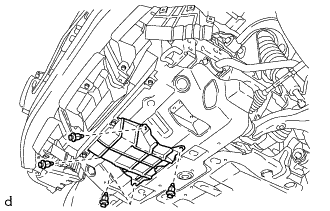
Remove the 4 clips and cool air intake duct.
ENGINE OIL COOLER > REMOVAL |
| 1. REMOVE COOL AIR INTAKE DUCT (for 4WD with Intuitive Parking Assist System) |
|
Remove the 4 clips and cool air intake duct.
| 2. REMOVE FRONT LOWER BUMPER COVER (w/o Intuitive Parking Assist System) |
Remove the clip, 5 bolts and front lower bumper cover.
| 3. REMOVE FRONT LOWER BUMPER COVER (w/ Intuitive Parking Assist System) |
Remove the clip, 4 bolts and front lower bumper cover.
| 4. REMOVE AIR INTAKE DUCT LH (w/ Intuitive Parking Assist System) |
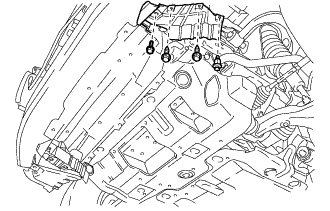 |
Remove the clip and bolt.
Remove the 2 screws and air intake duct LH.
| 5. REMOVE AIR INTAKE DUCT RH (w/ Intuitive Parking Assist System) |
| 6. REMOVE NO. 1 ENGINE UNDER COVER SUB-ASSEMBLY |
Remove the 4 bolts.
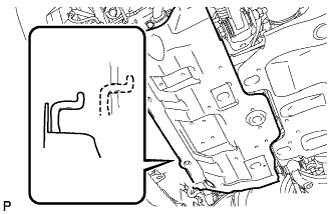 |
Unhook the No. 1 engine under cover sub-assembly from the vehicle body as shown in the illustration.
| 7. REMOVE UPPER RADIATOR SUPPORT SEAL |
Remove the 13 clips and upper radiator support seal.
| 8. DRAIN ENGINE COOLANT |
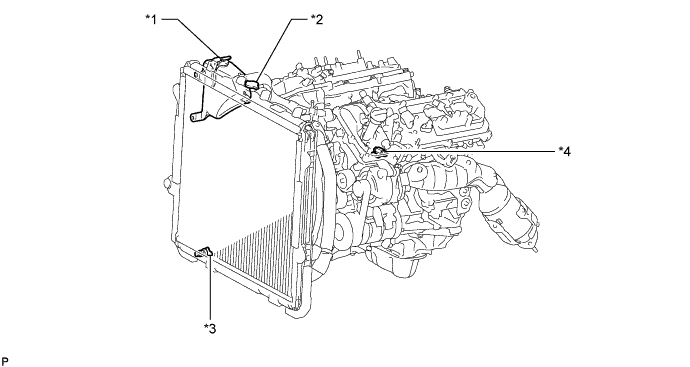
| *1 | Reservoir Cap | *2 | Radiator Cap |
| *3 | Radiator Drain Cock Plug | *4 | Cylinder Block Drain Cock Plug (RH side) |
Loosen the radiator drain cock plug.
Remove the radiator cap and drain the coolant.
Loosen the cylinder block drain cock plug and drain the coolant from the engine.
| 9. DRAIN ENGINE OIL |
Remove the oil filler cap.
Remove the oil pan drain plug and drain the engine oil into a container.
Install a new gasket and the oil pan drain plug.
| 10. REMOVE OIL FILTER ELEMENT |
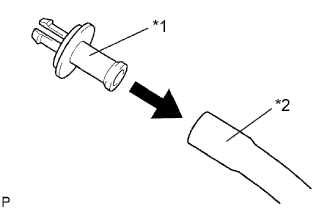 |
Connect a hose with an inside diameter of 15 mm (0.591 in.) to the pipe.
| *1 | Pipe |
| *2 | Hose |
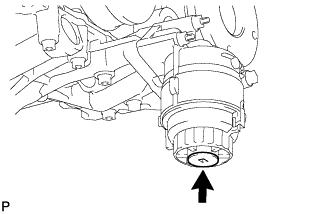 |
Remove the oil filter drain plug.
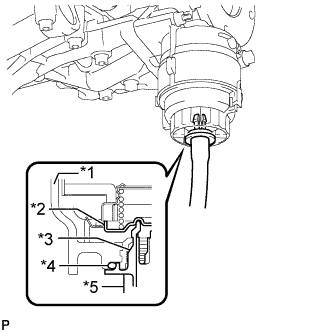 |
Install the pipe to the oil filter cap.
| *1 | Oil Filter Cap Assembly |
| *2 | Valve |
| *3 | Pipe |
| *4 | O-ring |
| *5 | Hose |
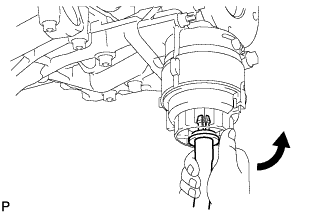 |
Check that oil is drained from the oil filter. Then, disconnect the pipe and remove the O-ring as shown in the illustration.
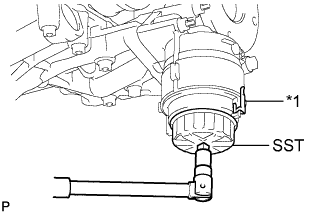 |
Using SST, remove the oil filter cap.
| *1 | Oil Filter Bracket Clip |
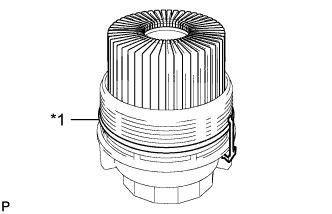 |
Remove the oil filter element and O-ring from the oil filter cap.
| *1 | O-ring |
| 11. DISCONNECT WATER BY-PASS PIPE SUB-ASSEMBLY |
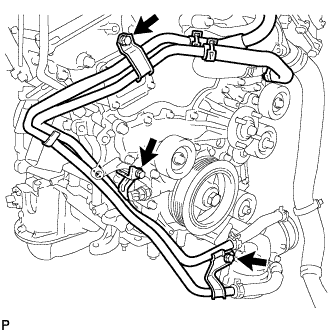 |
Remove the 3 bolts.
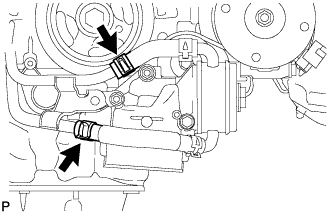 |
Slide the 2 hose clamps and disconnect the 2 water by-pass hoses from the water by-pass pipe sub-assembly.
| 12. REMOVE OIL FILTER BRACKET |
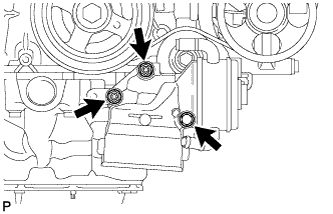 |
Remove the 2 nuts, bolt, oil filter bracket and gasket.
| 13. REMOVE OIL COOLER ASSEMBLY |
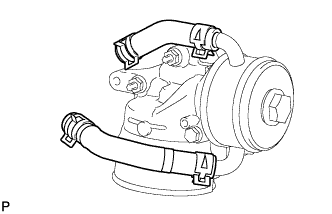 |
Slide the 2 hose clamps and remove the 2 water bypass hoses.
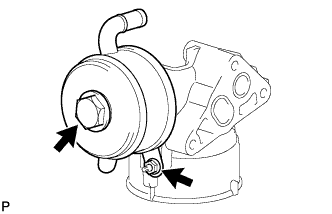 |
Remove the oil cooler union bolt, nut and oil cooler assembly.
Remove the seal washer from the oil cooler union bolt.